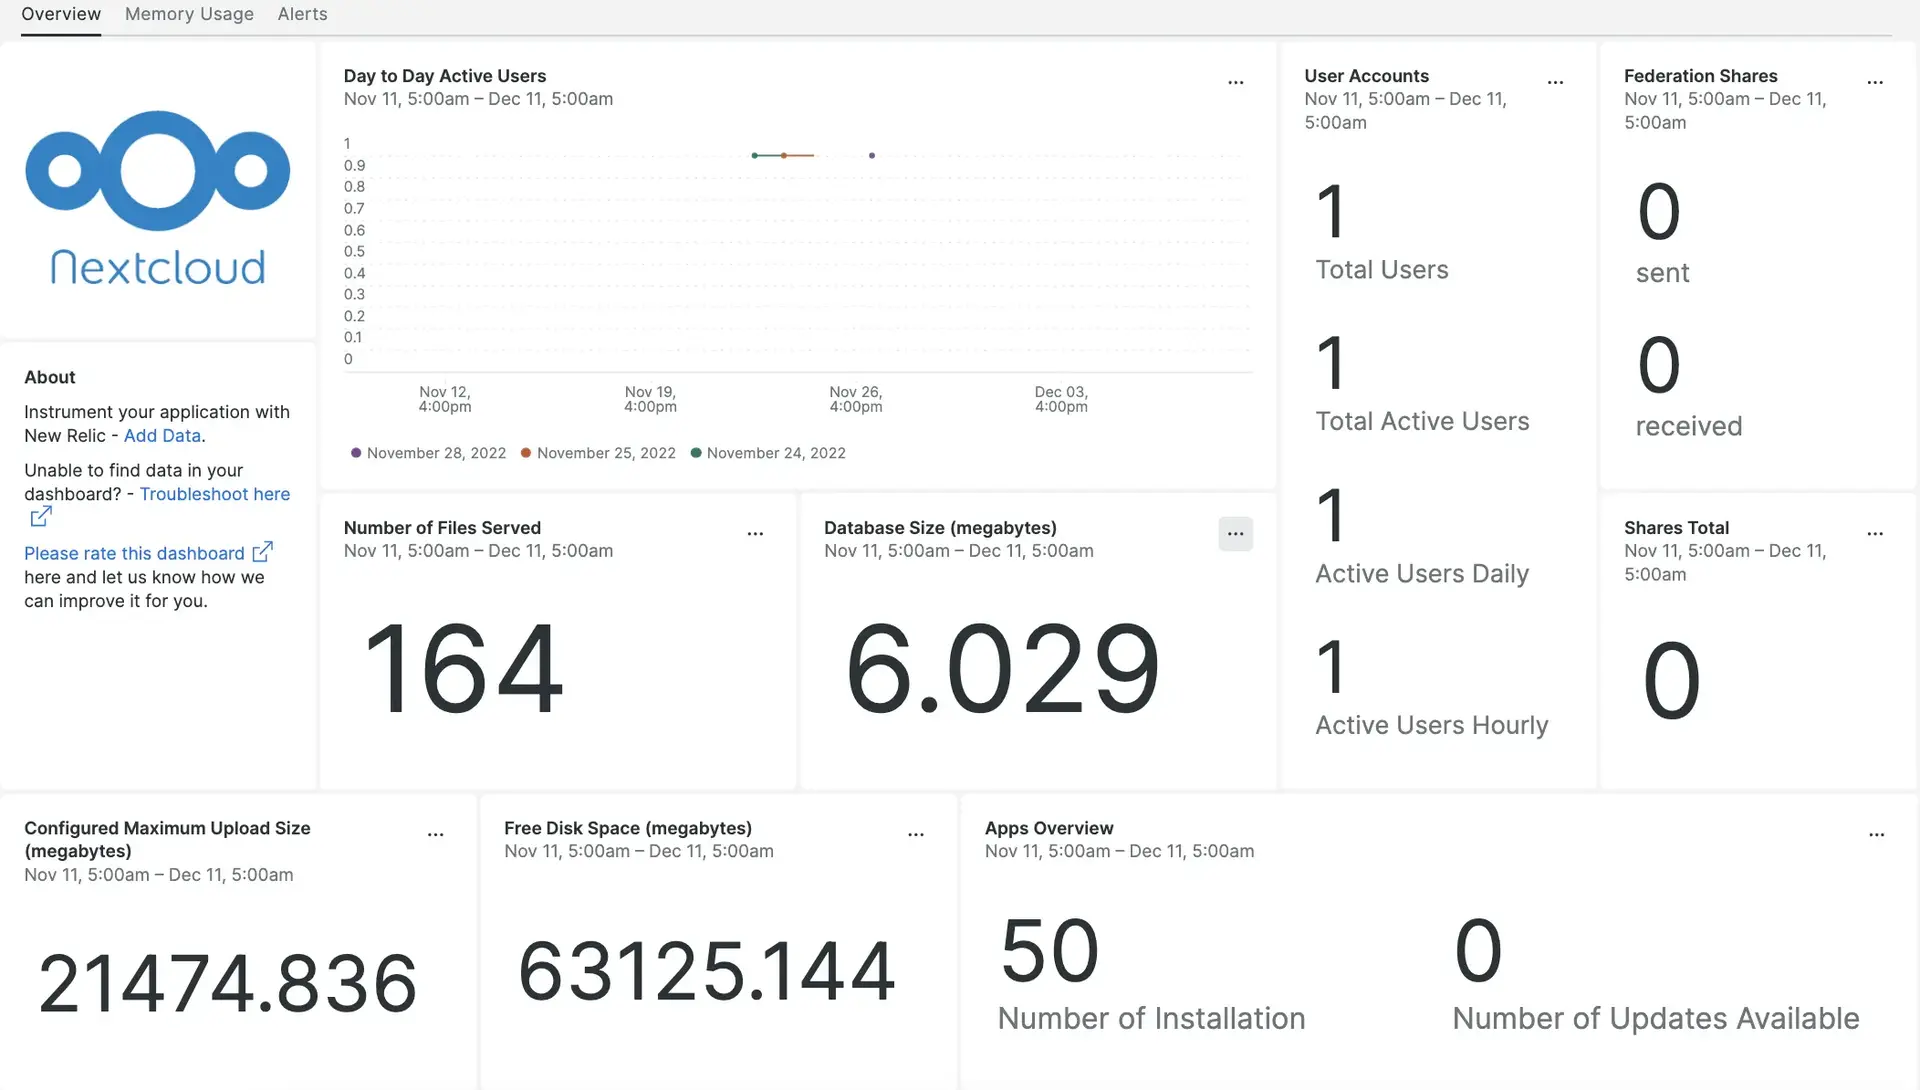
Nextcloud ダッシュボードを使用すると、システム内のファイル数、ユーザー アカウント、データベース サイズを簡単に追跡できます。 Nextcloud 統合は、インフラストラクチャエージェントと Prometheus OpenMetrics 統合で構築されており、最も重要なデータをオールインワンで表示できる一連のデフォルトのを提供します。

Nextcloud と New Relic の統合をセットアップすると、すぐにこのようなダッシュボードにデータが表示されます。
インテグレーションをインストールするには、次の手順を実行します。
インフラストラクチャエージェントをインストールします
Nextcloud インテグレーションを使用するには、まず同じホストにインフラストラクチャエージェントをインストールする必要があります。 インフラストラクチャエージェントはホスト自体を監視し、次のステップでインストールするインテグレーションは Nexcloud 固有のデータを使用して監視を拡張します。
Nextcloud 用に NRI-Flex を構成する
当社の flex インテグレーションはNew Relic Infrastructureエージェントにバンドルされており、Nextcloud データをNew Relicに送信するために使用されます。 flex 設定ファイルを作成するには、次の手順に従います。
nri-flex-nextcloud.ymlという名前のファイルを作成します/etc/newrelic-infra/integrations.d設定テンプレートを使用して、
nri-flex-nextcloud.ymlという名前のファイル内のフィールドYOUR_EVENT_TYPEとYOUR_HOST_IPを更新します。event_typeの値は、メトリクスを NRDB に保存するために使用されます。 たとえば、EVENT_TYPEを次のように更新することができます。NextcloudFlexMetricsnri-flex-nextcloud.ymlファイルは次のようになります。integrations:
name: nri-flex config: name: nextcloudFlex global: base_url: http://YOUR_HOST_IP/ocs/v2.php/apps/serverinfo/api/v1/ user: nextcloud_username pass: nextcloud_password apis:
- event_type: YOUR_EVENT_TYPE url: info?format=json
Nextcloud のメトリクスは、次の URL で入手できます。 `http://YOUR_HOST_IP/ocs/v2.php/apps/serverinfo/api/v1/info?format=json`
Nextcloud ログを New Relic に転送する
ログ転送を使用して、Nextcloud ログを New Relic に転送できます。
logging.ymlという名前のログファイルを作成します/etc/newrelic-infra/logging.d/次のスクリプトを
logging.ymlファイルに追加します。logs:- name: nextcloud.logfile: /var/www/nextcloud/data/nextcloud.logattributes:logtype: nextcloud_log
New Relic インフラストラクチャ エージェントを再起動します
データの使用を開始する前に、 インフラストラクチャ エージェントを再起動します。
次のコマンドはほとんどのシステムで動作するはずです:
$sudo systemctl restart newrelic-infra.serviceデータを検索する
Nextcloudという名前の事前に構築されたダッシュボード テンプレートを選択して、Nextcloud サーバーのメトリクスを監視できます。事前に構築されたダッシュボード テンプレートを使用するには、次の手順に従います。
one.newrelic.comから、 + Integrations & Agentsページに移動します。
Dashboardsをクリックします。
検索バーに
Nextcloudと入力します。Nextcloud ダッシュボードが表示されます。それをクリックしてインストールします。
Nextcloud ダッシュボードはカスタム ダッシュボードとみなされ、Dashboards UIに表示されます。 ダッシュボードの使用と編集に関するドキュメントについては、ダッシュボードのドキュメントを参照してください。
過去 5 分間のアクティブ ユーザー数をチェックする NRQL クエリの例を次に示します。
FROM NextcloudFlexMetrics SELECT latest(ocs.data.activeUsers.last5minutes)過去 24 時間のアクティブ ユーザー数をチェックする NRQL クエリの例を次に示します。
FROM NextcloudFlexMetrics SELECT latest(ocs.data.activeUsers.last24hours)
次は何ですか?
NRQL クエリの構築とダッシュボードの生成について詳しくは、以下をご覧ください。
- 基本的なクエリと高度なクエリを作成するには 、クエリ ビルダーの概要 を読んでください。
- ダッシュボードの概要を 読んで、ダッシュボードをカスタマイズし、さまざまなアクションを実行します。
- ダッシュボードを管理して、 表示モードを調整したり、ダッシュボードにコンテンツを追加したりする方法をご覧ください。