NVIDIA Triton インテグレーションは、本番環境での AI モデルの展開と管理を監視します。 Triton は、ディープラーニング モデル向けの柔軟でスケーラブルなソリューションを提供し、GPU や CPU を含むさまざまなハードウェア プラットフォームにわたって AI アプリケーションを効率的にデプロイできるようにします。

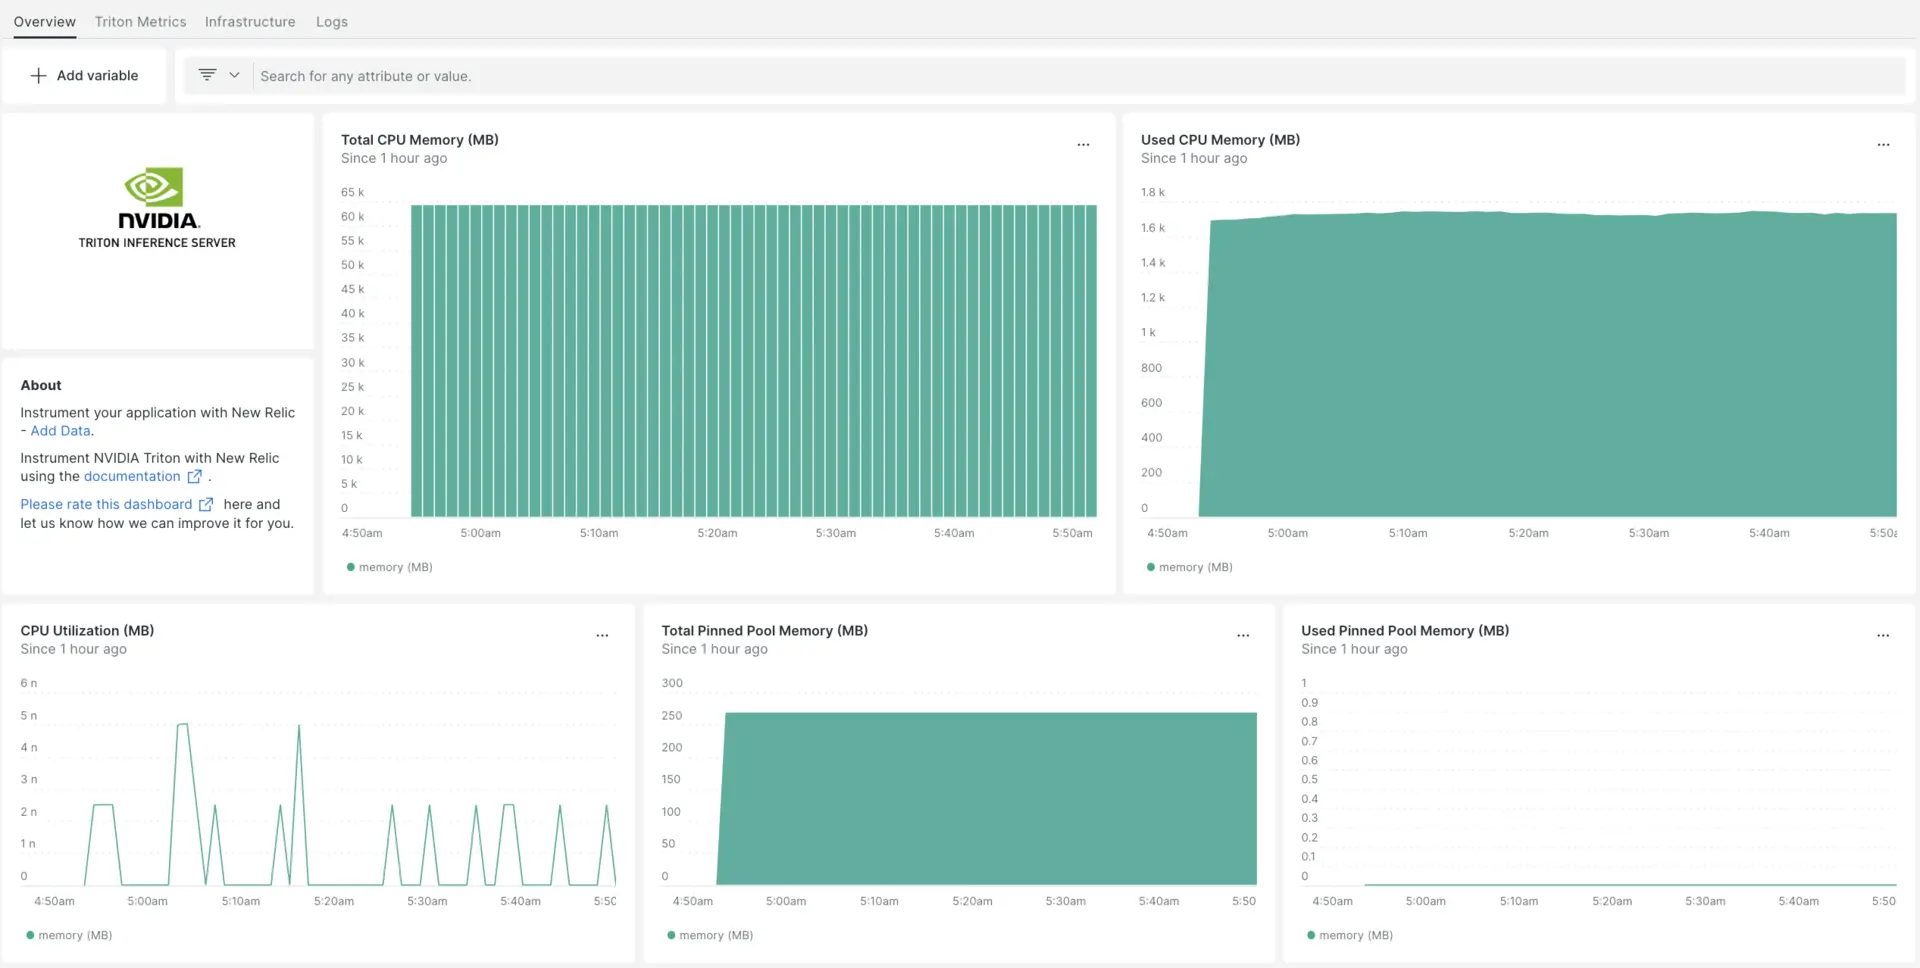
NVIDIA Triton インテグレーションをセットアップすると、NVIDIA Triton メトリックのダッシュボードが提供されます。
インフラストラクチャエージェントをインストールします
NVIDIA Triton インテグレーションを使用するには、同じホストにインフラストラクチャエージェントもインストールする必要があります。 インフラストラクチャエージェントはホスト自体を監視し、次のステップでインストールするインテグレーションは NVIDIA Triton 固有のデータを使用して監視を拡張します。
NVIDIA Tritonインテグレーションを有効にする nri-prometheus
Triton サーバーのメトリックは URL http://localhost:8002/metricsに表示されます。
ヒント
Tritonサーバーのメトリクス収集の詳細については、 NVIDIAのドキュメントを参照してください。
NVIDIA Triton インテグレーションをセットアップするには、次の手順に従います。
このコマンドを実行して、インテグレーション ディレクトリに
nri-prometheus-config.ymlという名前のファイルを作成します。bash$touch /etc/newrelic-infra/integrations.d/nri-prometheus-config.ymlエージェントが NVIDIA Triton データをキャプチャできるようにするには、次のスニペットを
nri-prometheus-config.ymlファイルに追加します。integrations:- name: nri-prometheusconfig:# When standalone is set to false nri-prometheus requires an infrastructure agent to work and send data. Defaults to truestandalone: false# When running with infrastructure agent emitters will have to include infra-sdkemitters: infra-sdk# The name of your cluster. It's important to match other New Relic products to relate the data.cluster_name: "YOUR_DESIRED_CLUSTER_NAME"targets:- description: NVIDIA Triton metrics listurls: ["http://localhost:8002/metrics"]# tls_config:# ca_file_path: "/etc/etcd/etcd-client-ca.crt"# cert_file_path: "/etc/etcd/etcd-client.crt"# key_file_path: "/etc/etcd/etcd-client.key"# Whether the integration should run in verbose mode or not. Defaults to falseverbose: false# Whether the integration should run in audit mode or not. Defaults to false.# Audit mode logs the uncompressed data sent to New Relic. Use this to log all data sent.# It does not include verbose mode. This can lead to a high log volume, use with careaudit: false# The HTTP client timeout when fetching data from endpoints. Defaults to 30s.# scrape_timeout: "30s"# Length in time to distribute the scraping from the endpointsscrape_duration: "5s"# Number of worker threads used for scraping targets.# For large clusters with many (>400) endpoints, slowly increase until scrape# time falls between the desired `scrape_duration`.# Increasing this value too much will result in huge memory consumption if too# many metrics are being scraped.# Default: 4# worker_threads: 4# Whether the integration should skip TLS verification or not. Defaults to falseinsecure_skip_verify: truetimeout: 10s
NVIDIA Triton ログ設定
nvidia triton ログを構成するには、以下の手順に従います。
実行中のコンテナのステータスを確認するには、次のdockerコマンドを実行します。
bash$sudo docker psnvidia-tritonコンテナのコンテナ ID をコピーし、次のコマンドを実行します。
bash$sudo docker logs -f <container_id> &> /tmp/triton.log &その後、
/tmp/ディレクトリにtriton.logという名前のログファイルがあることを確認します。
NVIDIA Triton ログを New Relic に転送する
ログ転送を使用して、NVIDIA Triton ログを New Relic に転送できます。 Linux マシンでは、 logging.ymlという名前のログファイルはこのパスにある必要があります。
$cd /etc/newrelic-infra/logging.d/上記のパスでログファイルを見つけたら、次のスクリプトをlogging.ymlファイルに含めます。
logs: - name: triton.log file: /tmp/triton.log attributes: logtype: triton_logsNew Relic インフラストラクチャ エージェントを再起動します
このコマンドを実行して、 インフラストラクチャエージェントを再起動します。
$sudo systemctl restart newrelic-infra.service数分以内に、NVIDIA Triton サーバーはメトリックをone.newrelic.comに送信します。
データを検索する
NVIDIA Triton サーバー メトリックを監視するには、 NVIDIA Tritonという名前の事前に構築されたダッシュボード テンプレートを選択できます。 事前に構築されたダッシュボード テンプレートを使用するには、次の手順に従ってください。
one.newrelic.com > Integrations & Agentsに移動し、 NVIDIA Tritonと入力します。
Dashboards [ダッシュボード]の下で、 NVIDIA Tritonをクリックします。
開いたポップアップ ウィンドウでアカウントを変更する場合は、 Edit [編集] をクリックします。
Setup NVIDIA Triton 「NVIDIA Triton のセットアップ」をクリックするか、このデータソースがすでにセットアップされている場合は、Skip this step [この手順をスキップします]。
「ダッシュボードの表示」をクリックして、New Relic で NVIDIA Triton データを表示します。
カスタム NVIDIA Triton ダッシュボードはDashboards UI にあります。 詳細についてはダッシュボードのセクションをご覧ください。
NVIDIA Triton CPU メモリをチェックするためのNRQL クエリを次に示します。
SELECT latest(nv_cpu_memory_total_bytes) / 1e+6 AS 'memory (MB)' FROM Metric
次は何ですか?
NRQL クエリの作成とダッシュボードの生成の詳細については、次のドキュメントをご覧ください。
- 基本的なクエリと高度なクエリを作成するためのクエリ ビルダーの概要。
- ダッシュボードをカスタマイズしてさまざまなアクションを実行するためのダッシュボードの概要。
- ダッシュボードを管理して、ダッシュボードの表示モードを調整したり、ダッシュボードにコンテンツを追加したりします。