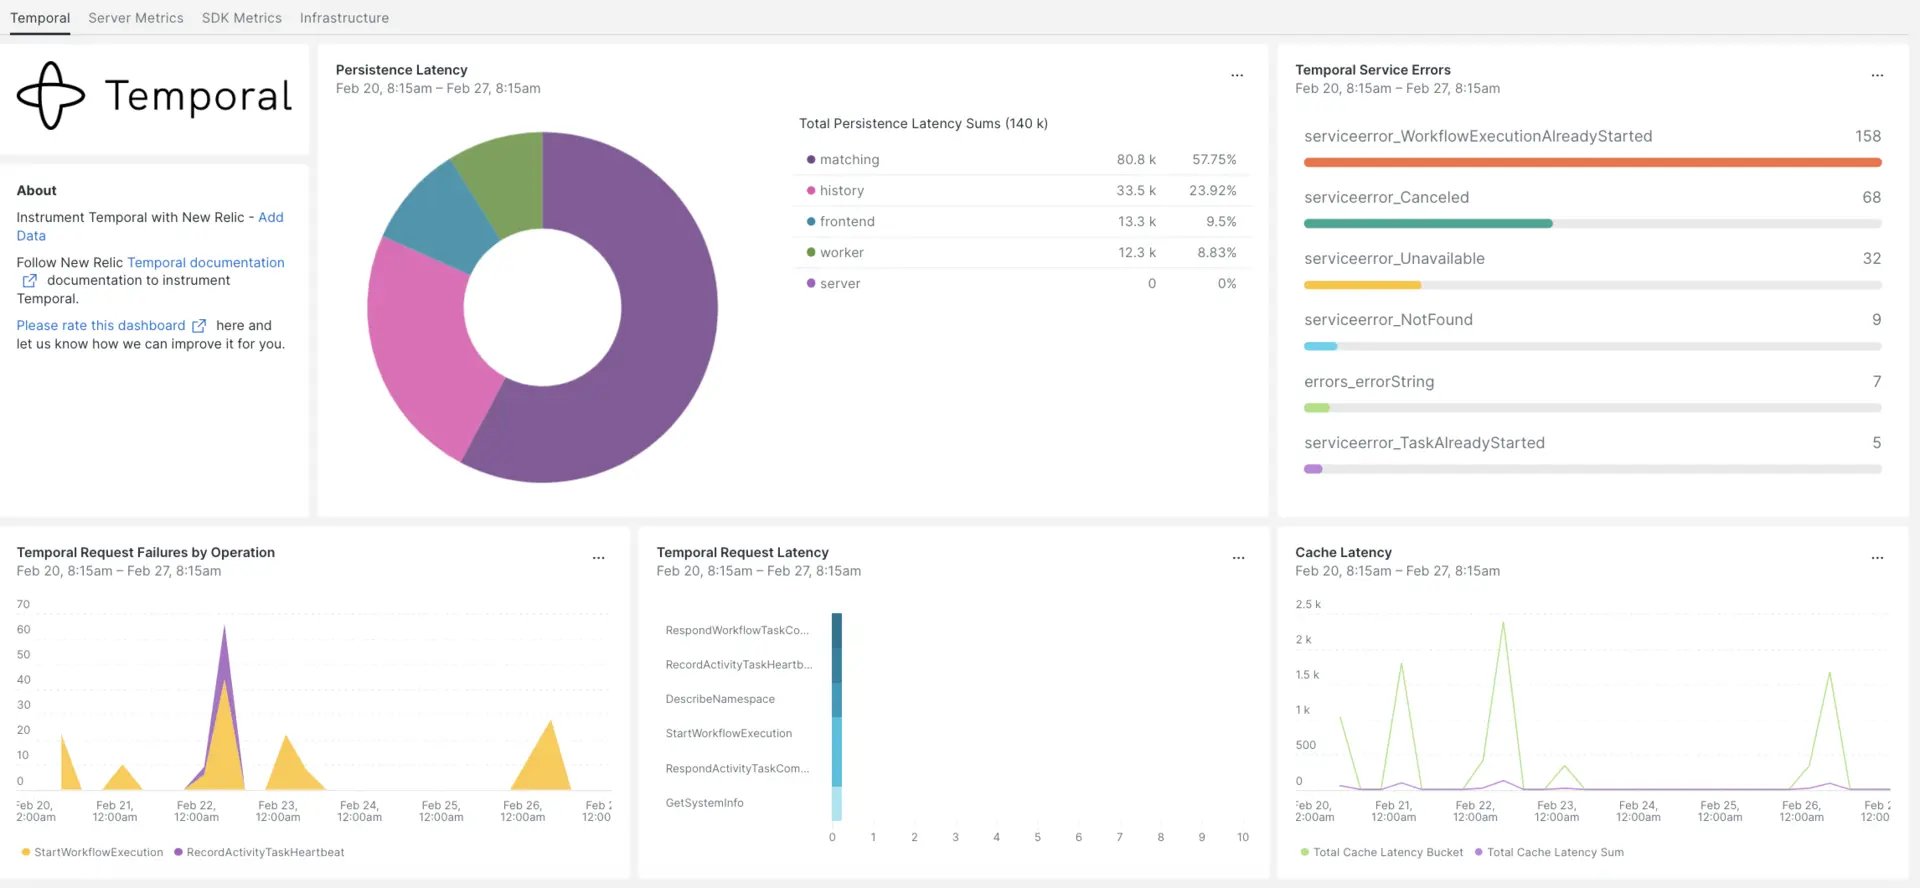
当社の Temporal Integration は、Temporal データのパフォーマンスを監視し、書き込み分散型、フォールト トレラント、スケーラブルなアプリケーションの問題の診断を支援します。 当社の Temporal インテグレーションでは、最も重要な Temporal SDK アプリ メトリックスを備えた事前構築されたダッシュボードを提供します。

New Relic との統合を設定したら、すぐにこのようなダッシュボードでデータを確認できます。
インフラストラクチャエージェントをインストールします
Temporal Integration を使用するには、まず同じホストにインフラストラクチャエージェントをインストールする必要があります。 インフラストラクチャエージェントはホスト自体を監視しますが、次の手順でインストールするインテグレーションは、データベースやインスタンスメトリックなどの時間固有のデータを使用して監視を拡張します。
Temporal メトリクスを公開する
次の手順では、デフォルトの設定ファイルdocker-compose.ymlを使用して Temporal Server のローカル インスタンスを実行します。
まだインストールしていない場合は、ホストに
dockerとdocker-composeをインストールします。bash$sudo apt install docker$sudo apt install docker-composeリポジトリをクローンします:
bash$git clone https://github.com/temporalio/docker-compose.gitプロジェクトのルートにディレクトリを変更します。
bash$sudo nano docker-compose/docker-compose.ymlPrometheus エンドポイントとポートを
docker-compose.ymlファイルに追加します。Environment:- PROMETHEUS_ENDPOINT=0.0.0.0:8000ports:- 8000:8000インスタンスを構築するには、
docker-compose upコマンドを実行します。bash$sudo docker-compose up次の URL でインスタンスが正しく実行されていることを確認します。
- Temporal サーバーは
localhost:7233で利用可能になります。 - Temporal Web UIは次の場所でご利用いただけます。
http://YOUR_DOMAIN:8080 - Temporal サーバーのメトリクスは、
http://YOUR_DOMAIN:8000/metrics
- Temporal サーバーは
Java SDK メトリクスを公開する
ここで、Prometheus がスクレイピングする SDK クライアント メトリックを公開します。
プロジェクトのメイン フォルダーに
MetricsWorker.javaファイルを作成します。//...// You need to import the following packages to set up metrics in Java.// See the Developer's guide for packages required for the other SDKs.import com.sun.net.httpserver.HttpServer;import com.uber.m3.tally.RootScopeBuilder;import com.uber.m3.tally.Scope;import com.uber.m3.util.Duration;import com.uber.m3.util.ImmutableMap;// See the Micrometer documentation for configuration details on other supported monitoring systems.// This example shows how to set up the Prometheus registry and stats reported.PrometheusMeterRegistry registry = new PrometheusMeterRegistry(PrometheusConfig.DEFAULT);StatsReporter reporter = new MicrometerClientStatsReporter(registry);// set up a new scope, report every 10 secondsScope scope = new RootScopeBuilder().tags(ImmutableMap.of("workerCustomTag1","workerCustomTag1Value","workerCustomTag2","workerCustomTag2Value")).reporter(reporter).reportEvery(com.uber.m3.util.Duration.ofSeconds(10));// For Prometheus collection, expose the scrape endpoint at port 8077. See Micrometer documentation for details on starting the Prometheus scrape endpoint. For example,HttpServer scrapeEndpoint = MetricsUtils.startPrometheusScrapeEndpoint(registry, 8077); //note: MetricsUtils is a utility file with the scrape endpoint configuration. See Micrometer docs for details on this configuration.// Stopping the starter stops the HTTP server that exposes the scrape endpoint.//Runtime.getRuntime().addShutdownHook(new Thread(() -> scrapeEndpoint.stop(1)));//Create Workflow service stubs to connect to the Frontend Service.WorkflowServiceStubs service = WorkflowServiceStubs.newServiceStubs(WorkflowServiceStubsOptions.newBuilder().setMetricsScope(scope) //set the metrics scope for the WorkflowServiceStubs.build());//Create a Workflow service client, which can be used to start, signal, and query Workflow Executions.WorkflowClient yourClient = WorkflowClient.newInstance(service,WorkflowClientOptions.newBuilder().build());//...プロジェクト ディレクトリに移動してプロジェクトをビルドします。
bash$./gradlew buildワーカーを起動します。
bash$./gradlew -q execute -PmainClass=<YOUR_METRICS_FILE>公開された Prometheus Scrape オブジェクトのワーカー メトリックを確認してください:
http://YOUR_DOMAIN:8077/metrics。注記
SDK メトリクス構成の詳細については、Temporal 公式ドキュメントを参照してください。
NRI-Prometheus の構成
インストレーションが成功したら、次の NRI-Prometheus 設定を行います。
次のパスに
nri-prometheus-temporal-config.ymlという名前のファイルを作成します。bash$cd /etc/newrelic-infra/integrations.d/設定ファイルの例を次に示します。 プレースホルダー URL を必ず更新してください。
integrations:- name: nri-prometheusconfig:standalone: false# Defaults to true. When standalone is set to `false`, `nri-prometheus` requires an infrastructure agent to send data.emitters: infra-sdk# When running with infrastructure agent emitters will have to include infra-sdkcluster_name: Temporal_Server_Metrics# Match the name of your cluster with the name seen in New Relic.targets:- description: Temporal_Server_Metricsurls: ["http://<YOUR_DOMAIN>:8000/metrics", "http://<YOUR_DOMAIN>:8077/metrics"]# tls_config:# ca_file_path: "/etc/etcd/etcd-client-ca.crt"# cert_file_path: "/etc/etcd/etcd-client.crt"# key_file_path: "/etc/etcd/etcd-client.key"verbose: false# Defaults to false. This determines whether or not the integration should run in verbose mode.audit: false# Defaults to false and does not include verbose mode. Audit mode logs the uncompressed data sent to New Relic and can lead to a high log volume.# scrape_timeout: "YOUR_TIMEOUT_DURATION"# `scrape_timeout` is not a mandatory configuration and defaults to 30s. The HTTP client timeout when fetching data from endpoints.scrape_duration: "5s"# worker_threads: 4# `worker_threads` is not a mandatory configuration and defaults to `4` for clusters with more than 400 endpoints. Slowly increase the worker thread until scrape time falls between the desired `scrape_duration`. Note: Increasing this value too much results in huge memory consumption if too many metrics are scraped at once.insecure_skip_verify: false# Defaults to false. Determins if the integration should skip TLS verification or not.timeout: 10s
一時ログを構成する
一時ログを構成するには、以下の手順に従います。
実行中のコンテナのステータスを確認するには、次のdockerコマンドを実行します。
bash$sudo docker psTemporalio/ UIコンテナのコンテナ ID をコピーし、次のコマンドを実行します。
bash$sudo docker logs -f <container_id> &> /tmp/temporal.log &その後、
/tmp/ディレクトリにtemporal.logという名前のログファイルがあることを確認します。
ログをNew Relicに転送する
ログ転送を使用して、Temporal ログを New Relic に転送できます。
Linux マシンでは、
logging.ymlという名前のログファイルが次のパスにあることを確認してください。bash$cd /etc/newrelic-infra/logging.d/上記のパスでログファイルを見つけたら、次のスクリプトを
logging.ymlファイルに含めます。logs:- name: temporal.logfile: /tmp/temporal.logattributes:logtype: temporal_logs以下の手順に従って、インフラストラクチャ エージェントを再起動してください。
bash$sudo systemctl restart newrelic-infra.serviceデータがNew Relic アカウントに流れ始めるまで数分間お待ちください。
データを検索する
Temporal という名前の事前に構築されたダッシュボード テンプレートを選択して、Temporal メトリクスを監視できます。 事前に構築されたダッシュボード テンプレートを使用するには、次の手順に従います。
one.newrelic.comより、 + Integrations & Agentsページに移動します。
[ダッシュボード]をクリックします。
検索バーにTemporalと入力します。
Temporal ダッシュボードが表示されたら、クリックしてインストールします。
Temporal ダッシュボードはカスタム ダッシュボードとみなされ、ダッシュボードUIに表示されます。 ダッシュボードの使用と編集に関するドキュメントについては、ダッシュボードのドキュメントを参照してください。
以下は、Temporal リクエスト レイテンシの合計を確認するための NRQL クエリです。
SELECT sum(temporal_request_latency_sum) FROM Metric WHERE scrapedTargetURL = 'http://<YOUR_DOMAIN>:8000/metrics'