New Relicへのシームレスなデータ統合により、Envoy の運営にインサイトを深く取り込みます。 キー メトリクスを監視して、Envoy バックエンドクラスタ、リスニング ソケット、HTTP ルーティング、および暗号化マテリアルの最適なパフォーマンスを確保します。

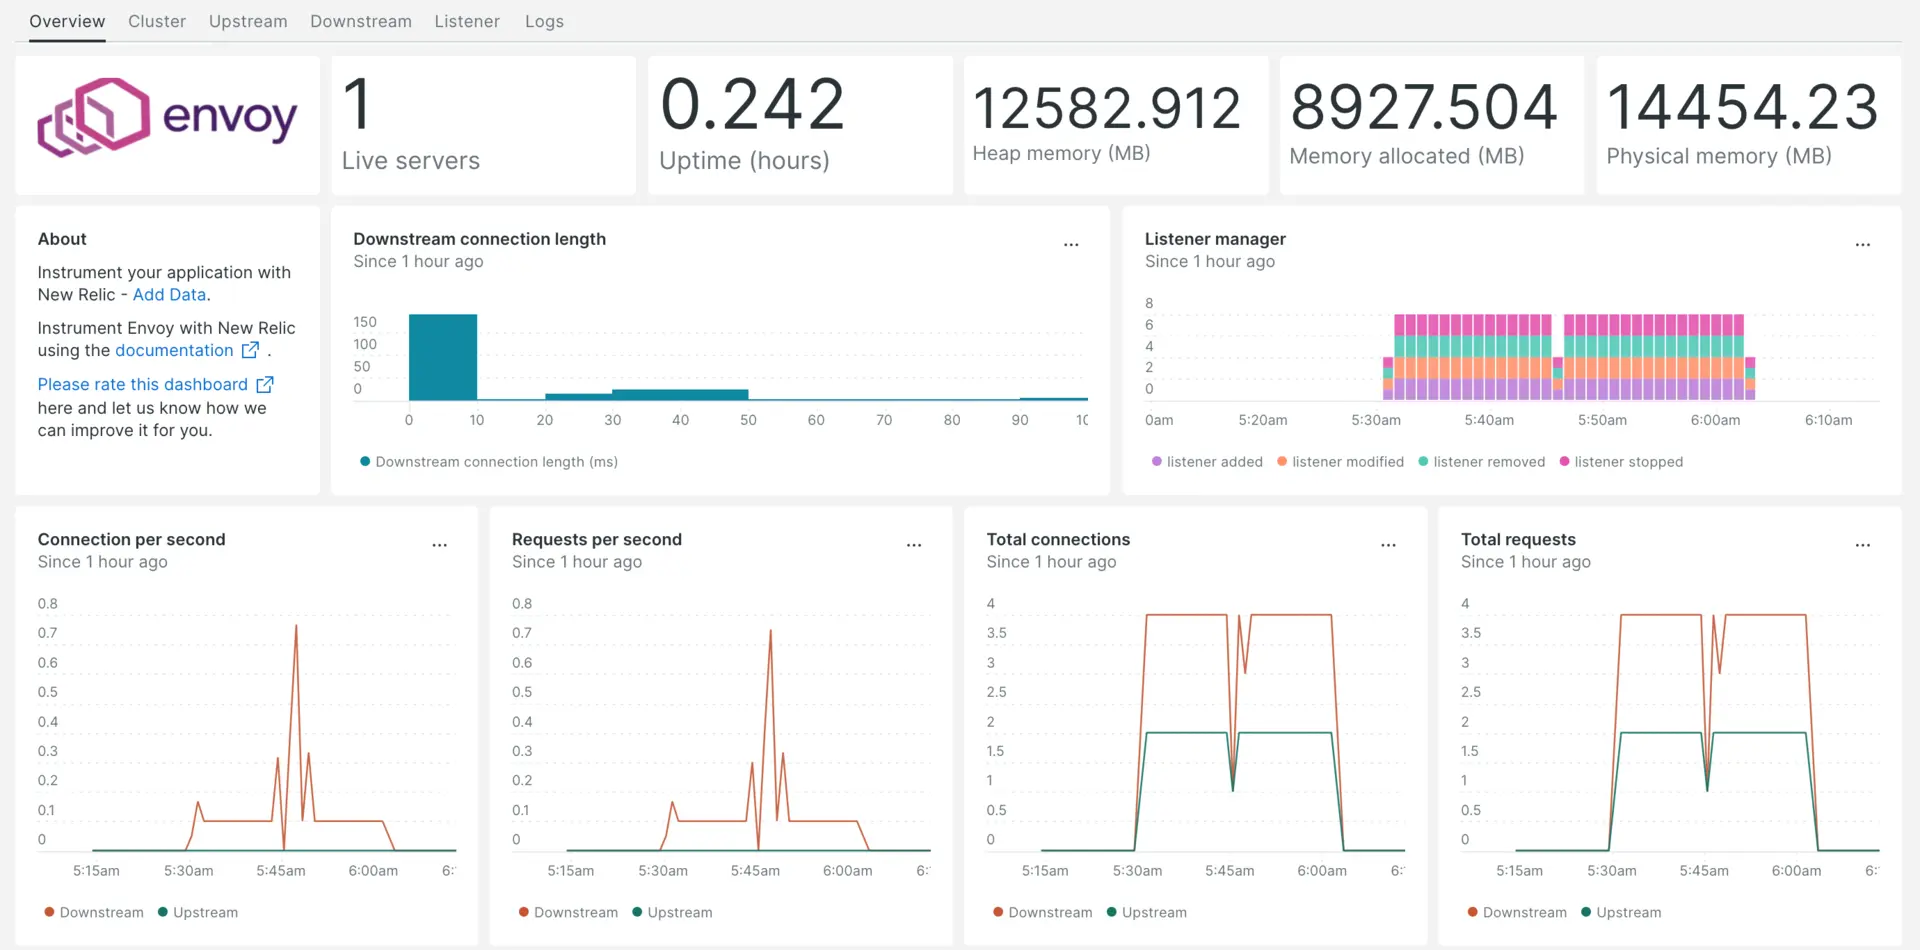
Envoy インテグレーションをセットアップした後、Envoy メトリクス用のダッシュボードを提供します。
インフラストラクチャエージェントをインストールします
Envoy 統合を使用するには、同じホストにインフラストラクチャ エージェントもインストールする必要があります。 インフラストラクチャエージェントはホスト自体を監視しますが、次のステップでインストールする統合は Envoy 固有のデータを使用して監視を拡張します。
nri-prometheus との Envoy 統合を有効にする
Envoy 統合をセットアップするには、次の手順に従います。
Integration ディレクトリに
nri-prometheus-config.ymlという名前のファイルを作成します。bash$touch /etc/newrelic-infra/integrations.d/nri-prometheus-config.yml次のスニペットを
nri-prometheus-config.ymlファイルに追加して、エージェントが Envoy データをキャプチャできるようにします。integrations:- name: nri-prometheusconfig:# When standalone is set to false nri-prometheus requires an infrastructure agent to work and send data. Defaults to truestandalone: false# When running with infrastructure agent emitters will have to include infra-sdkemitters: infra-sdk# The name of your cluster. It's important to match other New Relic products to relate the data.cluster_name: "YOUR_DESIRED_CLUSTER_NAME"targets:- description: Envoy metrics listurls: ["http://<ip-address>:9901/stats/prometheus"]# tls_config:# ca_file_path: "/etc/etcd/etcd-client-ca.crt"# cert_file_path: "/etc/etcd/etcd-client.crt"# key_file_path: "/etc/etcd/etcd-client.key"# Whether the integration should run in verbose mode or not. Defaults to falseverbose: false# Whether the integration should run in audit mode or not. Defaults to false.# Audit mode logs the uncompressed data sent to New Relic. Use this to log all data sent.# It does not include verbose mode. This can lead to a high log volume, use with careaudit: false# The HTTP client timeout when fetching data from endpoints. Defaults to 30s.# scrape_timeout: "30s"# Length in time to distribute the scraping from the endpointsscrape_duration: "5s"# Number of worker threads used for scraping targets.# For large clusters with many (>400) endpoints, slowly increase until scrape# time falls between the desired `scrape_duration`.# Increasing this value too much will result in huge memory consumption if too# many metrics are being scraped.# Default: 4# worker_threads: 4# Whether the integration should skip TLS verification or not. Defaults to falseinsecure_skip_verify: truetimeout: 10s
Envoy ログの転送
Envoy ログを New Relic に転送するには、次の手順に従います。
次のパスにある
logging.ymlという名前のログファイルを編集します。bash$cd /etc/newrelic-infra/logging.d次のスクリプトを
logging.ymlファイルに追加します。 必要に応じて、fileEnvoy ログ ファイルパスに置き換えます。logs:- name: envoy.logfile: /tmp/envoy.logattributes:logtype: envoy_logs- name: envoy-admin.logfile: /tmp/admin_access.logattributes:logtype: envoy_admin_logs
New Relic インフラストラクチャ エージェントを再起動します
インフラストラクチャ エージェントを再起動します。
$sudo systemctl restart newrelic-infra.service数分以内に、アプリケーションはメトリクスを one.newrelic.comに送信します。
データを検索する
Envoyという名前の事前に構築されたダッシュボード テンプレートを選択して、Envoy アプリケーション メトリクスを監視できます。 事前に構築されたダッシュボード テンプレートを使用するには、次の手順に従います。
one.newrelic.comから、 + Integrations & Agentsページに移動します
クリック Dashboards
検索バーに次のように入力します。
EnvoyEnvoy ダッシュボードが表示されます。 クリックしてインストールしてください
Envoy ダッシュボードはカスタム ダッシュボードとみなされ、Dashboards UIに表示されます。 ダッシュボードの使用と編集に関するドキュメントについては、ダッシュボードのドキュメントを参照してください。
Envoy のダウンストリーム合計接続を確認する NRQL クエリは次のとおりです。
SELECT latest(envoy_http_downstream_cx_total) as 'Downstream total connections' from Metric
次は何ですか?
NRQL クエリの作成とダッシュボードの生成の詳細については、次のドキュメントをご覧ください。
- 基本的なクエリと高度なクエリを作成するためのクエリ ビルダーの概要。
- ダッシュボードをカスタマイズしてさまざまなアクションを実行するためのダッシュボードの概要。
- ダッシュボードを管理して、ダッシュボードの表示モードを調整したり、ダッシュボードにコンテンツを追加したりします。