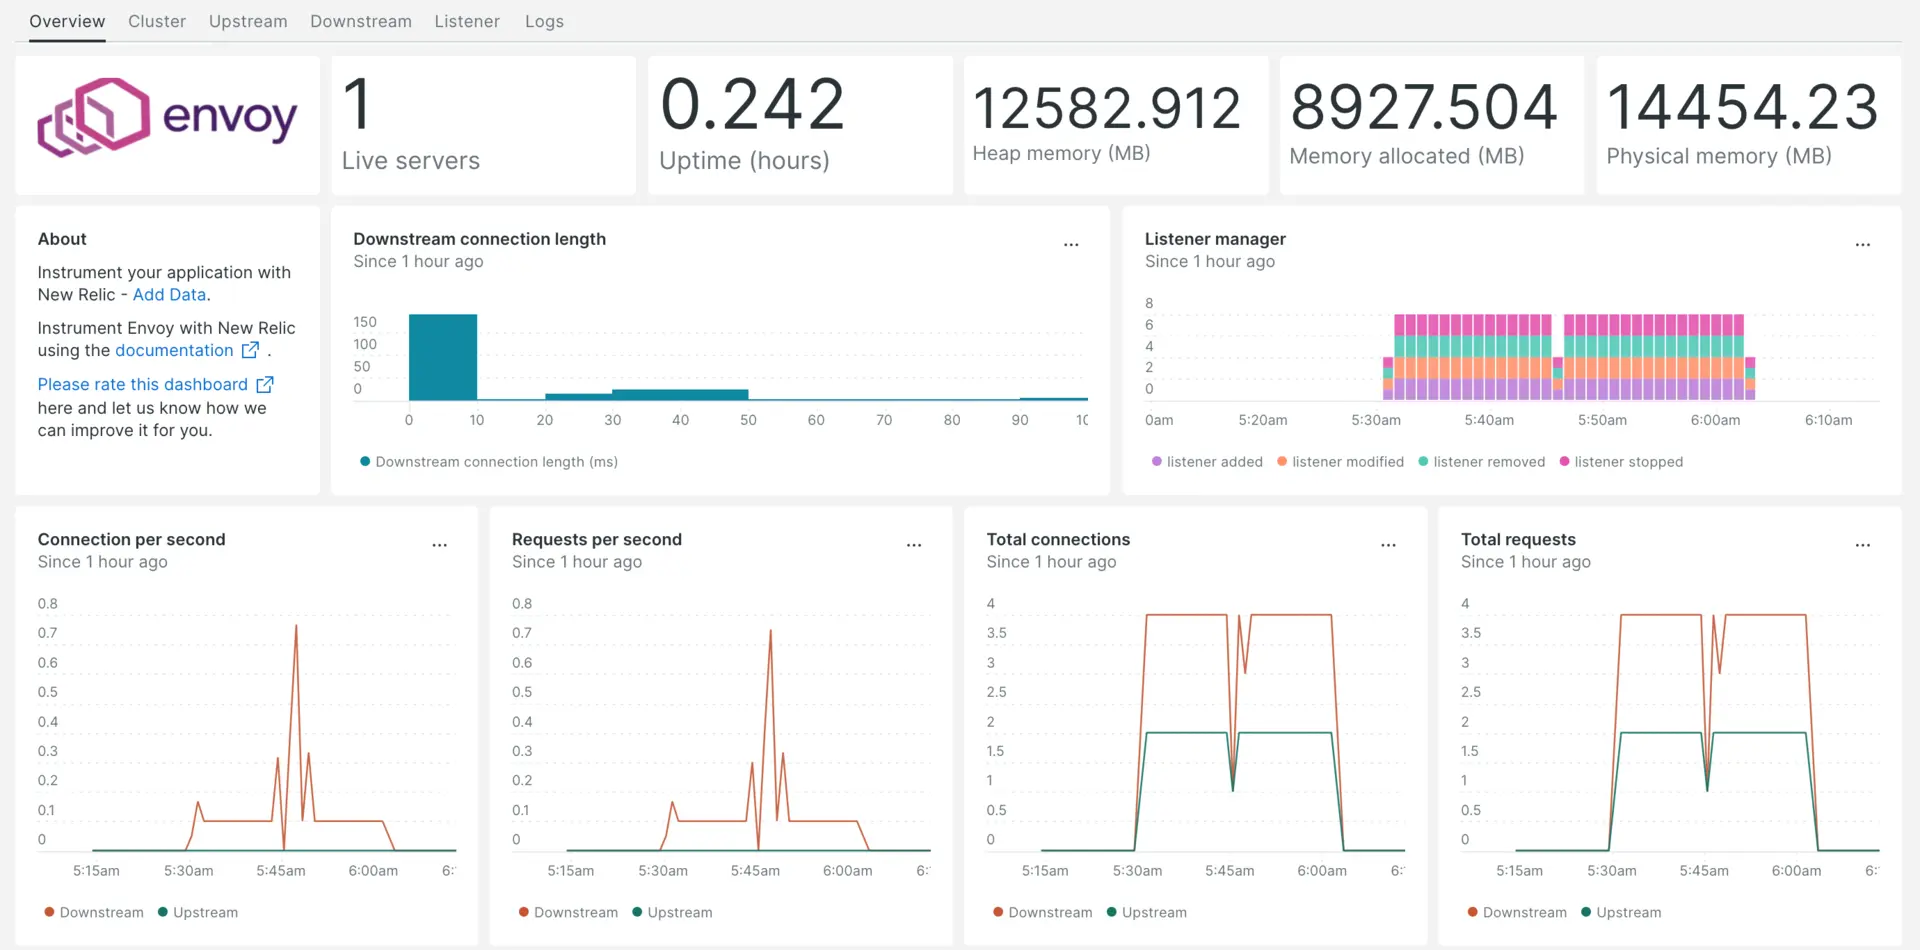
뉴렐릭으로의 원활한 데이터 통합을 통해 Envoy의 운영에 대한 심층적인 정보를 얻으세요. Envoy 백앤드 클러스터, 청취 소켓, HTTP 라우팅 및 암호화 자료의 최적 성능을 보장하기 위해 주요 지표를 모니터링합니다.

Envoy 통합을 설정한 후 Envoy 메트릭을 위한 대시보드를 제공합니다.
인프라 에이전트 설치
Envoy 통합을 사용하려면 동일한 호스트에 인프라 에이전트도 설치 해야 합니다. 클라이언트 에이전트는 호스트 자체를 모니터링하고, 다음 단계에서 설치하게 될 통합은 Envoy 관련 데이터로 모니터링을 확장합니다.
nri-prometheus와 Envoy 통합 활성화
Envoy 통합을 설정하려면 다음 단계를 따르세요.
통합 디렉터리에
nri-prometheus-config.yml이라는 파일을 만듭니다.bash$touch /etc/newrelic-infra/integrations.d/nri-prometheus-config.yml에이전트가 Envoy 데이터를 캡처할 수 있도록 하려면 다음 스니펫을
nri-prometheus-config.yml파일에 추가하세요.integrations:- name: nri-prometheusconfig:# When standalone is set to false nri-prometheus requires an infrastructure agent to work and send data. Defaults to truestandalone: false# When running with infrastructure agent emitters will have to include infra-sdkemitters: infra-sdk# The name of your cluster. It's important to match other New Relic products to relate the data.cluster_name: "YOUR_DESIRED_CLUSTER_NAME"targets:- description: Envoy metrics listurls: ["http://<ip-address>:9901/stats/prometheus"]# tls_config:# ca_file_path: "/etc/etcd/etcd-client-ca.crt"# cert_file_path: "/etc/etcd/etcd-client.crt"# key_file_path: "/etc/etcd/etcd-client.key"# Whether the integration should run in verbose mode or not. Defaults to falseverbose: false# Whether the integration should run in audit mode or not. Defaults to false.# Audit mode logs the uncompressed data sent to New Relic. Use this to log all data sent.# It does not include verbose mode. This can lead to a high log volume, use with careaudit: false# The HTTP client timeout when fetching data from endpoints. Defaults to 30s.# scrape_timeout: "30s"# Length in time to distribute the scraping from the endpointsscrape_duration: "5s"# Number of worker threads used for scraping targets.# For large clusters with many (>400) endpoints, slowly increase until scrape# time falls between the desired `scrape_duration`.# Increasing this value too much will result in huge memory consumption if too# many metrics are being scraped.# Default: 4# worker_threads: 4# Whether the integration should skip TLS verification or not. Defaults to falseinsecure_skip_verify: truetimeout: 10s
Envoy 로그 전달
Envoy 로그를 뉴렐릭으로 전달하려면 다음 단계를 따르세요.
다음 경로에 있는
logging.yml이라는 로그 파일을 편집합니다.bash$cd /etc/newrelic-infra/logging.d다음 스크립트를
logging.yml파일에 추가합니다. 필요한 경우fileEnvoy 로그 파일 경로로 바꿉니다.logs:
name: envoy.log file: /tmp/envoy.log attributes: logtype: envoy_logs
name: envoy-admin.log file: /tmp/admin_access.log attributes: logtype: envoy_admin_logs
New Relic 인프라 에이전트 다시 시작
인프라 에이전트를 다시 시작하십시오.
$sudo systemctl restart newrelic-infra.service몇 분 안에 애플리케이션이 메트릭을 one.newrelic.com 으로 보냅니다.
데이터 찾기
Envoy 이라는 사전 구축된 대시보드 템플릿을 선택하여 Envoy의 스토리를 모니터링할 수 있습니다. 사전 구축된 대시보드 템플릿을 사용하려면 다음 단계를 따르세요.
one.newrelic.com 에서,
+ Add data
페이지로 이동
클릭
Dashboards
검색창에 다음을 입력하세요.
EnvoyEnvoy 대시보드가 나타나야 합니다. 클릭해서 설치하세요
귀하의 Envoy 대시보드는 맞춤형 대시보드로 간주되며 Dashboards UI 에서 찾을 수 있습니다. 대시보드 사용 및 편집에 대한 문서는 대시보드 문서 를 참조하세요.
다음은 Envoy 다운스트림 총 연결을 확인하는 NRQL 쿼리입니다.
SELECT latest(envoy_http_downstream_cx_total) as 'Downstream total connections' from Metric
다음은 뭐지?
NRQL 쿼리 작성 및 대시보드 생성에 대해 자세히 알아보려면 다음 문서를 확인하세요.
- 기본 및 고급 쿼리를 생성 하기 위한 쿼리 빌더 소개
- 대시보드를 사용자 지정하고 다양한 작업을 수행하기 위한 대시보드 소개
- 대시보드를 관리하여 대시 보드 표시 모드를 조정하거나 대시보드에 더 많은 콘텐츠를 추가합니다.