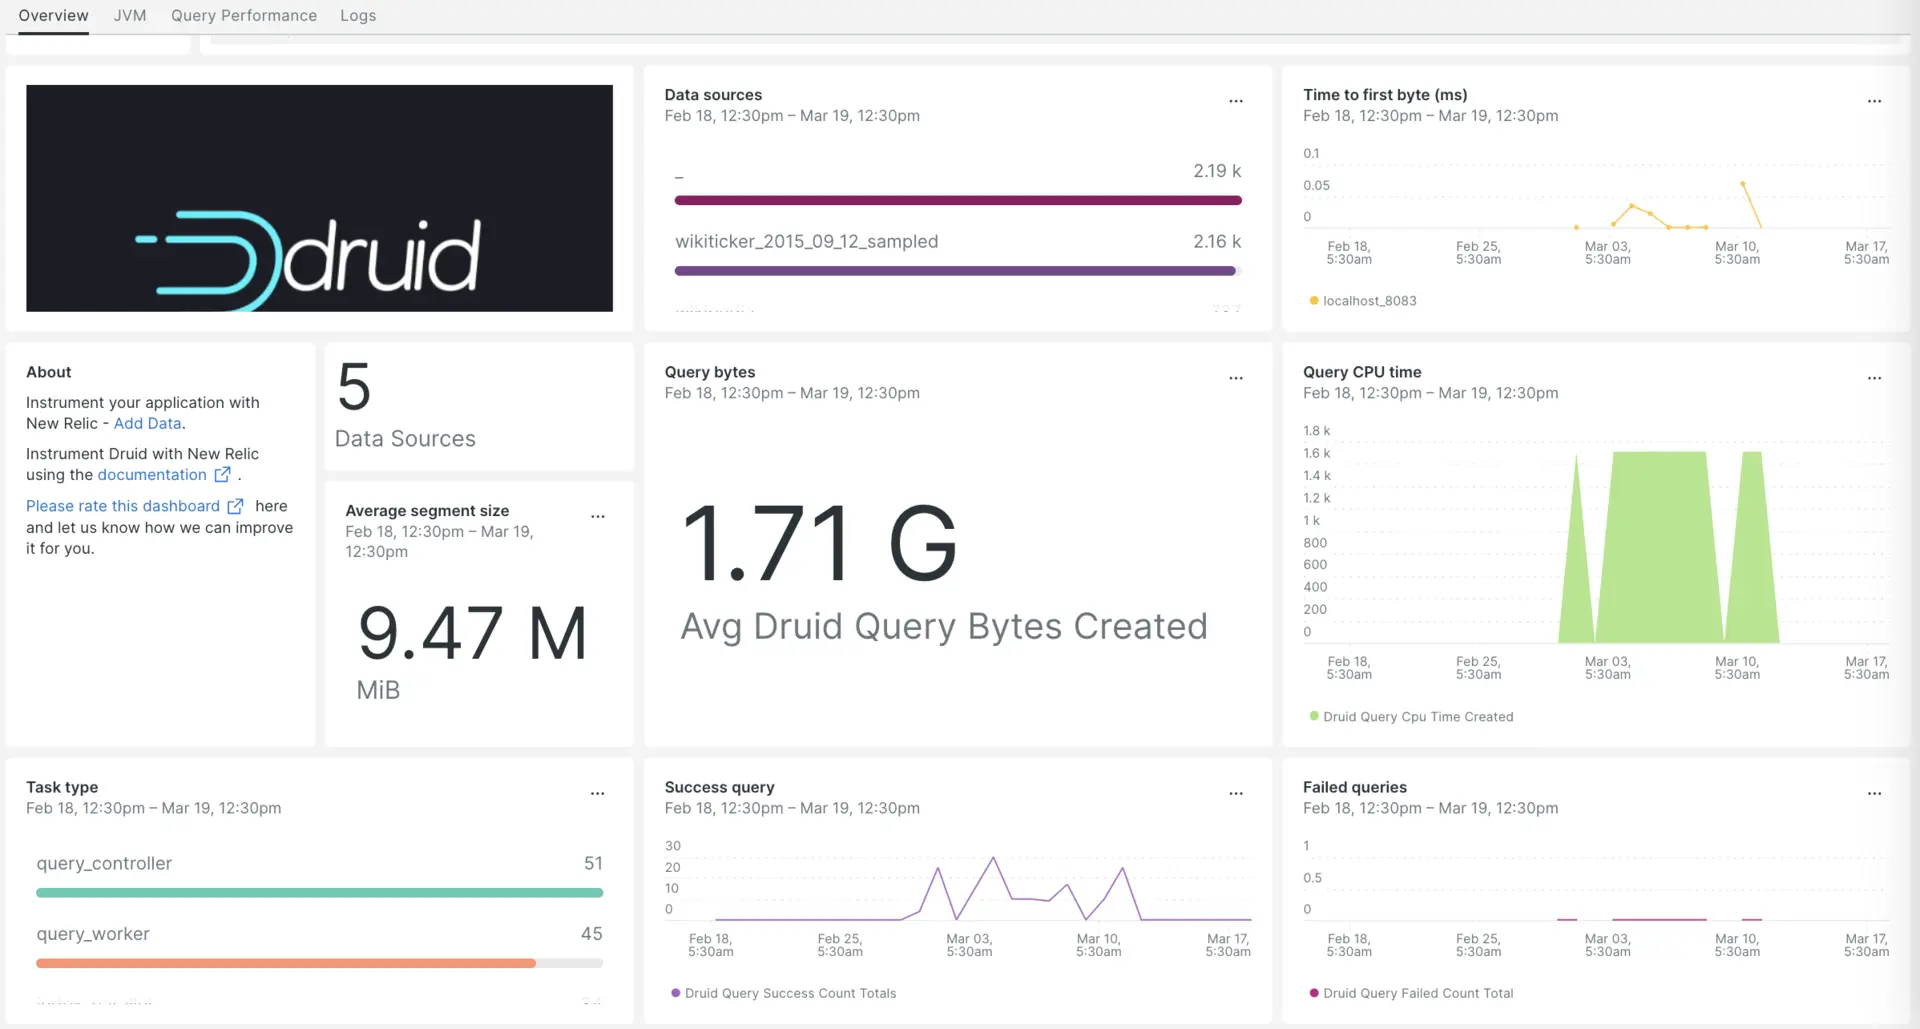
Apache Druid をNew Relicと統合すると、Druid クラスタのパフォーマンスを監視、分析、最適化する能力が強化されます。 Apache Druid 統合は強力な監視機能とアラート機能を提供するため、Druid ベースの分析プラットフォームの信頼性と効率性を確保できます。

New Relicとの Apache Druid 統合をセットアップしたら、箱から出してすぐにダッシュボードでデータを確認できます。
Apache Druid 統合のセットアップ
Apache Druid 統合をセットアップするには、次の手順を実行します。
インフラストラクチャエージェントをインストールします
Apache Druid 統合を使用するには、まず同じホストにインフラストラクチャエージェントをインストールする必要があります。 インフラストラクチャエージェントはホスト自体を監視し、Apache Druid 統合は Druid クラスタに固有のデータを使用して監視を拡張します。
Prometheus Emitter を使用して Druid メトリクスを公開する
apache-druid-$version/conf/druid/single-server/micro-quickstart/_common/common.runtime.propertiesファイルの拡張機能ロード リストの末尾にprometheus.emitterを追加します。druid.extensions.loadList=["druid-hdfs-storage", "druid-kafka-indexing-service", "druid-datasketches", "druid-multi-stage-query", "prometheus-emitter"]左側の列にリストされているファイル パスに、右側の列にリストされているコード スニペットを追加します。
ファイルパス
コードスニペット
PATH/TO/broker/runtime.properties# Monitoringdruid.monitoring.monitors=["org.apache.druid.java.util.metrics.JvmMonitor"]druid.emitter=prometheusdruid.emitter.logging.logLevel=infodruid.emitter.prometheus.strategy=exporterdruid.emitter.prometheus.port=19091PATH/TO/coordinator-overlord/runtime.properties# Monitoringdruid.monitoring.monitors=["org.apache.druid.java.util.metrics.JvmMonitor"]druid.emitter=prometheusdruid.emitter.logging.logLevel=infodruid.emitter.prometheus.strategy=exporterdruid.emitter.prometheus.port=19092PATH/TO/historical/runtime.properties# Monitoringdruid.monitoring.monitors=["org.apache.druid.java.util.metrics.JvmMonitor"]druid.emitter=prometheusdruid.emitter.logging.logLevel=infodruid.emitter.prometheus.strategy=exporterdruid.emitter.prometheus.port=19093PATH/TO/middleManager/runtime.properties# Monitoringdruid.monitoring.monitors=["org.apache.druid.java.util.metrics.JvmMonitor"]druid.emitter=prometheusdruid.emitter.logging.logLevel=infodruid.emitter.prometheus.strategy=exporterdruid.emitter.prometheus.port=19094PATH/TO/router/runtime.properties# Monitoringdruid.monitoring.monitors=["org.apache.druid.java.util.metrics.JvmMonitor"]druid.emitter=prometheusdruid.emitter.logging.logLevel=infodruid.emitter.prometheus.strategy=exporterdruid.emitter.prometheus.port=19095
Prometheus エミッター拡張機能をインストールする
次のコマンドを実行して、Apache Druid セットアップの
extensionsフォルダ ディレクトリ内にprometheus-emitterという名前のフォルダを作成します。bash$cd apache-druid-$version/extensions/bash$sudo mkdir prometheus-emitterdruid ダウンロード ディレクトリに移動し、次のコマンドを実行して、サーバーが起動時に呼び出す jar ファイルを作成します。
bash$sudo java \>-cp "lib/*" \>-Ddruid.extensions.directory="extensions" \>-Ddruid.extensions.hadoopDependenciesDir="hadoop-dependencies" \>org.apache.druid.cli.Main tools pull-deps \>--no-default-hadoop \>-c "org.apache.druid.extensions.contrib:prometheus-emitter:24.0.0"
Apache Druid 用にnri-prometheusを構成する
nri-prometheus-config.ymlという名前のファイルを作成します。bash$touch /etc/newrelic-infra/integrations.d/nri-prometheus-config.yml次のスニペットを
nri-prometheus-config.ymlファイルに追加して、Apache Druid データのキャプチャを有効にします。integrations:- name: nri-prometheusconfig:# When standalone is set to false nri-prometheus requires an infrastructure agent to work and send data. Defaults to truestandalone: false# When running with infrastructure agent emitters will have to include infra-sdkemitters: infra-sdk# The name of your cluster. It's important to match other New Relic products to relate the data.cluster_name: "Apache-druid"targets:- description: Secure etcd exampleurls: ["http://<YOUR_HOST_IP>:19091/metrics","http://<YOUR_HOST_IP>:19092/metrics", "http://<YOUR_HOST_IP>:19093/metrics","http://<YOUR_HOST_IP>:19094/metrics","http://<YOUR_HOST_IP>:19095/metrics"]# tls_config:# ca_file_path: "/etc/etcd/etcd-client-ca.crt"# cert_file_path: "/etc/etcd/etcd-client.crt"# key_file_path: "/etc/etcd/etcd-client.key"# Whether the integration should run in verbose mode or not. Defaults to false.verbose: false# Whether the integration should run in audit mode or not. Defaults to false.# Audit mode logs the uncompressed data sent to New Relic. Use this to log all data sent.# It does not include verbose mode. This can lead to a high log volume, use with care.audit: false# The HTTP client timeout when fetching data from endpoints. Defaults to "5s" if it is not set.# This timeout in seconds is passed as well as a X-Prometheus-Scrape-Timeout-Seconds header to the exporters# scrape_timeout: "5s"# Length in time to distribute the scraping from the endpoints. Default to "30s" if it is not set.scrape_duration: "5s"# Number of worker threads used for scraping targets.# For large clusters with many (>400) endpoints, slowly increase until scrape# time falls between the desired `scrape_duration`.# Increasing this value too much will result in huge memory consumption if too# many metrics are being scraped.# Default: 4# worker_threads: 4# Whether the integration should skip TLS verification or not. Defaults to false.insecure_skip_verify: falsetimeout: 10s
Druid ログを New Relic に転送する
次のパスにある
logging.ymlという名前のログファイルを編集します。bash$cd /etc/newrelic-infra/logging.d次のスニペットを
logging.ymlファイルに追加します。- name: druid-logsfile: /home/<Druid-Download Directory>/log/*.logattributes:logtype: apache-druid
インフラストラクチャエージェントを再起動します
インフラストラクチャエージェントのドキュメントの指示に従って、インフラストラクチャエージェントを再起動します。 これはほとんどの人にとって機能する基本的なコマンドです。
$sudo systemctl restart newrelic-infra.serviceNew Relic で Druid メトリクスを表示する
上記の設定を完了すると、事前に構築されたダッシュボード テンプレートを使用してメトリクスを表示できます。 このダッシュボードにアクセスするには:
one.newrelic.com > + Add dataに移動します。
Dashboards [ダッシュボード]タブをクリックします。
検索ボックスに
Apache druidと入力します。それを選択し、 Install [インストール]をクリックします。
Apache Druid クイックスタートを計測し、メトリクスとアラートを確認するには、
Install nowボタンをクリックしてApache Druid クイックスタート ページをフォローすることもできます。Druid セグメントの平均サイズを確認するクエリの例を次に示します。
SELECT average(druid_segment_size) AS 'MiB' FROM Metric SINCE 30 MINUTES AGO
次は何ですか?
NRQL クエリの作成とダッシュボードの生成の詳細については、次のドキュメントをご覧ください。
基本的なクエリと高度なクエリを作成するためのクエリ ビルダーの概要。
表示モードを調整したり、ダッシュボードにコンテンツを追加したりできます。