• /
  • EnglishEspañol日本語한국어Português
  • Log inStart now

New Relic Teams

preview

We're still working on this feature, but we'd love for you to try it out!

This feature is currently provided as part of a preview program pursuant to our pre-release policies.

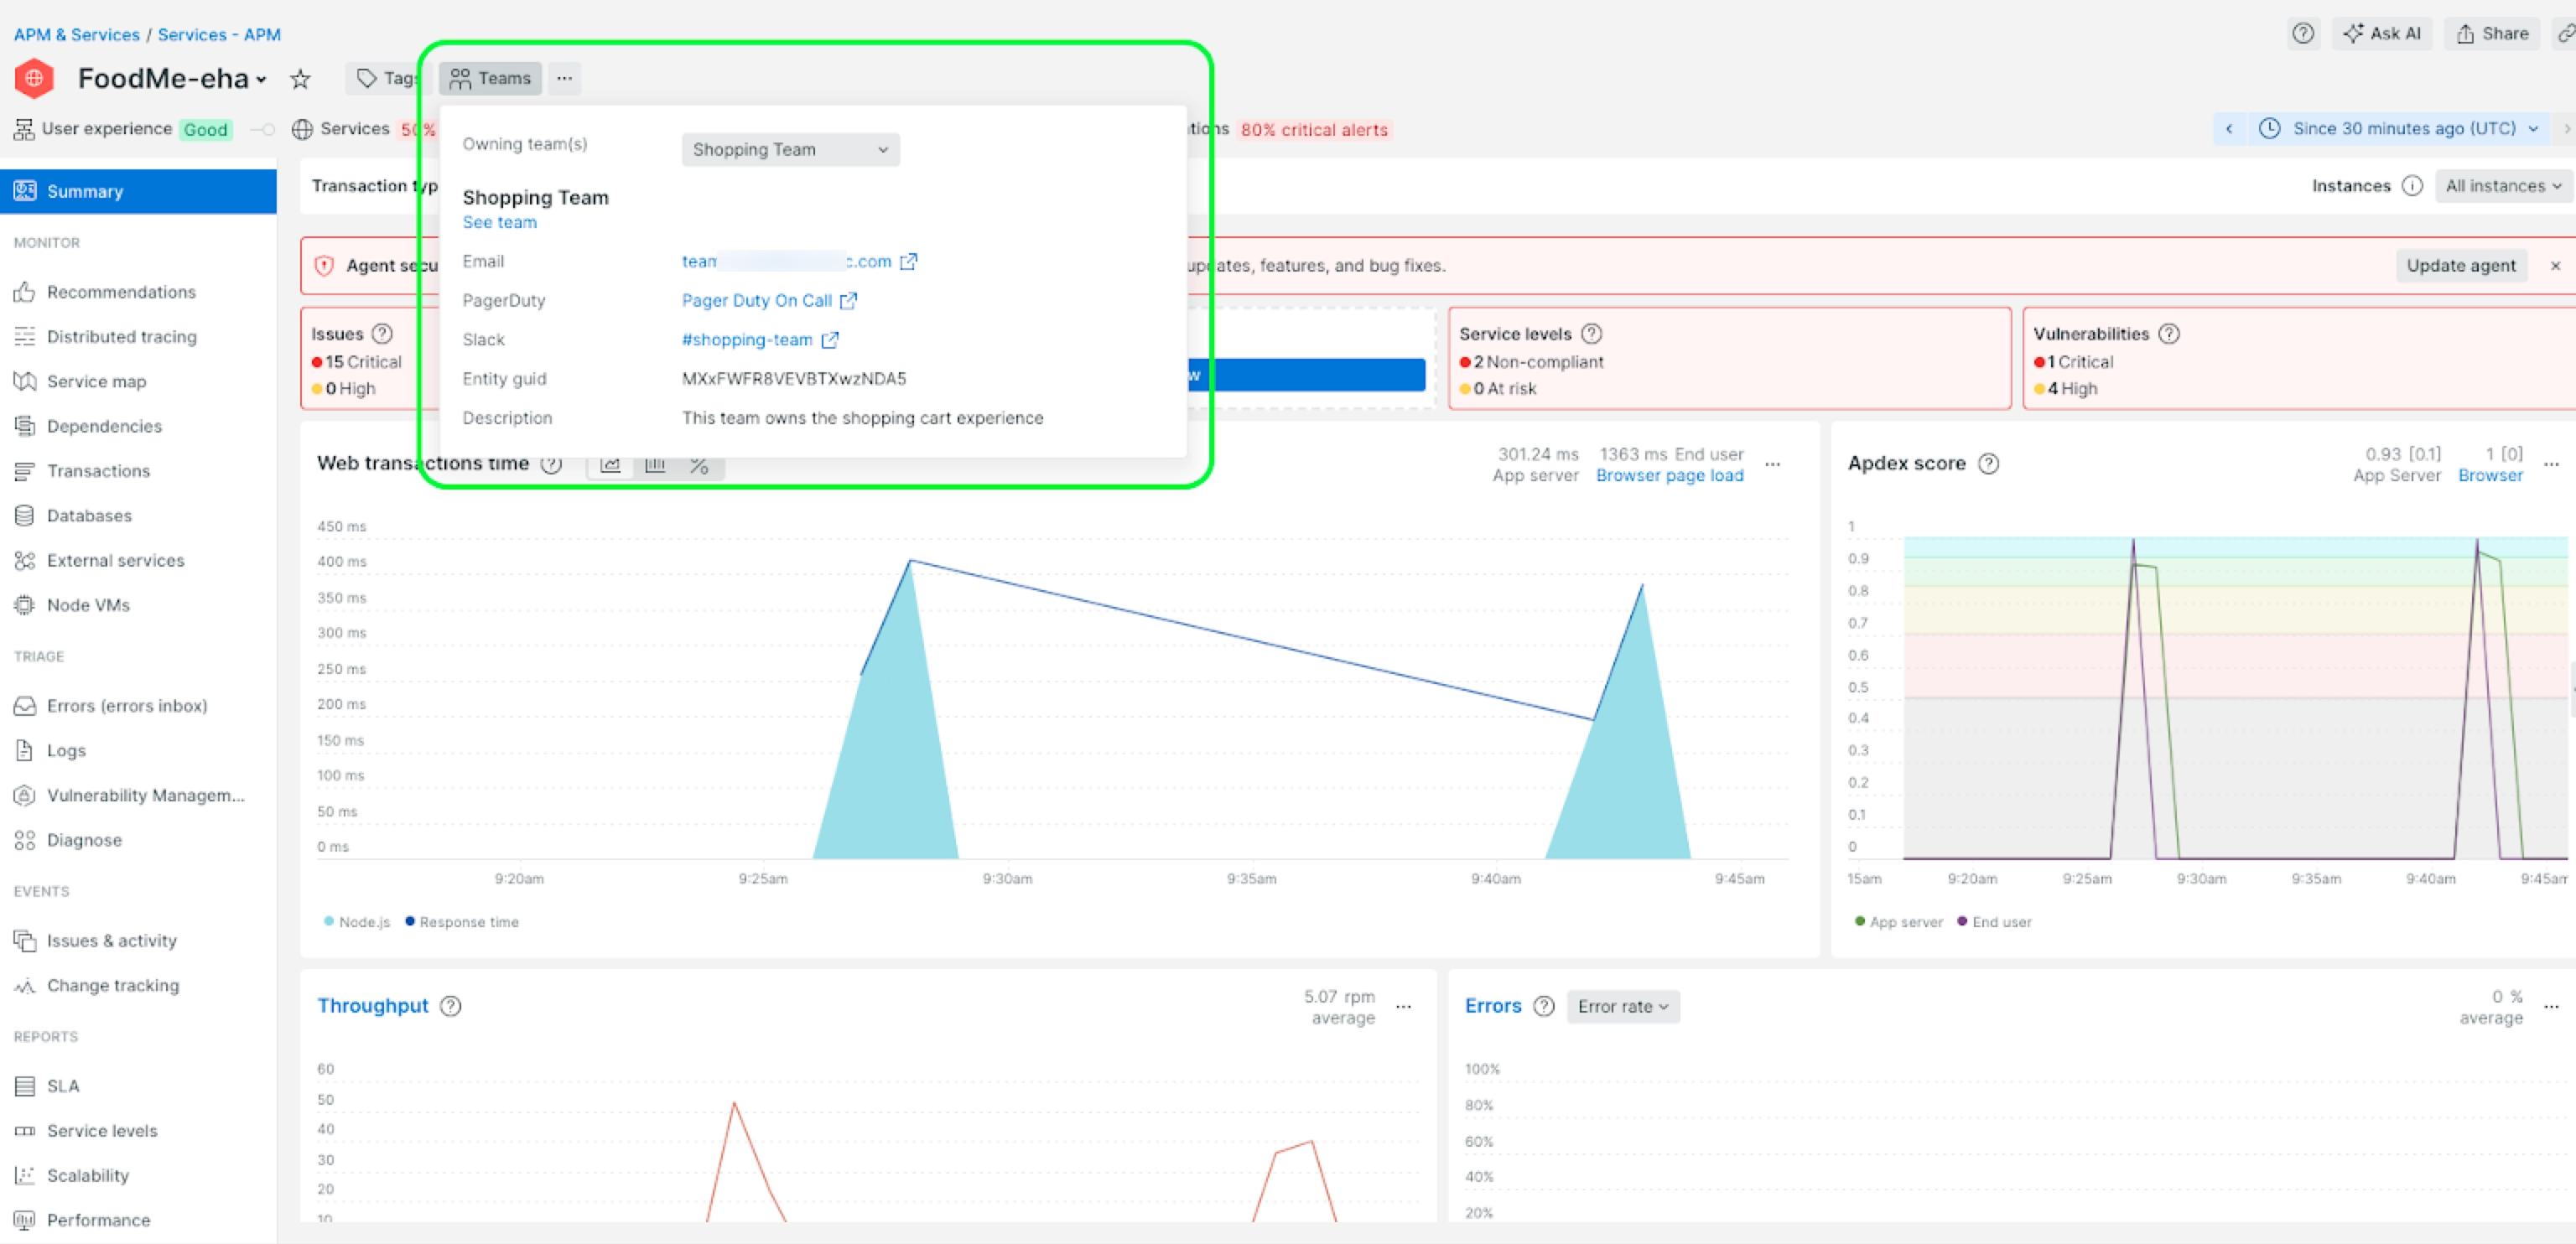
New Relic Teams lets you connect the entities you're monitoring to the Teams who own them. When you can easily see who owns an entity, you can speed up troubleshooting, enhance team collaboration, and improve your operational efficiency.

By assigning the different parts of your system to the teams who maintain them, you can find the right team for any service, host, or other entity.

How can you use Teams across New Relic?

You can leverage New Relic Teams in a variety of places across the platform. This means Teams is available when you need it to contact owners of specific entities. Here are some examples of how you can leverage the power of Teams:

The Team's hub page

The 'Team' hub page is a centralized space for all of your team's essential information. It facilitates collaboration among team members and keeps everyone updated about important developments. In the Overview tab you will find:

  • All active issues related to the entities your team owns that have been opened in the last 3 days.
  • A summary of your team's Service Levels statuses.
  • A summary of your team's Workloads statuses.
  • A summary of your team’s Scorecards compliance.
  • All error groups (Errors Inbox) of your team.
  • The list of team members that make up this team.
  • The list of all the important dashboards for easy access by any members of the team.
  • Links to documentation, runbooks, and troubleshooting guides relevant to your monitored systems and applications.
  • The list of the team's Workflows.
  • The list of the team's Alert Policies.
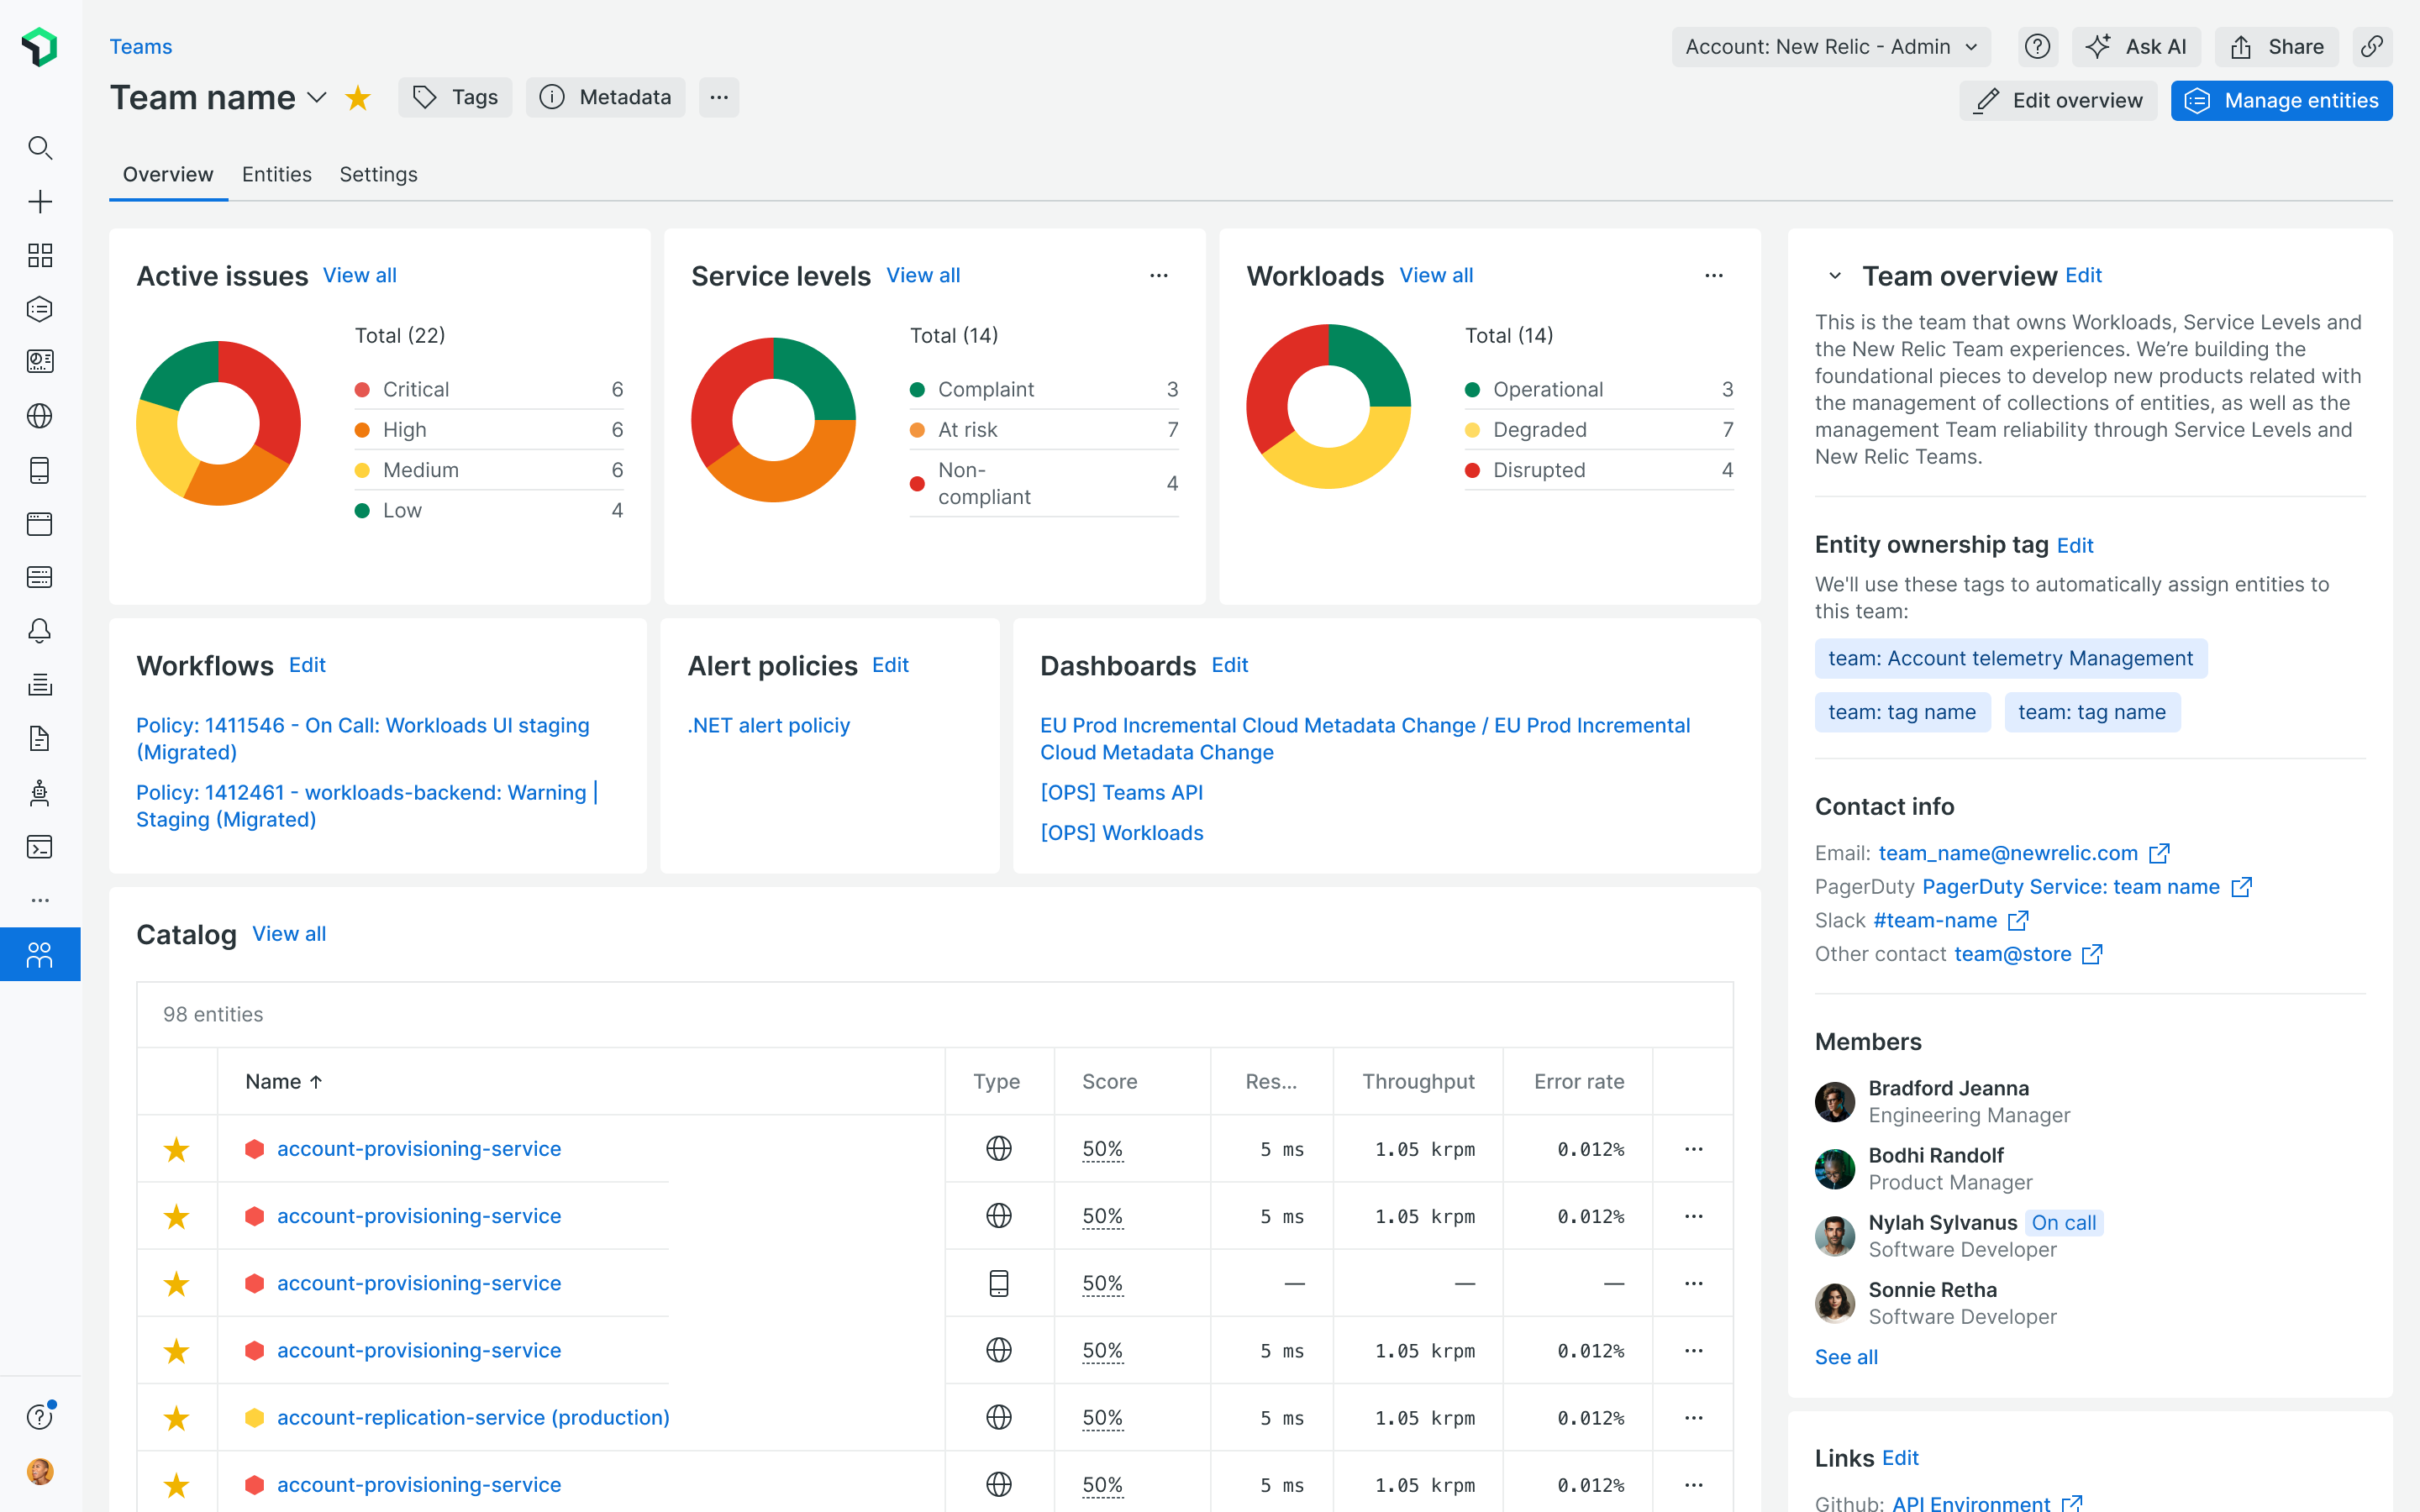
Screenshot showing the team hub page

In the Entities tab you will find all the entities your team owns and their health status.
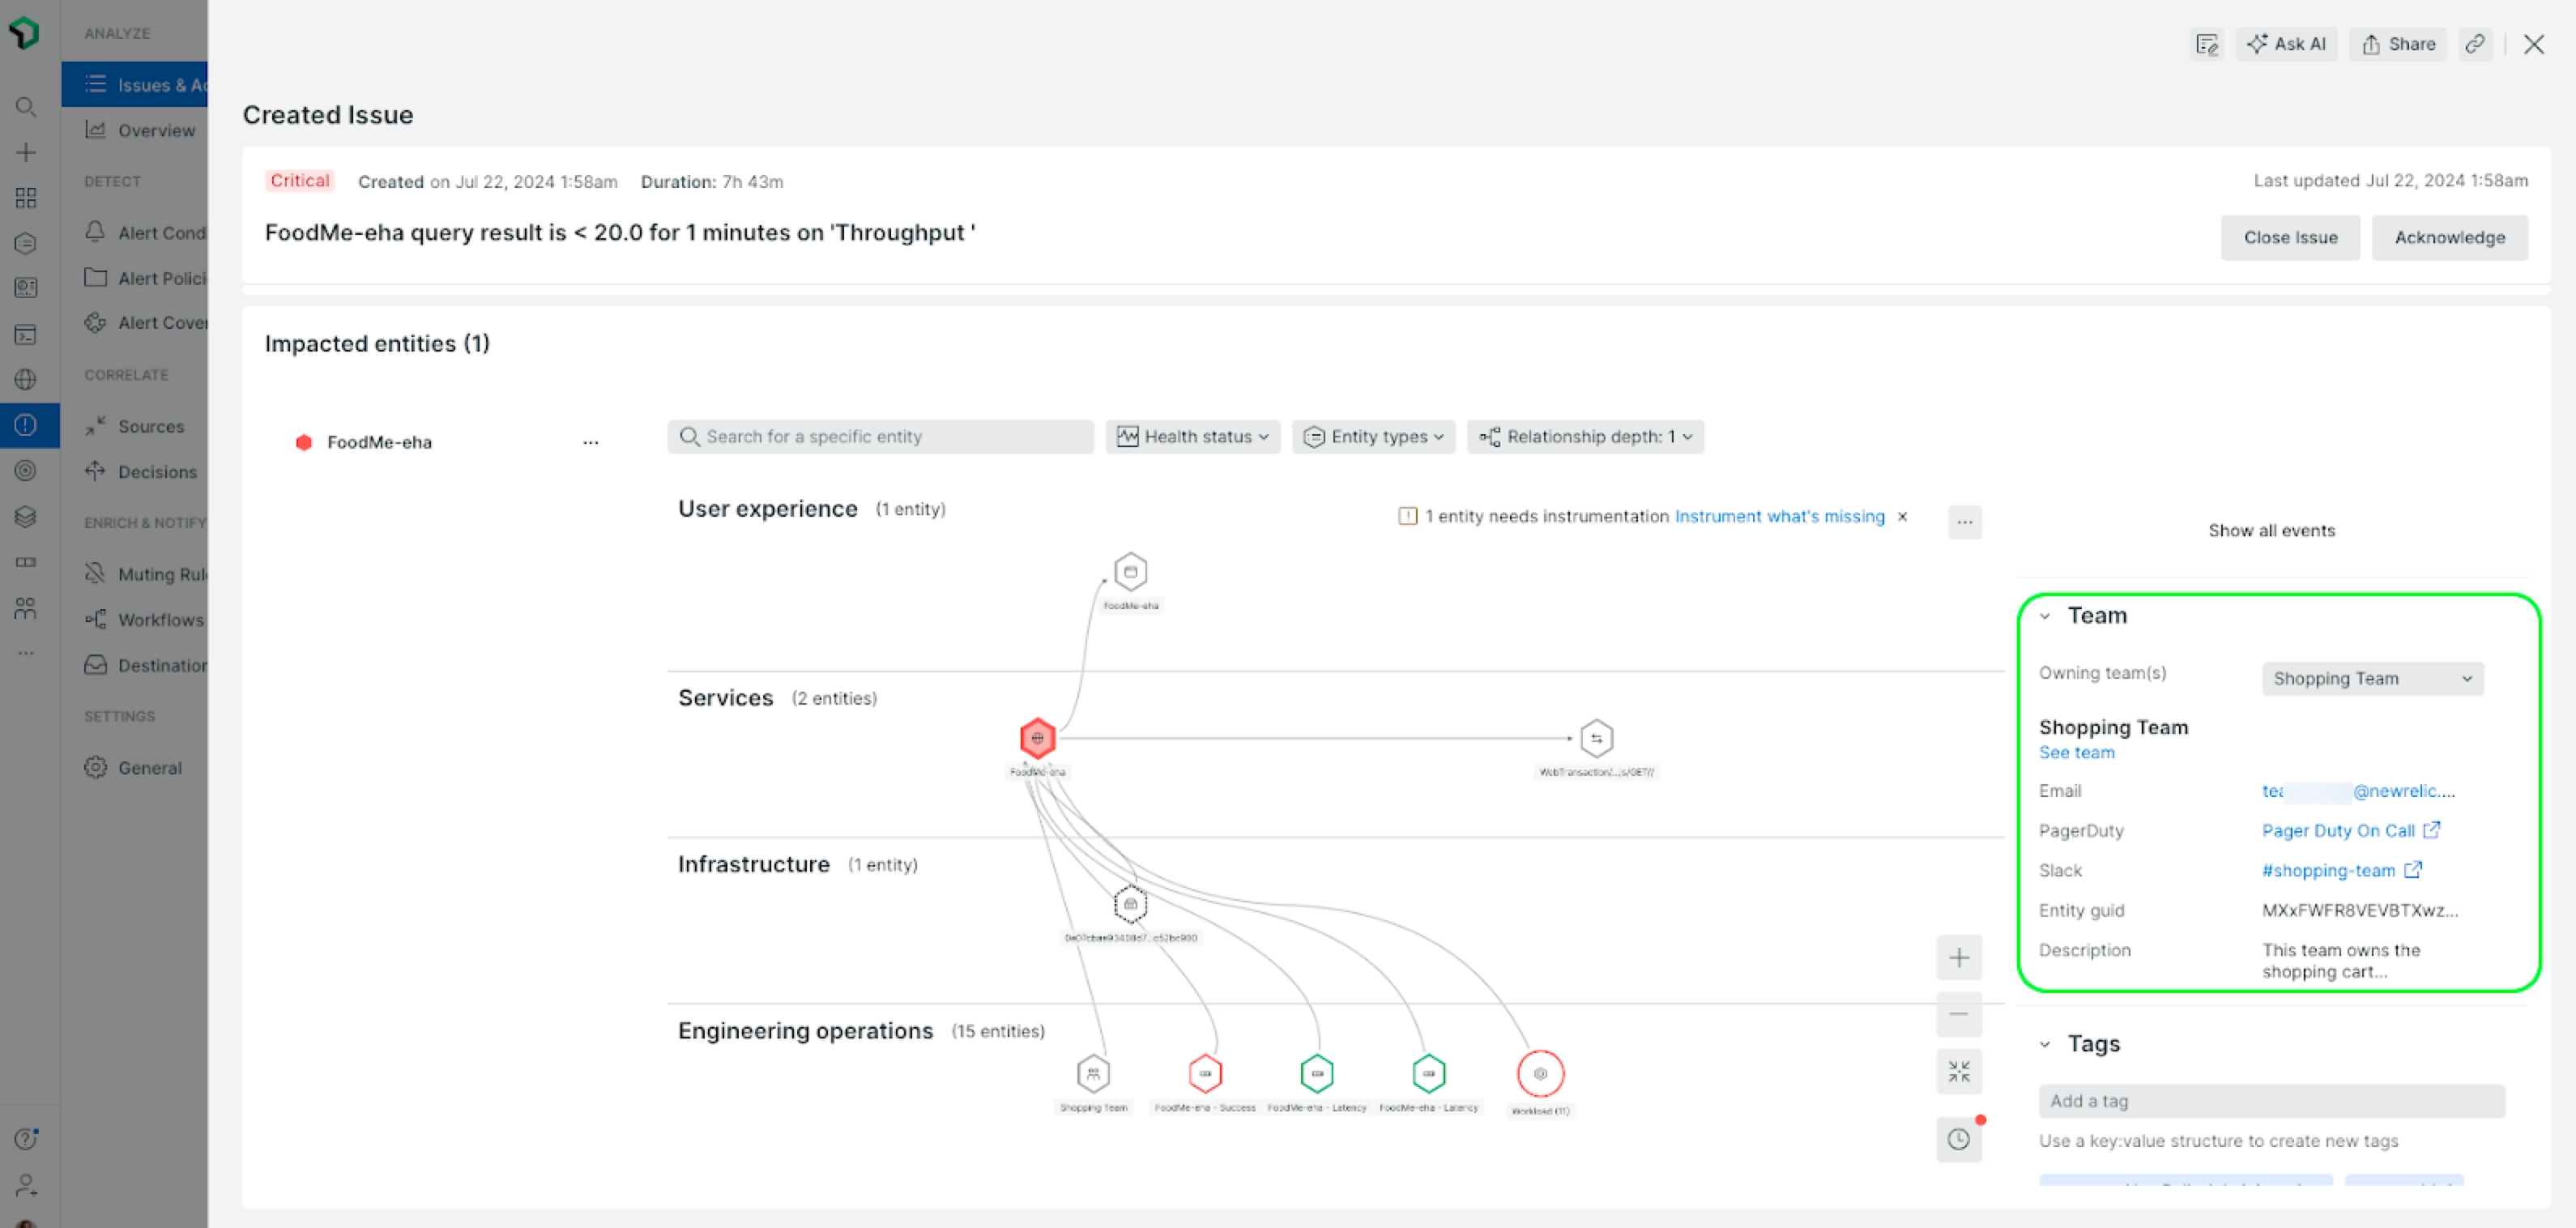
Who can access Teams?

To ensure that all users can always identify team ownership, Teams will be managed at the organizational level rather than at the account level.

  • Read Access: All users have read access to Teams, including metadata such as contact information, team members, and other relevant details.
  • Modify Teams: Users with the Organization Product Admin role can modify Teams. This is a new role assigned to all users who currently have the All Product Admin role.
  • Create & Delete Teams: Users with Administrative settings or Organization Manager or Authentication Manager roles can create and delete Teams.

Tip

To enable additional users to create and delete Teams without granting them the Organization Manager or Authentication Manager roles, you can create a custom role. Please ensure that the permissions are scoped to your org and not to an account.

Create Teams

Tip

If you prefer to create Teams programmatically, you can also create Teams with our NerdGraph API.

Create a Team manually

We recommend this option if you don't already have Team and service ownership data elsewhere.

  1. Go to All Capabilities > Teams.
  2. Click Build manually. Screenshot showing how to start the manual process
  3. Enter a team name.
  4. Add a description and an aliases for your team (optional).
  5. Add team members (optional).
  6. Click Create team.

Create Teams from user groups

We recommend this option if you want to keep your Teams synchronized with your existing New Relic user groups.

If your group names follow a recognizable pattern that distinguishes Teams, you can fully automate the synchronization. Otherwise, manually select the groups you want to create as teams.

Make sure you're assigned a user role that includes authentication_domain.read.groups permissions, and then complete these steps:

  1. Go to All Capabilities > Teams.
  2. Click Start with New Relic groups. Screenshot showing how to start with groups
  3. Select if you want to Automate with a rule or Select groups manuallyScreenshot showing options to start with groupsOption 1: Automate with a rule
  4. Add a rule to recognize the groups to create as teams, and click Create rule. Screenshot showing how to add a rule
  5. Click See teamsScreenshot showing how to add a rule From now on, the creation, updatation and deletion of Teams are in synchronization within your user groups.

Option 2: Manual group selection

  1. Select the user groups you want to create as Teams, and click Next. Screenshot showing how to select groups

    After you finish creating Teams, you're returned to the Overview page.

Screenshot showing the teams overview page

Assign Team ownership

There are two ways to assign team ownership to entities:

  • Automatically through tags
  • Manually through the New Relic UI

Tip

You can also use our NerdGraph API.

Ownership via tags

We recommend this option if you're already leveraging tags to define ownership. New Relic scans all of your entities looking for those tags and assign the entities to the right teams.

For example, if you're defining team ownership through a team in your agent's configuration, you can activate this option to have those entities assigned to the corresponding team. If we find a team:Frontend tag then any entities with that tag get assigned to your team named Frontend.

This functionality works across all of your accounts and data.

As you set up tags, you can also define team aliases so that we match multiple key values to the same team. For example, if the Frontend team has FE as an alias, then any entities tagged with team:FE are assigned to your team named Frontend.

Complete these steps:

  1. Go to All Capabilities > Teams > General.
  2. Select the option Tags for assigning entities to teams. Screenshot showing how to start using tags for ownership
  3. Select the tags you'd like to use.
  4. If you're using more than one team name or some other identifier for the same team, go to the Team hub to set up aliases. Screenshot showing where to set up aliases

In the Teams list, you can see the tags we're using to automatically set ownership for each of the existing Teams:

Screenshot of overview page after tag setup

Ownership via manual setup

You can assign ownership in the UI on the Team hub page or in the entity headers.

In Team hub page

Complete the following to assign ownership:

  1. Go to the Team's hub page and click Entity management: Screenshot showing the entity management page
  2. Select your entities. Screenshot showing entity selection
  3. Click Save.

In entity headers

You can also assign an owner to an entity in the entity summary page headers.

Screenshot showing how to assign in header

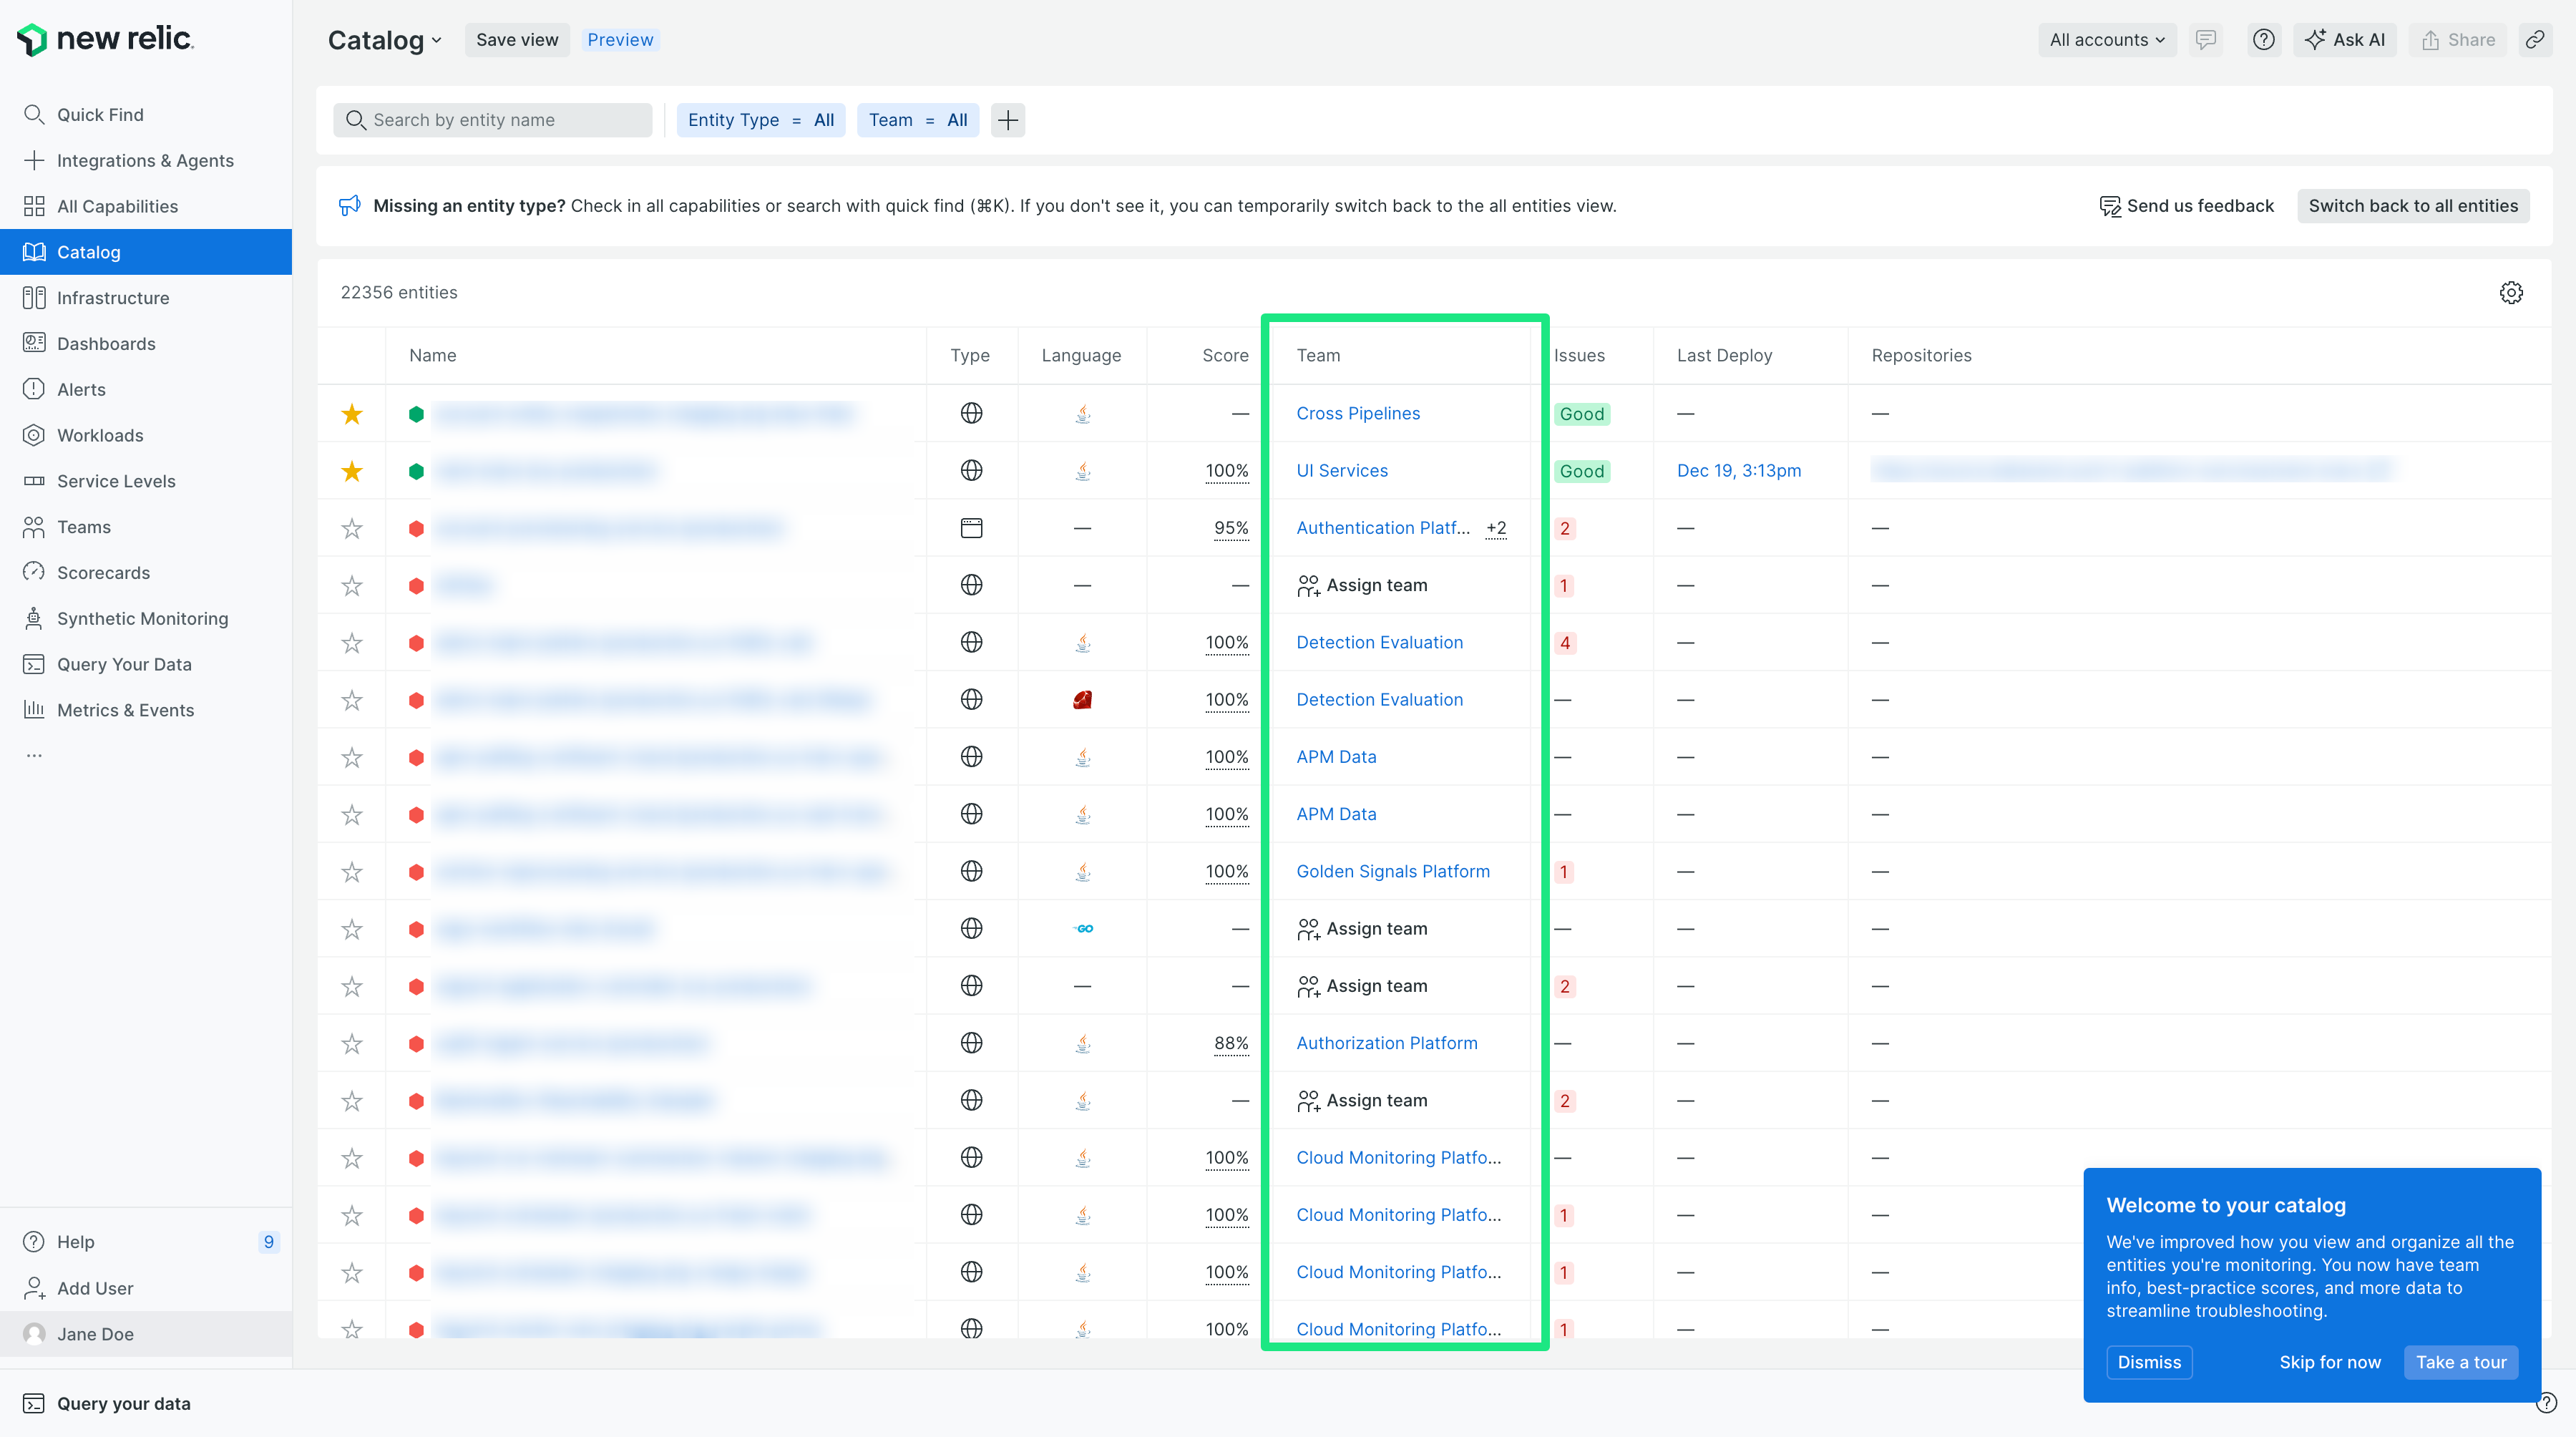
In Catalogs

You can also assign ownership to Catalog entries that are not yet assigned to a Team. Screenshot showing how to assign in catalogs

Add contact information and resources to your Team

To add contact information, dashboards and other team resources, go to All Capabilities > Teams > your team > Settings.

Screenshot showing where to add contact details

Customize the UI for your Team

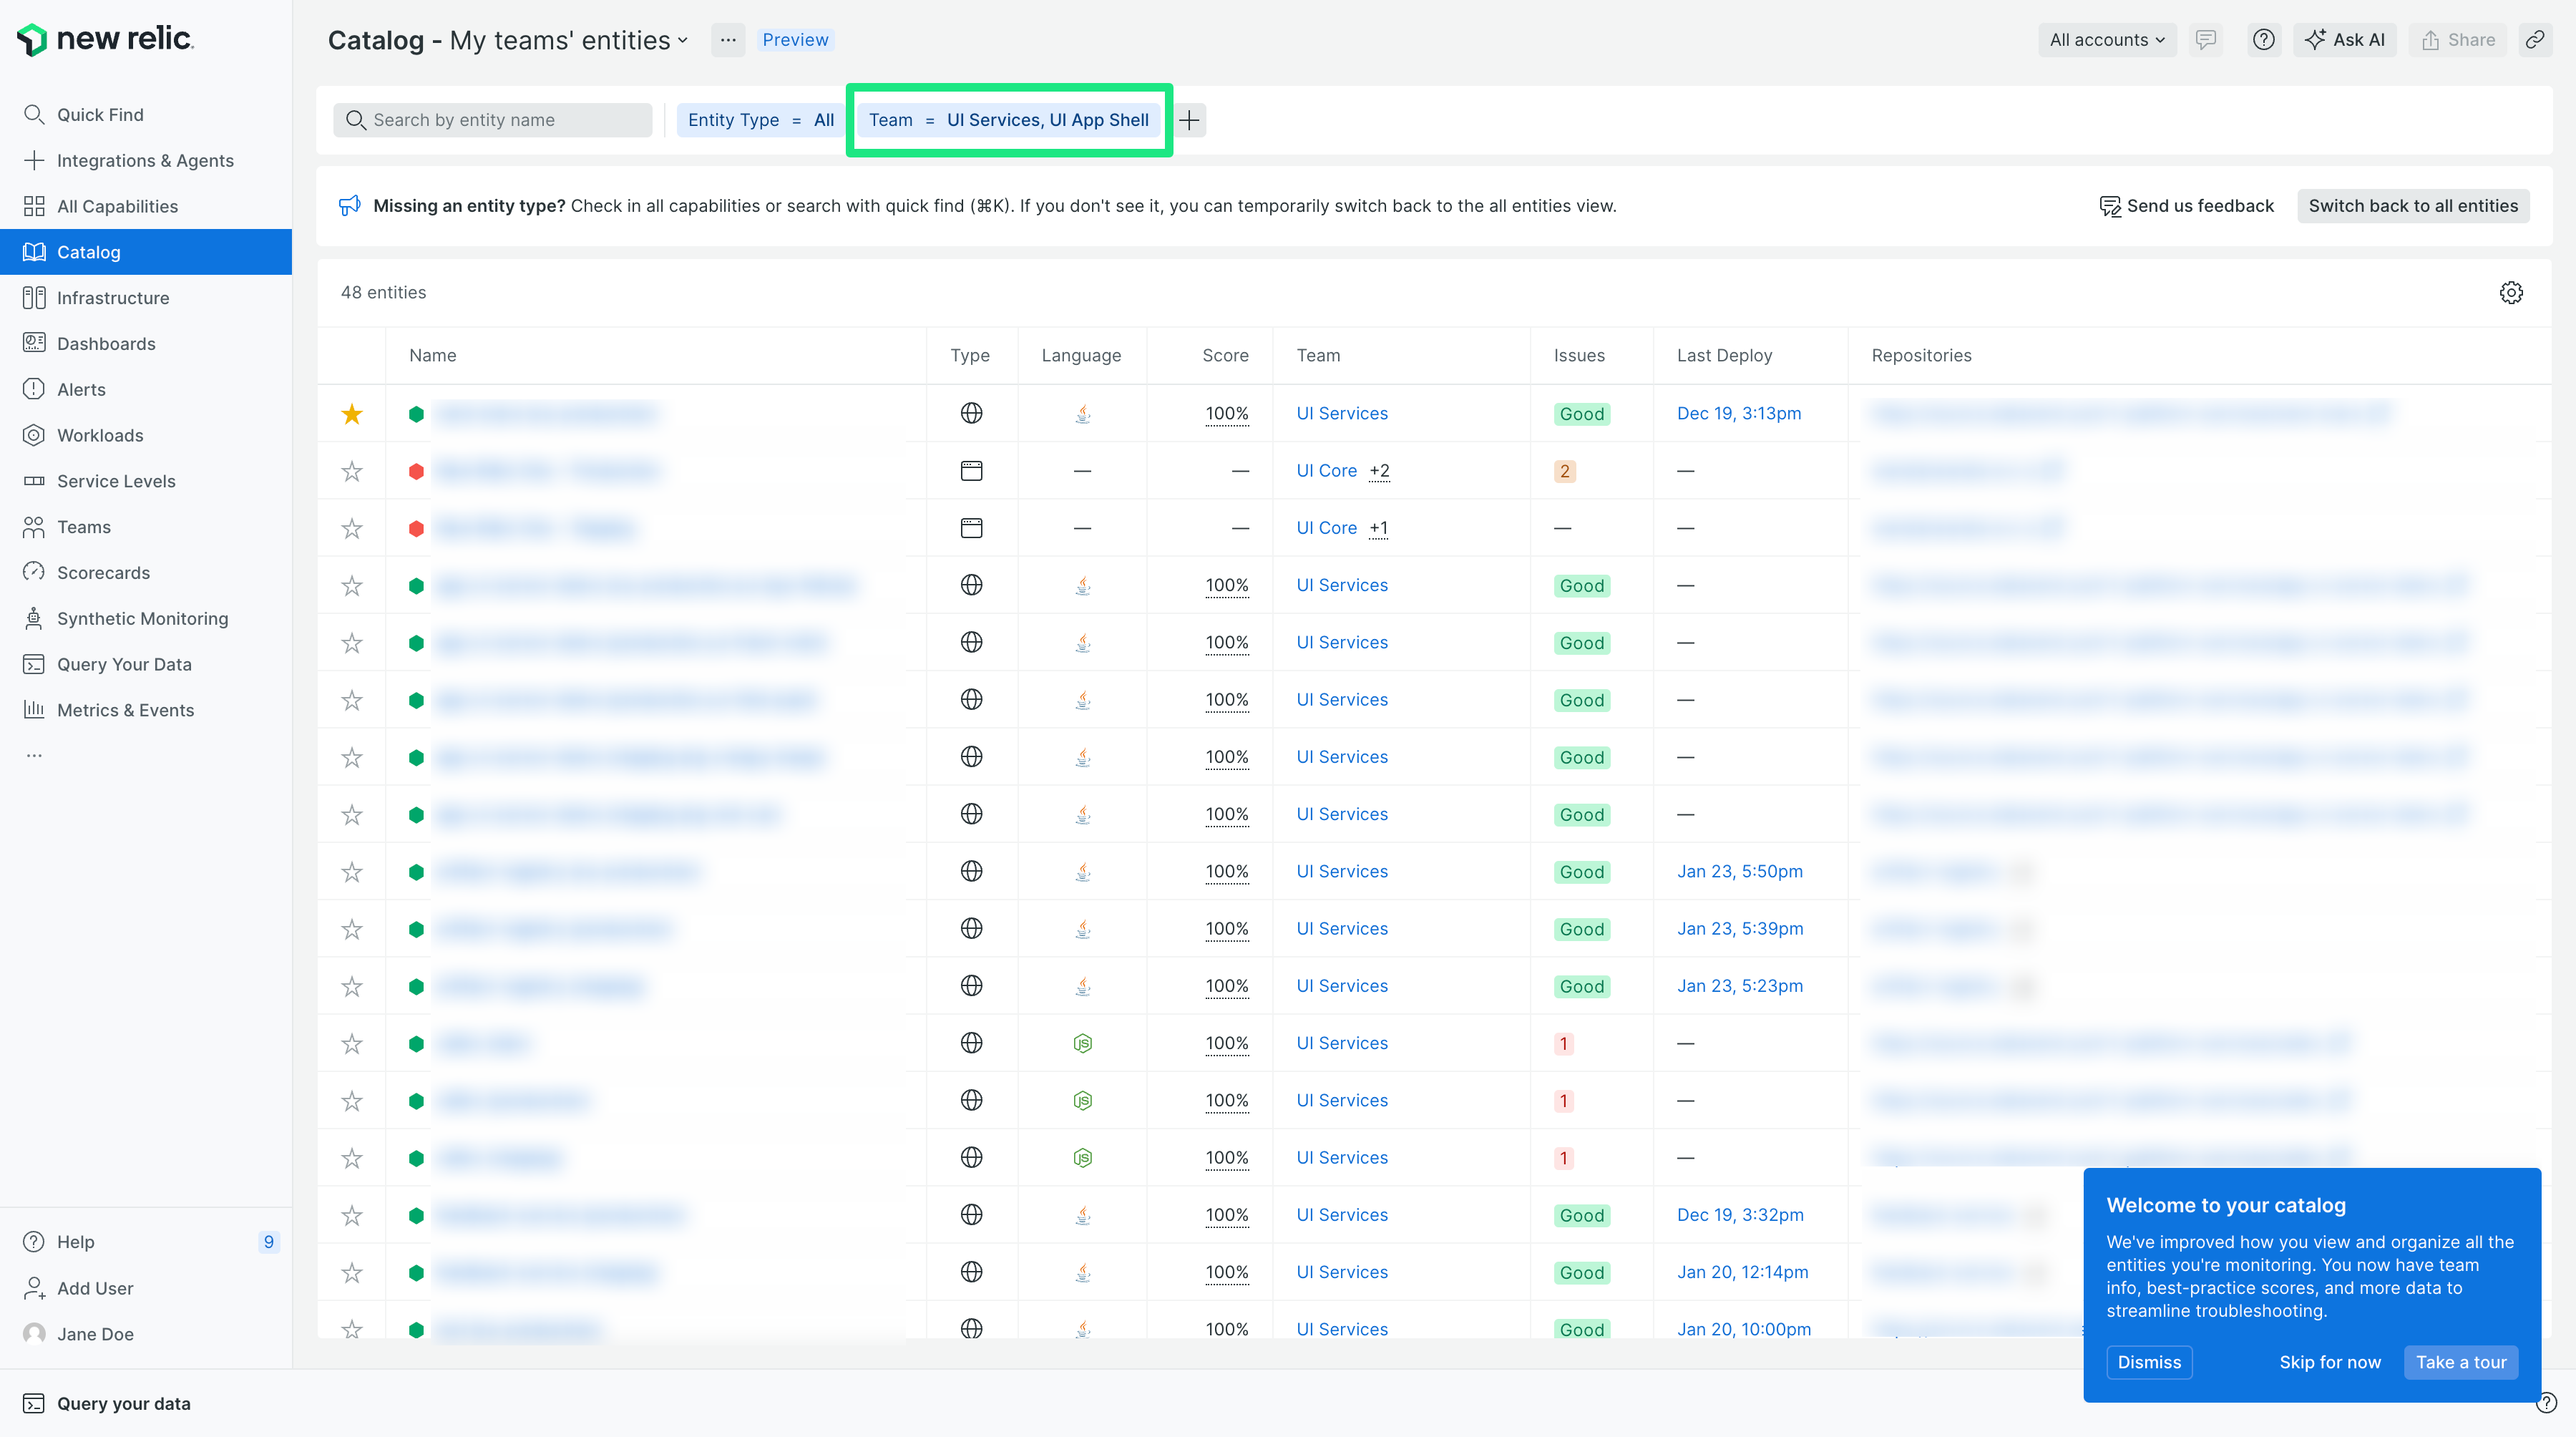
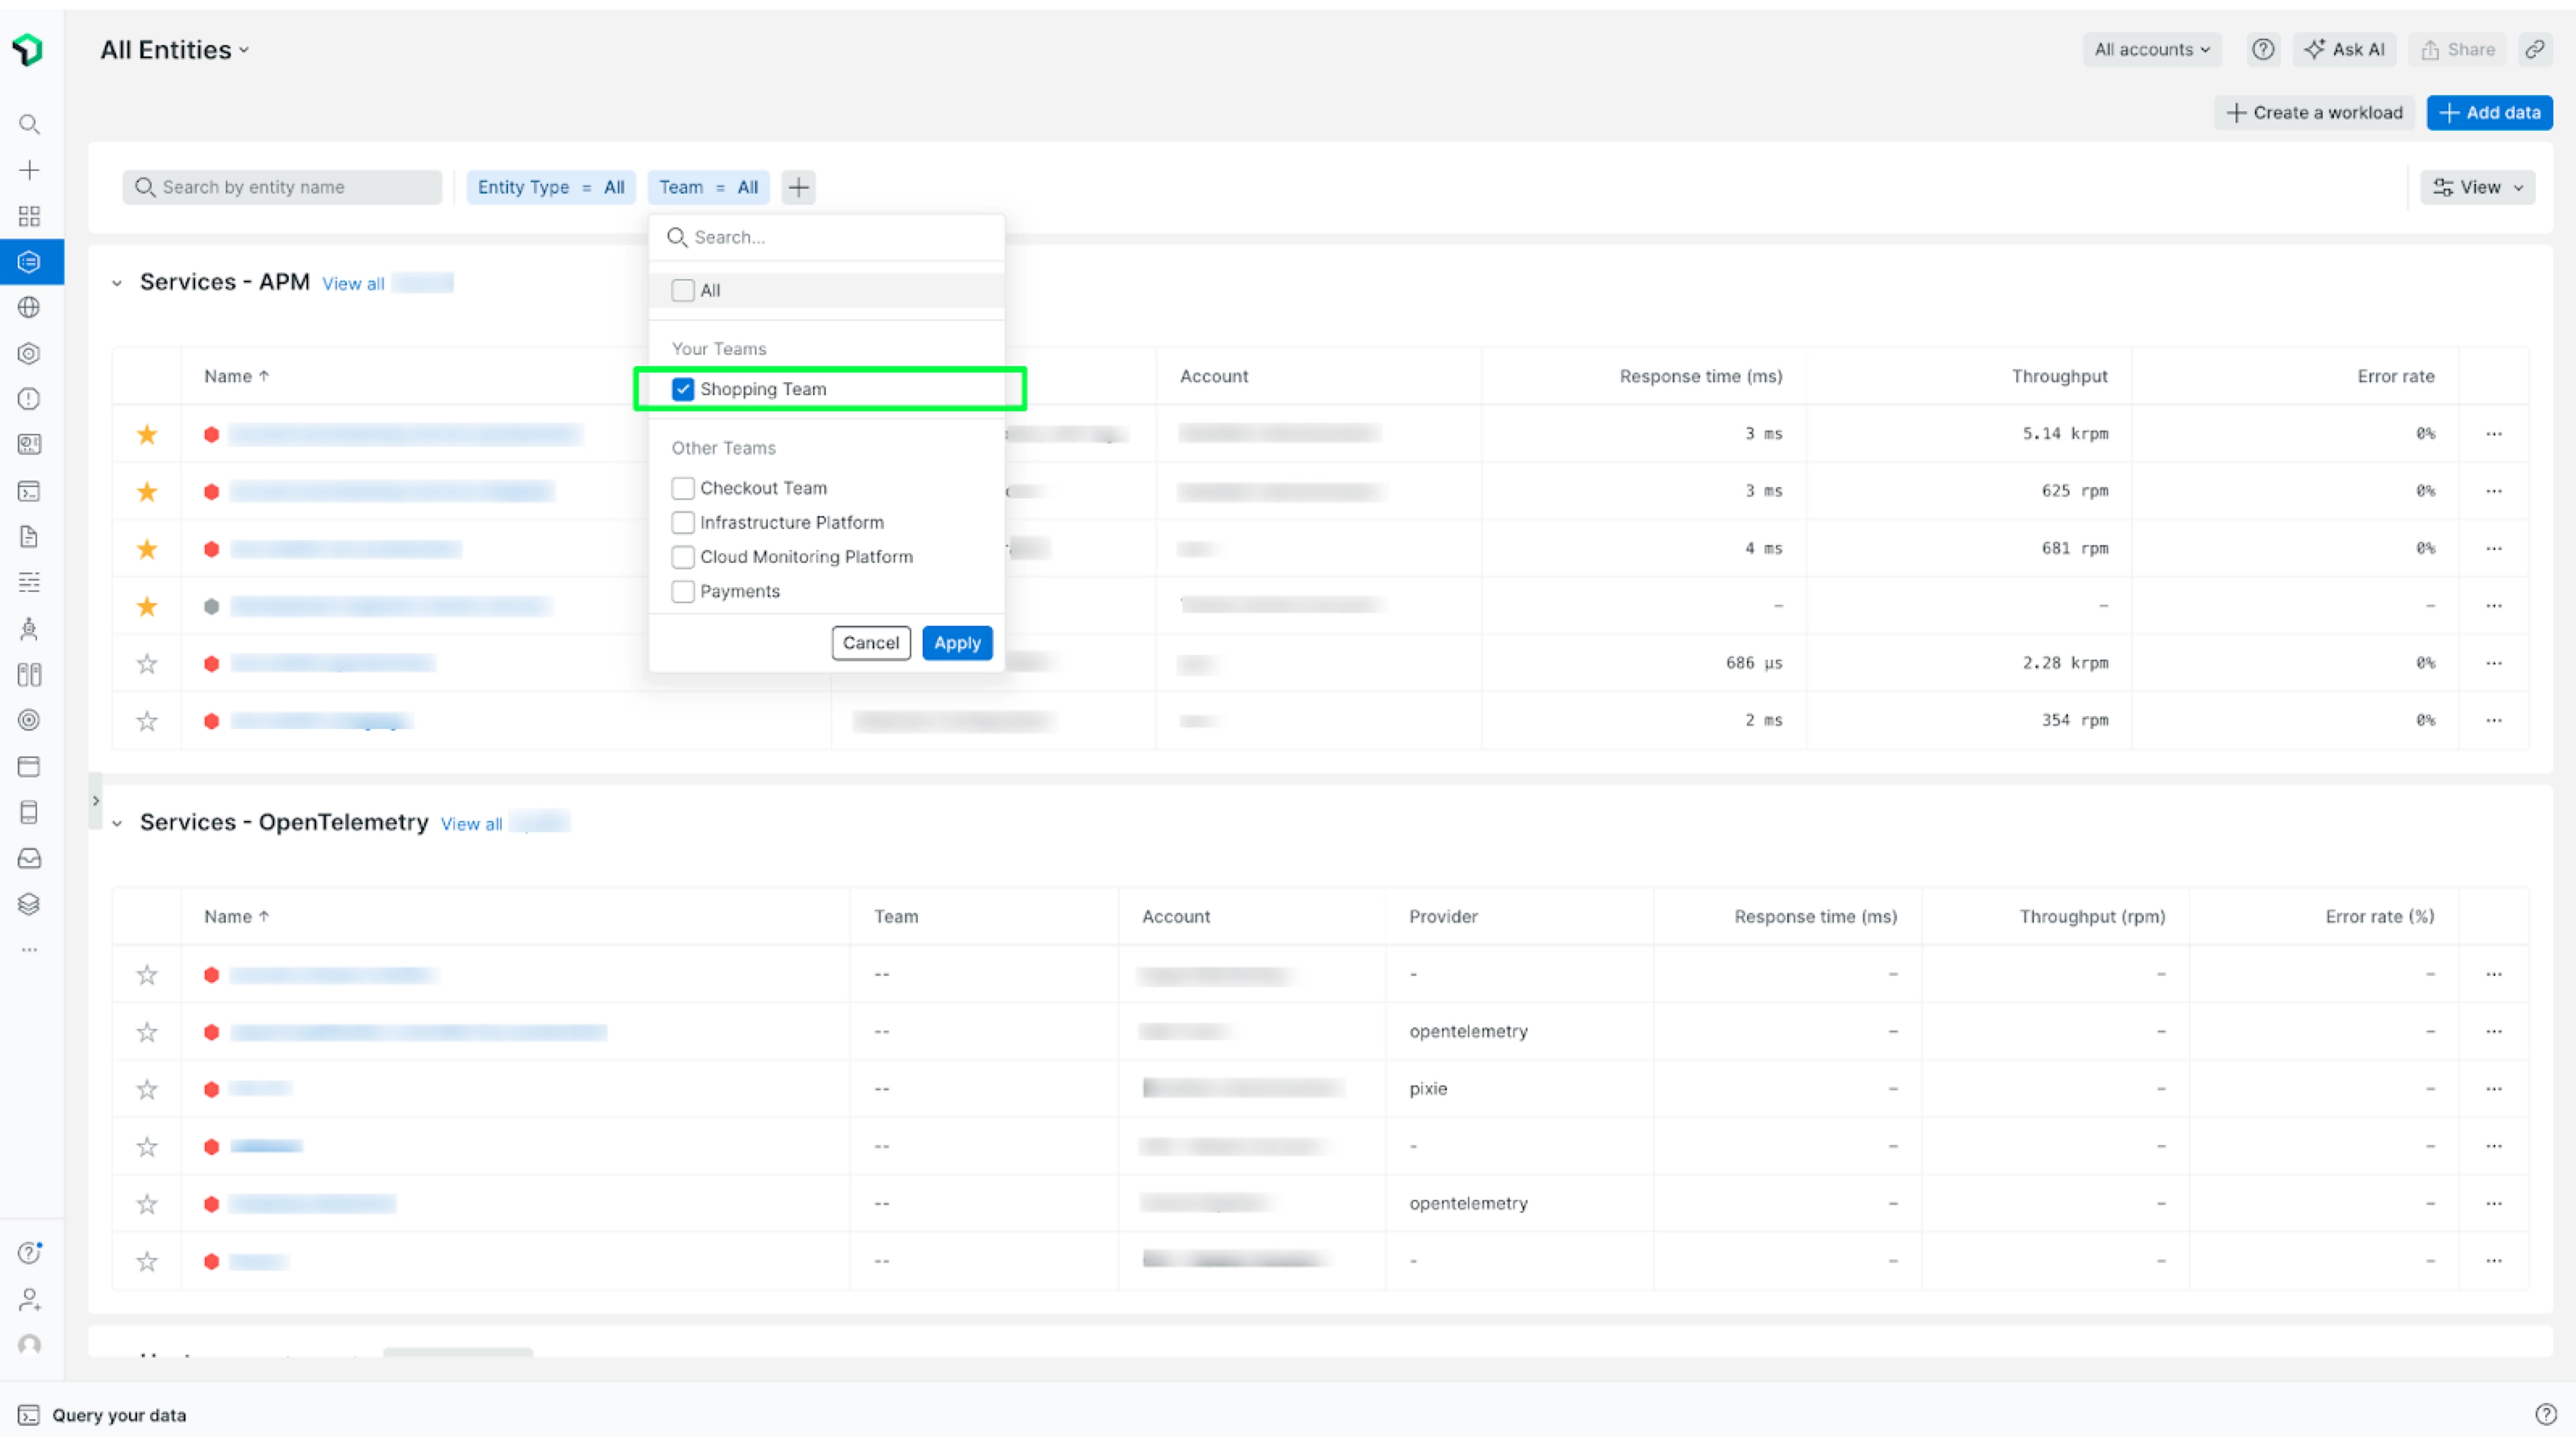
You can filter the All Entities view to show only the entities belonging to your Team.

  1. In the entity filter bar, select your Team from the dropdown. Your Teams appear at the top of the Team dropdown for easy access. Screen shot showing how to find your team in dropdown

  2. Save the new view by clicking Save view next to the capability name at the top left: Screenshot showing how to save the view

  3. When the new menu appears, enter a name for the view, select the permissions, and click Save to create the view: Screenshot showing where to name the view

    After you complete the process, the view is automatically applied: Screenshot showing that the new view is set as default

NerdGraph API

See how to complete the same teams tasks using GraphQL

Copyright © 2025 New Relic Inc.

This site is protected by reCAPTCHA and the Google Privacy Policy and Terms of Service apply.