Our New Relic Unity agent monitors your Unity mobile app and provides deep insights into your app's performance, errors, and user experience. Once you install and configure the Unity agent, you'll be able to:
- Capture C# and Native C++ errors: Identify and fix problems quickly.
- Track network requests: See how your app interacts with the backend.
- Use distributed tracing: Drill down into handled exceptions and find the root cause.
- Create custom events and metrics: Understand how your users interact with your app.

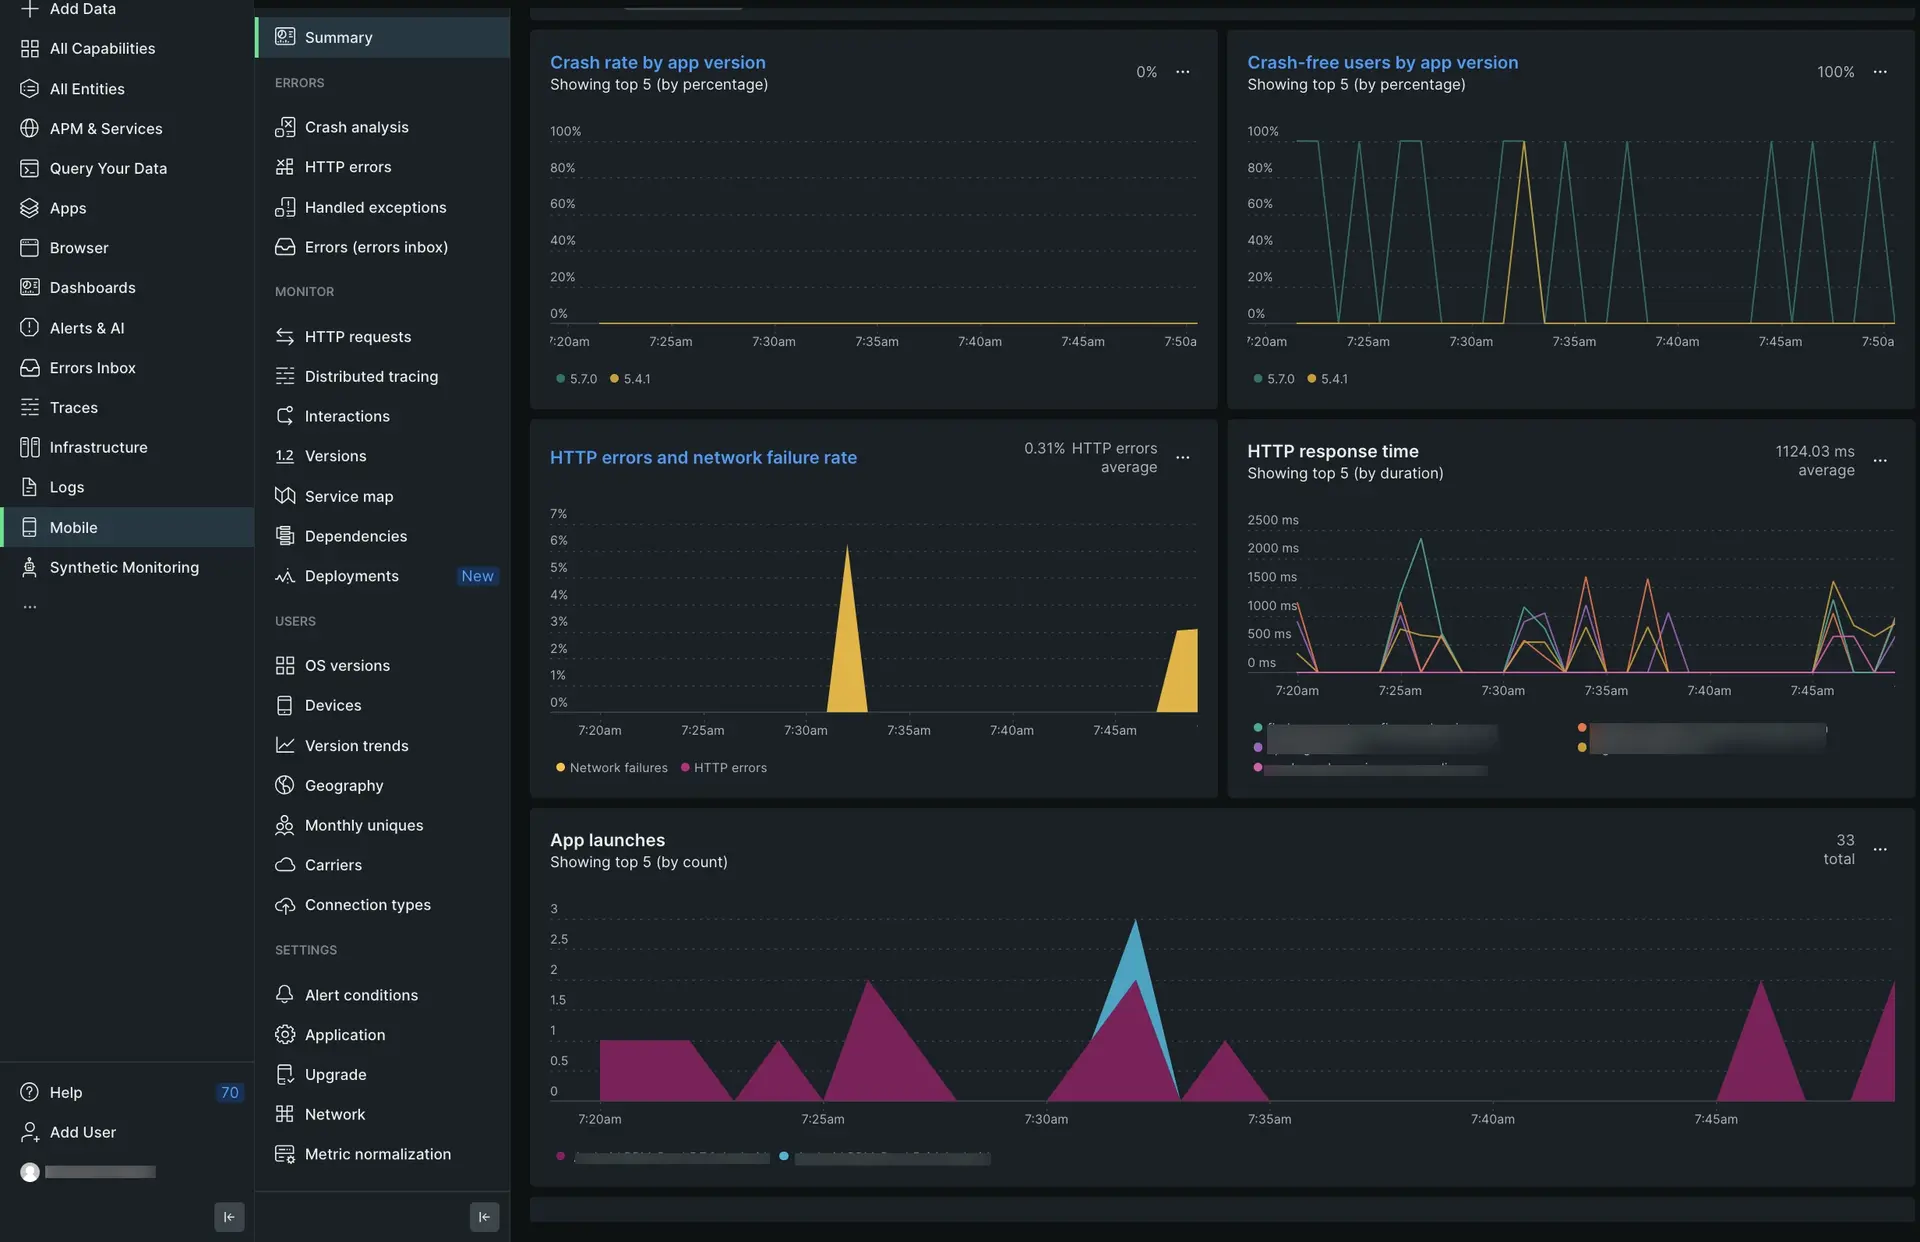
one.newrelic.com > All capabilities > Mobile > (select an app) > Summary: View Unity data, track HTTP requests and errors, and monitor how your app is performing over time.
(Recommended) Guided installation
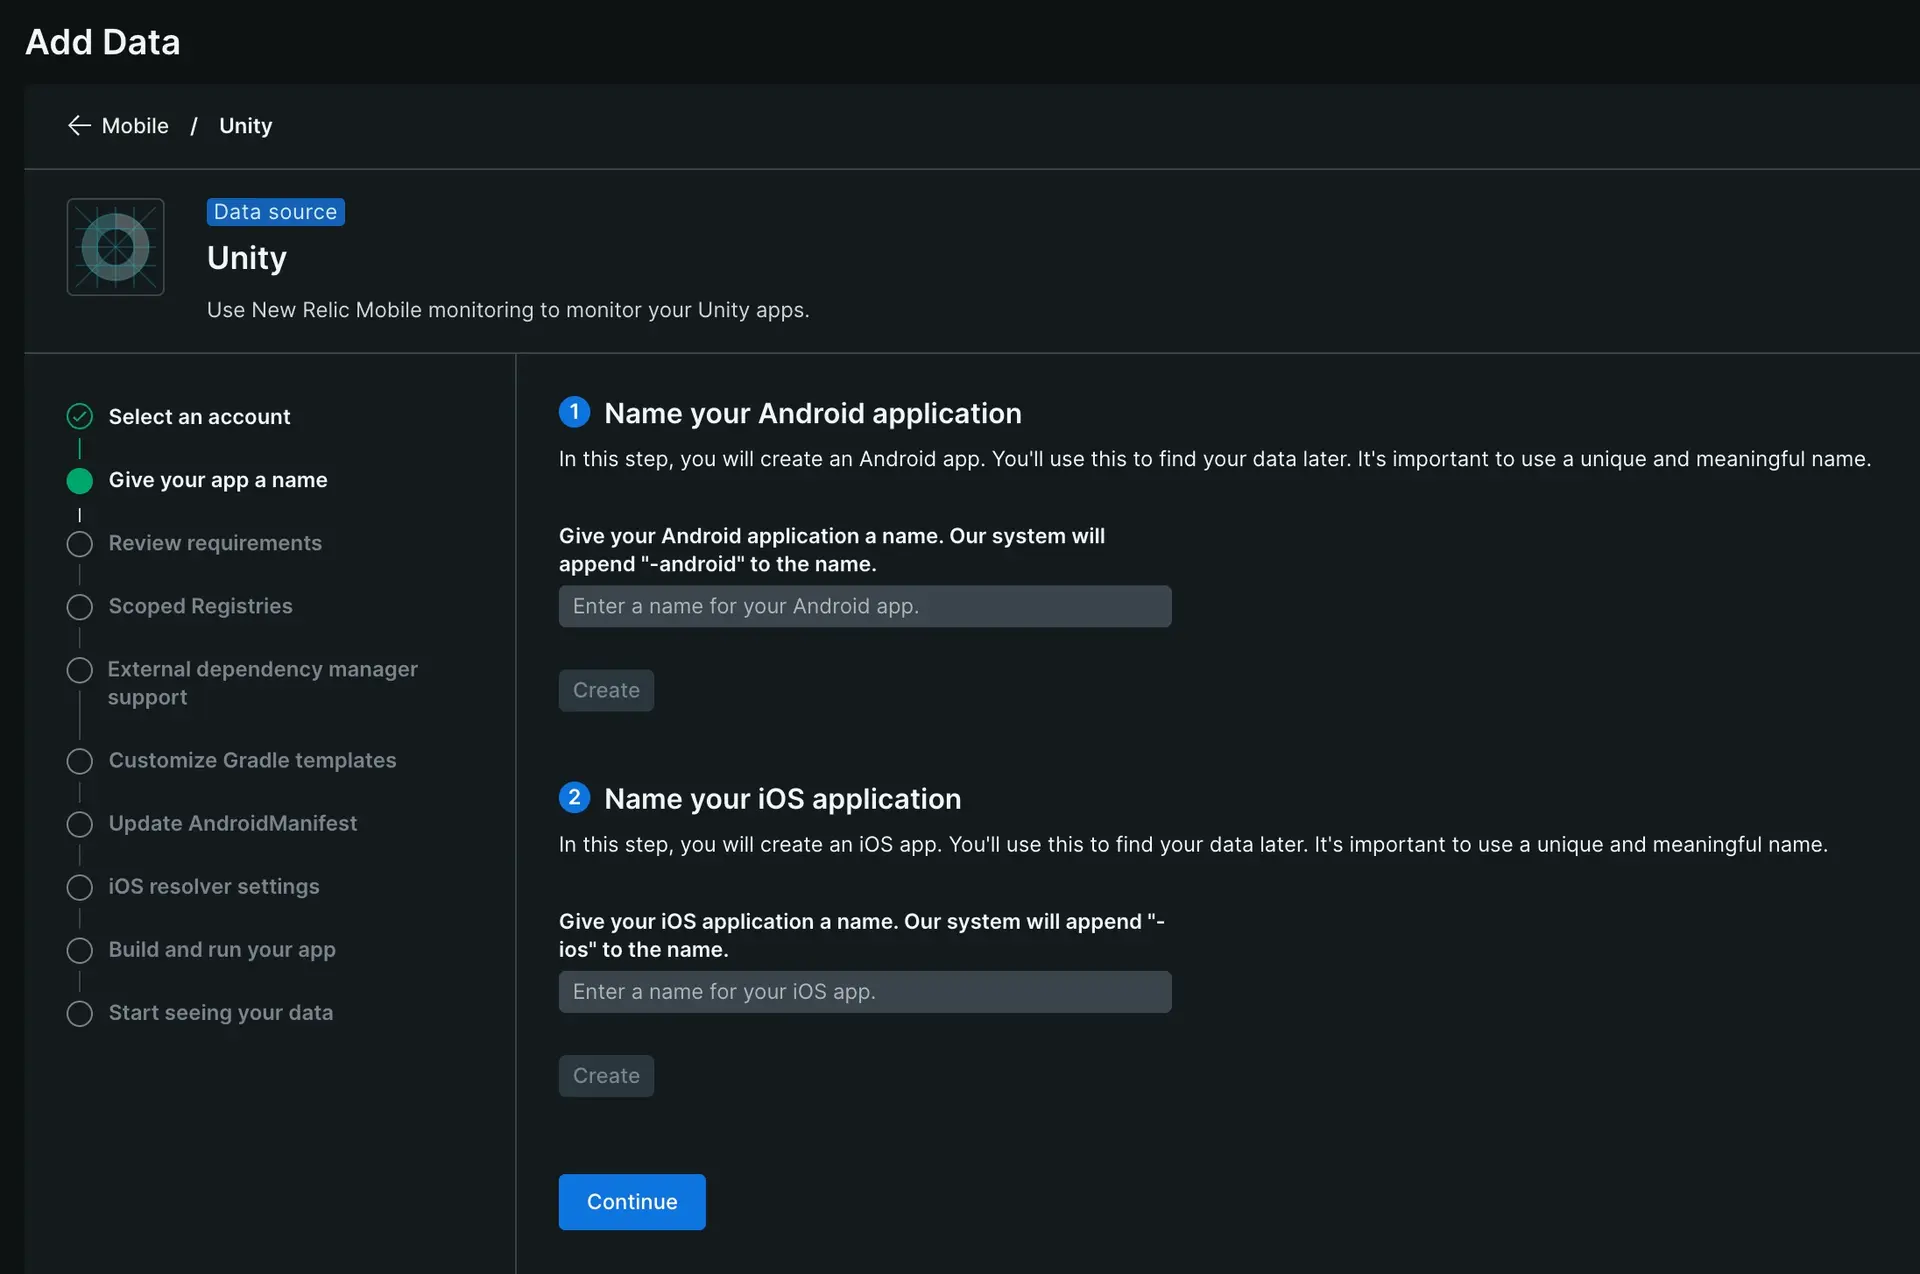
To install the Unity agent, follow our guided install, located directly in the UI.

Manual installation
If you need to install the agent manually, follow these steps:
Review the requirements
Before you install the Unity agent, make sure your Unity app meets these version requirements:
- For Android-native apps:
- Android API 24 or higher
- See Android-native requirements
- For iOS-native apps:
Add the Unity agent to your project
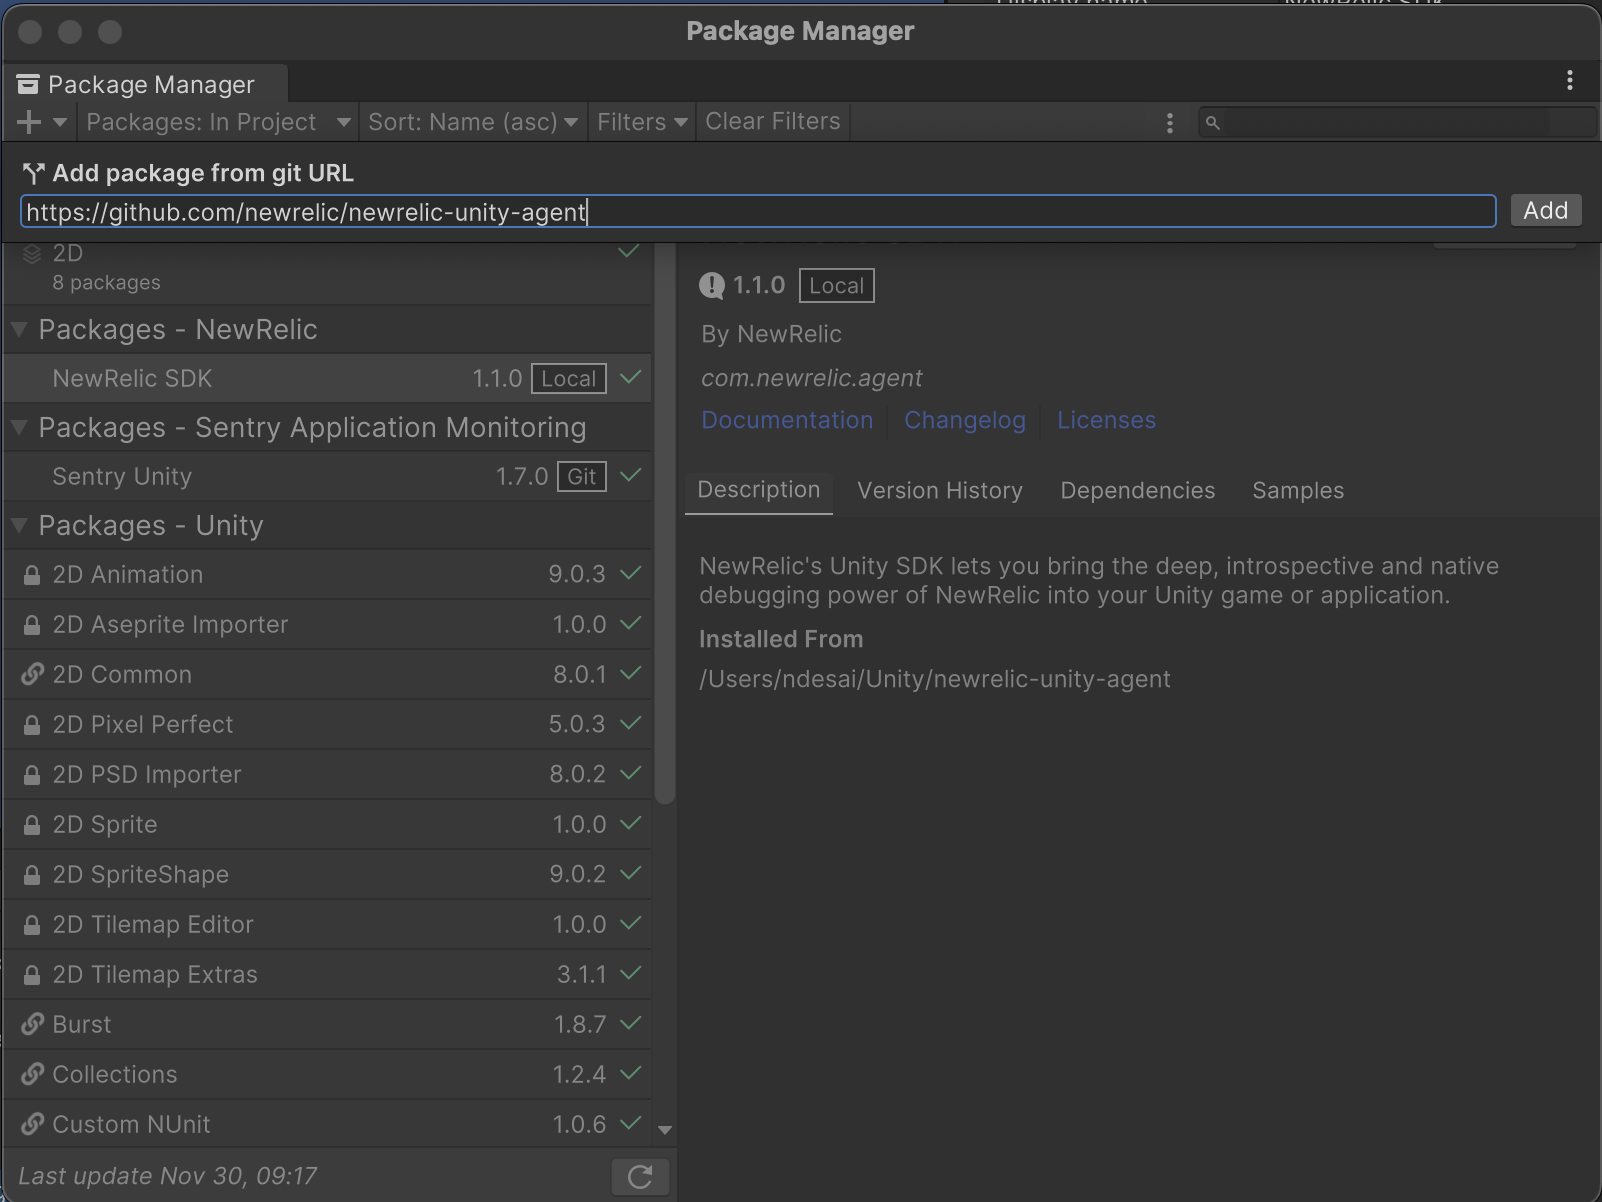
In the Unity package manager, add the following GitHub URL:
https://github.com/newrelic/newrelic-unity-agent.git
Add application token(s)
To enable New Relic to authenticate your Unity app's data, follow these steps:
Get your application token from New Relic:
- Go to one.newrelic.com, click Integrations & Agents, then click Mobile.
- Select your Unity app.
- Go to Settings > Application and copy the displayed Application token.
Add the token to your Unity project:
Open your Unity IDE.
Go to Tools > New Relic > Getting Started to open the editor window.
Paste the appropriate application token into the corresponding field for each platform your app supports:
- Android: Paste the Android token into the "Android App Token" field.
- iOS: Paste the iOS token into the "iOS App Token" field.
If your app runs on both Android and iOS, provide separate tokens for each platform. Do not use the same token for both.

(Android-only) Configure your Android app
To configure your Android app you need to customize your Gradle templates. If you're using Unity 2019 or later, follow the steps below.
In your Gradle build settings, you'll need to include the New Relic Maven repository URL. To do this, open your
mainTemplate.gradlefile, which is usually located in theAssets/Plugins/Androidfolder. Add the following snippet:allprojects {buildscript {repositories {ARTIFACTORY_REPOSITORYgoogle()jcenter()mavenCentral()}}}In your
baseProjectTemplate.gradlefile (usually located in your Unit project's Android folder), add the New Relicclasspathat the project level:dependencies {// If you are changing the Android Gradle Plugin version,// make sure it is compatible with the Gradle version preinstalled with Unity.// See which Gradle version is preinstalled with Unity here:// https://docs.unity3d.com/Manual/android-gradle-overview.html// See the official Gradle and Android Gradle Plugin compatibility table here:// https://developer.android.com/studio/releases/gradle-plugin#updating-gradle// To specify a custom Gradle version in Unity, go to "Preferences > External Tools",// uncheck "Gradle Installed with Unity (recommended)",// and specify a path to a custom Gradle version.classpath 'com.newrelic.agent.android:agent-gradle-plugin:7.2.0'BUILD_SCRIPT_DEPS}If you're using an older Unity version that requires Gradle 7.0 or lower, you'll need to use a specific classpath dependency to ensure compatibility:
dependencies {// If you are changing the Android Gradle Plugin version,// make sure it is compatible with the Gradle version preinstalled with Unity.// See which Gradle version is preinstalled with Unity here:// https://docs.unity3d.com/Manual/android-gradle-overview.html// See official Gradle and Android Gradle Plugin compatibility table here:// https://developer.android.com/studio/releases/gradle-plugin#updating-gradle// To specify a custom Gradle version in Unity, go to "Preferences > External Tools",// uncheck "Gradle Installed with Unity (recommended)",// and specify a path to a custom Gradle version.classpath 'com.newrelic.agent.android:agent-gradle-plugin:6.11.0'BUILD_SCRIPT_DEPS}If your project is using plugin DSL, make the following changes (and skip step 3):
In android/app/build.gradle:
plugins {id "com.android.application"id "kotlin-android"id "com.newrelic.agent.android" version "7.5.1" //<-- include this}In your
launcherTemplate.gradlefile (usually located in your Unity project's Android folder), apply thenewrelicplugin to the top of yourlauncherTemplate.gradlefile:apply plugin: "com.android.application"apply plugin: 'newrelic' // <-- add thisIn your
AndroidManifest.xmlfile, add the following permissions:<uses-permission android:name="android.permission.INTERNET" /><uses-permission android:name="android.permission.ACCESS_NETWORK_STATE" />
(iOS-only) Manage dependencies
For iOS, check your External Dependency Manager settings:
In your Unity IDE, go to Assets and open the External Dependency Manager.
Click iOS Resolver.
In the Podfile Configurations section, verify these settings:
- Add use_frameworks! to Podfile is disabled
- Always add the main target to Podfile is enabled

If you're not using the Podfile for iOS dependency management, follow these steps:
- Download and unzip the New Relic XCFramework SDK (iOS agent). You can get the latest iOS agent from our iOS agent release notes.
- Add the New Relic XCFramework to your Xcode project:
- Unzip the SDK download.
- From your Finder, drag the
NewRelicAgent.xcframeworkfolder into your Xcode project, placing it onto your Targets Frameworks pane. - Under the Embed column, click Embed & Sign.
And you're done! You should start seeing data in New Relic within 5 minutes.
Customize the agent instrumentation
Need to customize your agent instrumentation? Our public mobile SDK API methods let you collect custom data, configure default settings, and more.
The following customizations are available for the Unity agent.
If you want to... | Use this method |
|---|---|
Record breadcrumbs to track app activity that may be helpful for troubleshooting crashes. | |
Track a method as an interaction. | |
Record custom metrics. | |
Record an exception. | |
Record custom attributes and events. | There are several ways to report custom attributes and events:
|
Track custom network requests and failures. | |
Shut down the agent. | |
Run a test crash report. |
Monitor C# errors
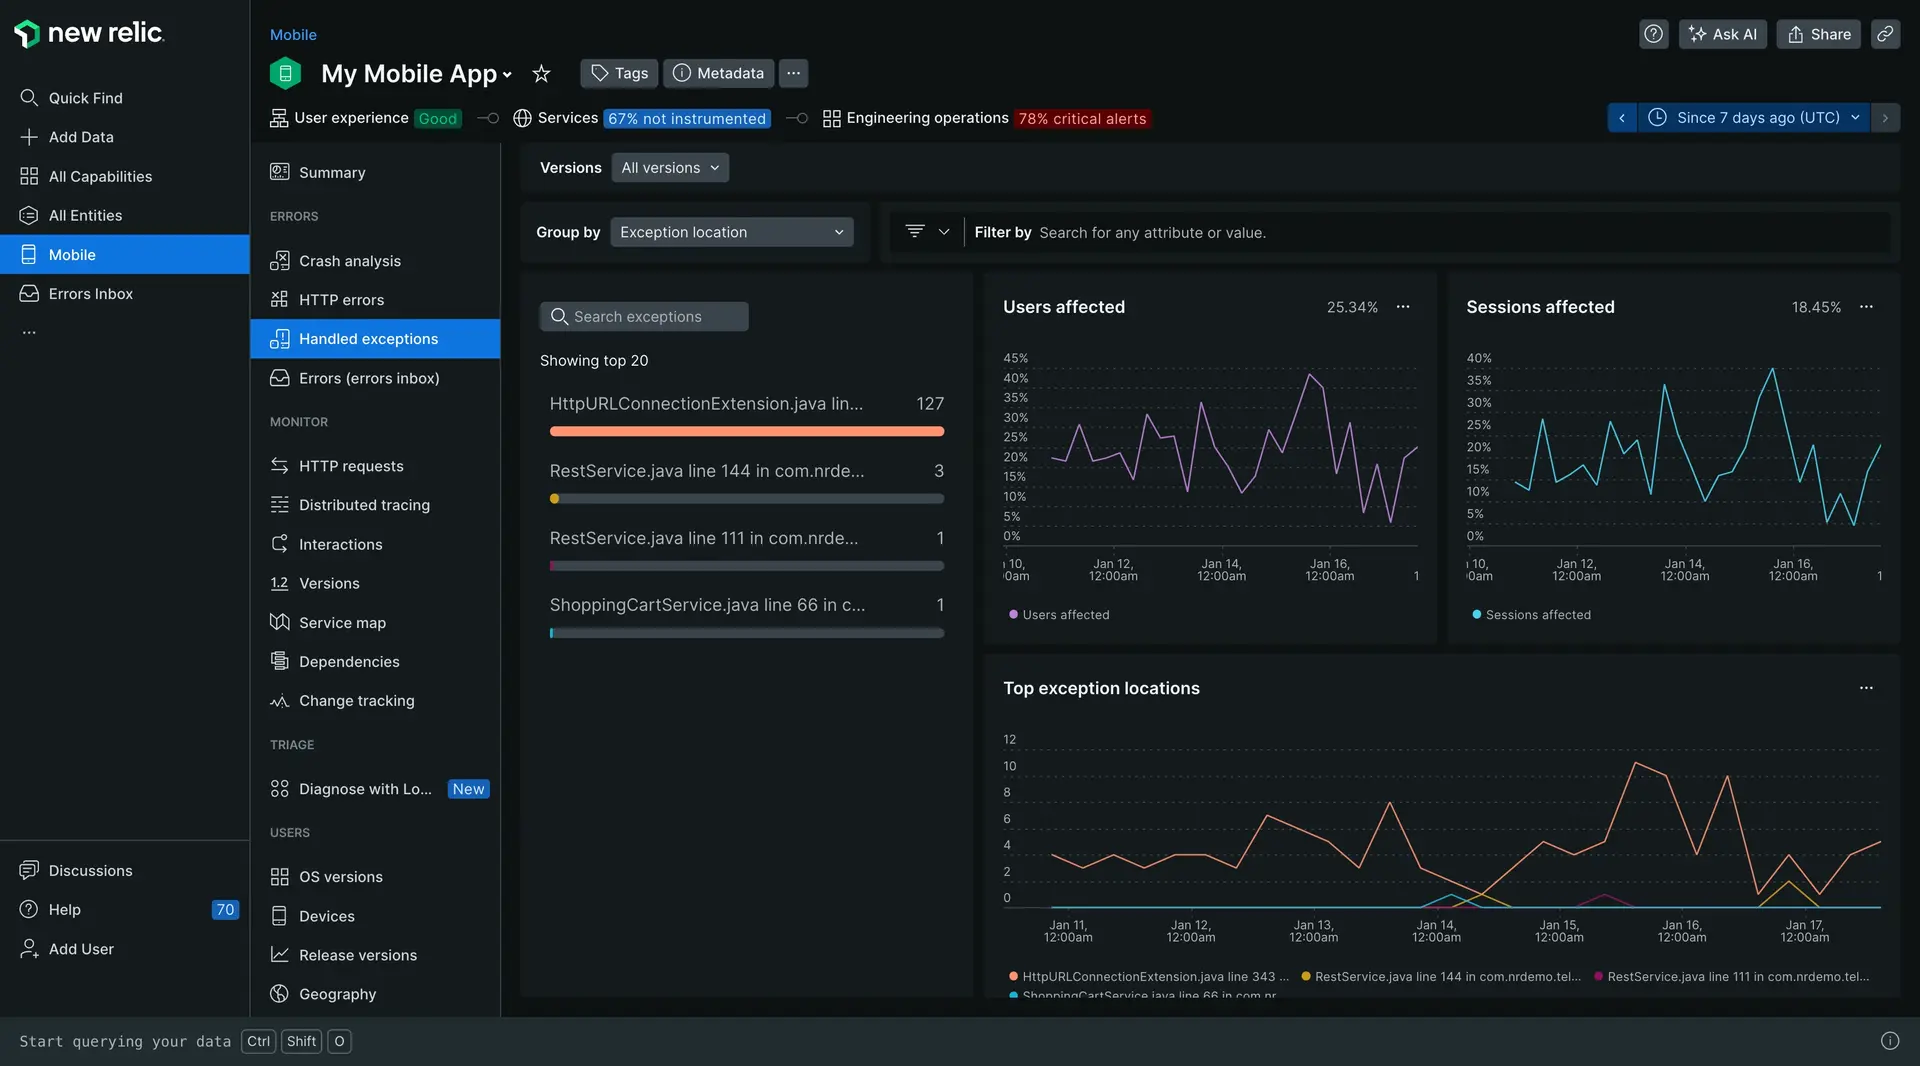
In the New Relic UI, you can view your fatal and non-fatal C# errors and handled exceptions, including details like event trails, attributes, and stack traces for each recorded error.

To view your errors:
- Go to one.newrelic.com > All capabilities > Mobile.
- Select your Unity app.
- Click Exceptions > Handled exceptions.
You can also build a dashboard for these errors using this query:
SELECT * FROM MobileHandledException SINCE 24 hours agoQuery log data
New Relic stores your Unity logs as custom events. You can query these logs and build dashboards for them using this NRQL query:
SELECT * FROM `Mobile Unity Logs` SINCE 30 MINUTES AGOFor more information on NRQL queries, see Introduction to NRQL.