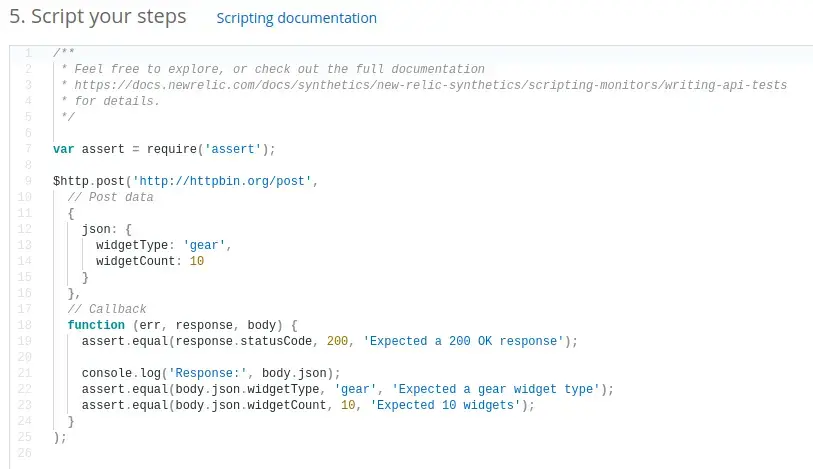
スクリプト化されたAPIモニターは、APIエンドポイントが正しく機能していることを確認します。スクリプト化されたAPIモニターを作成するには、 one.newrelic.com > Synthetic monitoring > Create a monitorに移動し、 Endpoint availabilityタイルを選択します。
ヒント
その他のAPIテスト例を表示して共有するには、サポートフォーラムの合成スクリプトセクションまたは合成モニタリングのクイックスタートライブラリを参照してください。
API gotモジュールを使用
APIテストは、$httpオブジェクトで使用できるgotモジュールによって作動します。$httpオブジェクトは、gotでrequestに似たカスタムエクスペリエンスを提供し、基本的なユースケースでモニターに下位互換性を提供します。$httpオブジェクトが提供するrequestのような体験は、Node.js 16以降のスクリプト化されたAPIランタイムで、requestを直接使用しようとする顧客にも返されます。
$httpオブジェクトを使用している限り、結果のタイミングの詳細が表示されます。$httpオブジェクトに含まれていないスクリプト化されたAPIユースケースでは、$harオブジェクトを使用してカスタムタイミングの詳細をレポートできます。
重要
最大で3分間のランタイム後、New Relicはスクリプトを手動で停止します。

one.newrelic.com > Synthetic monitoring > Create monitor:スクリプトエディターは、スクリプトコマンド(GitHubで使用可能)を単純化するために、関数、セレクター、その他の要素を提案します。
リクエストオプションを設定する
スクリプトを開始する場合は、以下の手順に従います。
- 変数(
optionsなど)を宣言して、gotオプションオブジェクトを保存します。 - URLエンドポイントやカスタムヘッダーなどのリクエストオプションを定義します。
ヒント
サポートされているオプションの完全なリストについては、GitHubのgotドキュメントにあるgotオプションを参照してください。
オプションオブジェクト内のオプションメタデータの例:
GETリクエストを送信する
GETリクエストをするには、$http.getメソッドを使用してリクエストを送信します。リクエストオプションを定義し、$http.getを使用してリクエストを行ってから、レスポンスを検証してエンドポイントが正しい結果を返していることを確認します。
次の例では、以下に方法を説明します。
- GETリクエストの再試行とタイムアウトを処理する
- json応答本文を解析する
- アプリケーションの稼働ステータスをアサートする
- 結果をカスタムアトリビュートに保存する
/** * Script Name: Advanced Example - Node 16.10.0 * Author:      New Relic * Version:     1.0 */
const assert = require("assert")
// Get secure credentialsconst applicationId = $secure.APP_IDconst apiKey = $secure.API_KEY
// The URL for the API endpoint to get information about a specific applicationconst URL = `https://api.newrelic.com/v2/applications/${applicationId}.json`
// Define headers, including the API key for authenticationconst headers = {  "X-Api-Key": apiKey,  "Custom-Header": "CustomValue", // Example of a custom header}
// Define got options for retries and timeoutsconst options = {  headers: headers,  timeout: {    request: 10000, // Set a global timeout of 10000 milliseconds for the request  },  retry: {    limit: 3, // Retry a failed request up to 3 times    statusCodes: [408, 413, 429, 500, 502, 503, 504], // Common status codes to retry on    errorCodes: [      "ETIMEDOUT",      "ECONNRESET",      "EADDRINUSE",      "ECONNREFUSED",      "EPIPE",      "ENOTFOUND",      "ENETUNREACH",      "EAI_AGAIN",    ],    methods: ["GET"], // Only retry for GET requests  },  hooks: {    beforeRetry: [      (options, error, retryCount) => {        console.error(          `Retrying after error ${error.code}, retry #: ${retryCount}`        )      },    ],  },}
// Make the GET request with a callback$http.get(URL, options, function (error, response, body) {  if (error) {    // Handle the error case    console.error(`Request failed: ${error.message}`)    return  }
  // Assert the response status code is 200  assert.equal(response.statusCode, 200, "Expected HTTP status code 200")
  // Log the status code to the console  console.log("Request Status Code:", response.statusCode)
  // If further processing of the response body is needed, it can be done here  // For example, parsing JSON response (if response is in JSON format)  const jsonData = typeof body === "string" ? JSON.parse(body) : body
  // Log the parsed JSON to the console  console.log("Parsed JSON data:", jsonData)
  // Check the application's health status  const healthStatus = jsonData.application.health_status  assert.equal(healthStatus, "green", "Expected the application's health status to be 'green'")
  // If the assertion passes, the script will continue; otherwise, it will fail the monitor
// This shows up in SyntheticCheck as `custom.healthStatus` $util.insights.set("healthStatus", healthStatus)})POSTリクエストを送信する
POSTリクエストをするには、$http.postメソッドを使用してリクエストを送信します。リクエストオプションを定義し、$http.postを使用してリクエストを行ってから、レスポンスを検証してエンドポイントが正しい結果を返していることを確認します。
重要
スクリプト環境には書き込み保護されたディレクトリが含まれています。スクリプトでファイルを保存する必要がある場合は、ファイル名の先頭に次のいずれかのパスを追加します。
runtime/input-output/input/runtime/input-output/output/
結果を検証する
結果を検証するには、assertモジュールをインポートして、テストケースを定義します。assertメソッドを呼び出して、エンドポイントのレスポンスを検証します。assert関数のいずれかが失敗する場合、モニター全体が失敗したチェックとみなされます。これにより、アラート通知がトリガされ、メトリクスに影響する場合があります。
重要
合成モニタリングは例外のスローを許可しません。例外がスローされると、スクリプトが失敗します。assertモジュールを使用して結果を検証し、console.log()を使用して合成コンソールに結果をログします。