Live archives allows you to store logs for as long as you need. New Relic has a thirty-day retention for logs by default, but with live archives, you can extend that period for up to seven years. Like old tax documents, sometimes you don't need your data close at hand, but it's safe to keep the information available for reference if needed.
Is live archives for you? Here are some use cases where you might benefit from this feature:
- Internal retention requirements: Does your company have a policy that requires you to keep logs for a certain period? The extended storage periods of live archives may help you meet your requirements.
- Trends and long-term debugging: Long-term log storage can help improve year-over-year performance. For example, if you manage a retail company, you can compare logs from one holiday season to the next to see how you can improve performance.
How live archives works
The live archives feature offers long-term log data storage that you intend to query sparingly for a lower storage cost. With live archives, you can have peace of mind knowing your logs are available for a longer period for potential audits or long-term debugging, but you will be charged separately for storage and querying your old data.
Get started
Enable live archives
First, you need to request live archives capabilities.
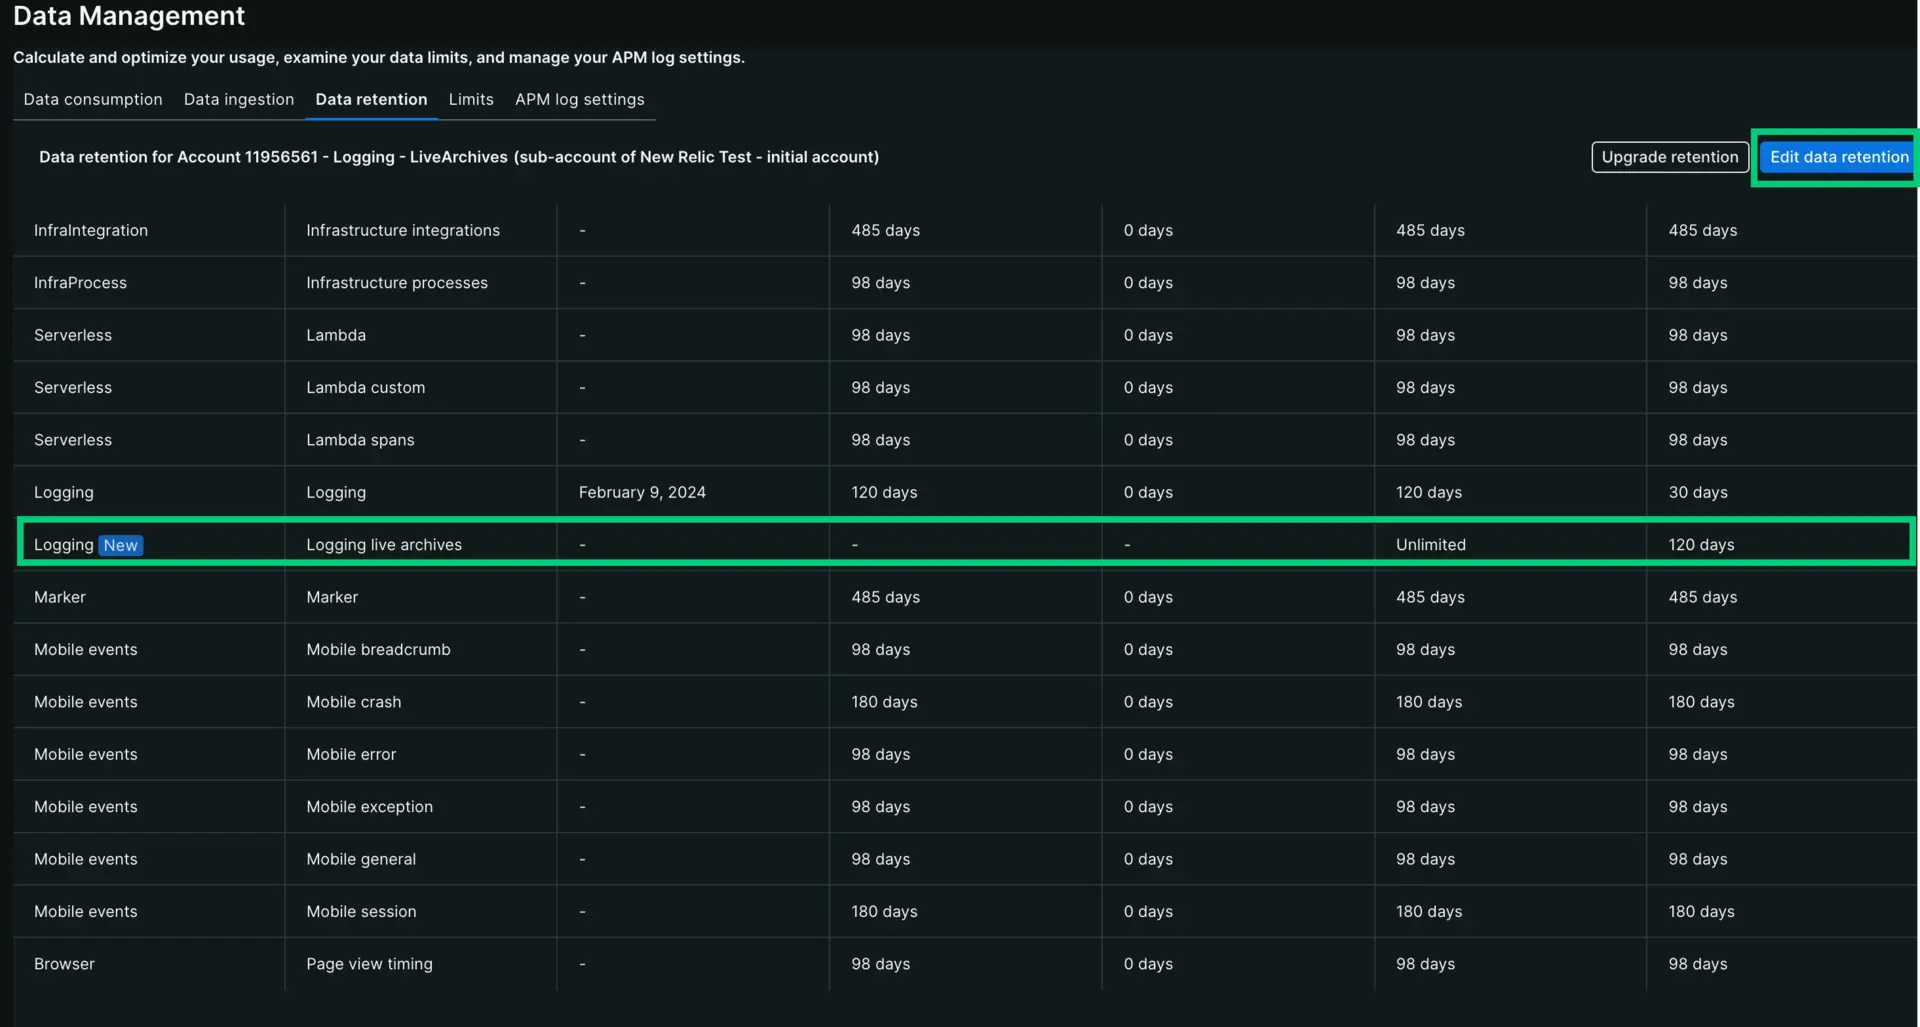
- On the Data retention UI page, located in the data management hub.
- Scroll down to Logging live archives.
- Hit Request. A member of our team will reach out to you.
Once you've enabled live archives, you need to edit your data retention.
On the Data retention UI page, located in the data management hub select Edit data retention.
Scroll down to Logging live archives and enter the total number of days you'd like your data stored. Keep in mind that this includes the standard retention days.
Click Apply changes.
Keep in mind that you will need Admin capabilities to edit data retention.

Create a partition using live archives
A partition is a way to group logs based on specific criteria. Creating partitions can help you filter out the logs you don't need and keep the ones you do with live archives.
Go to one.newrelic.com > All capabilities > Logs.
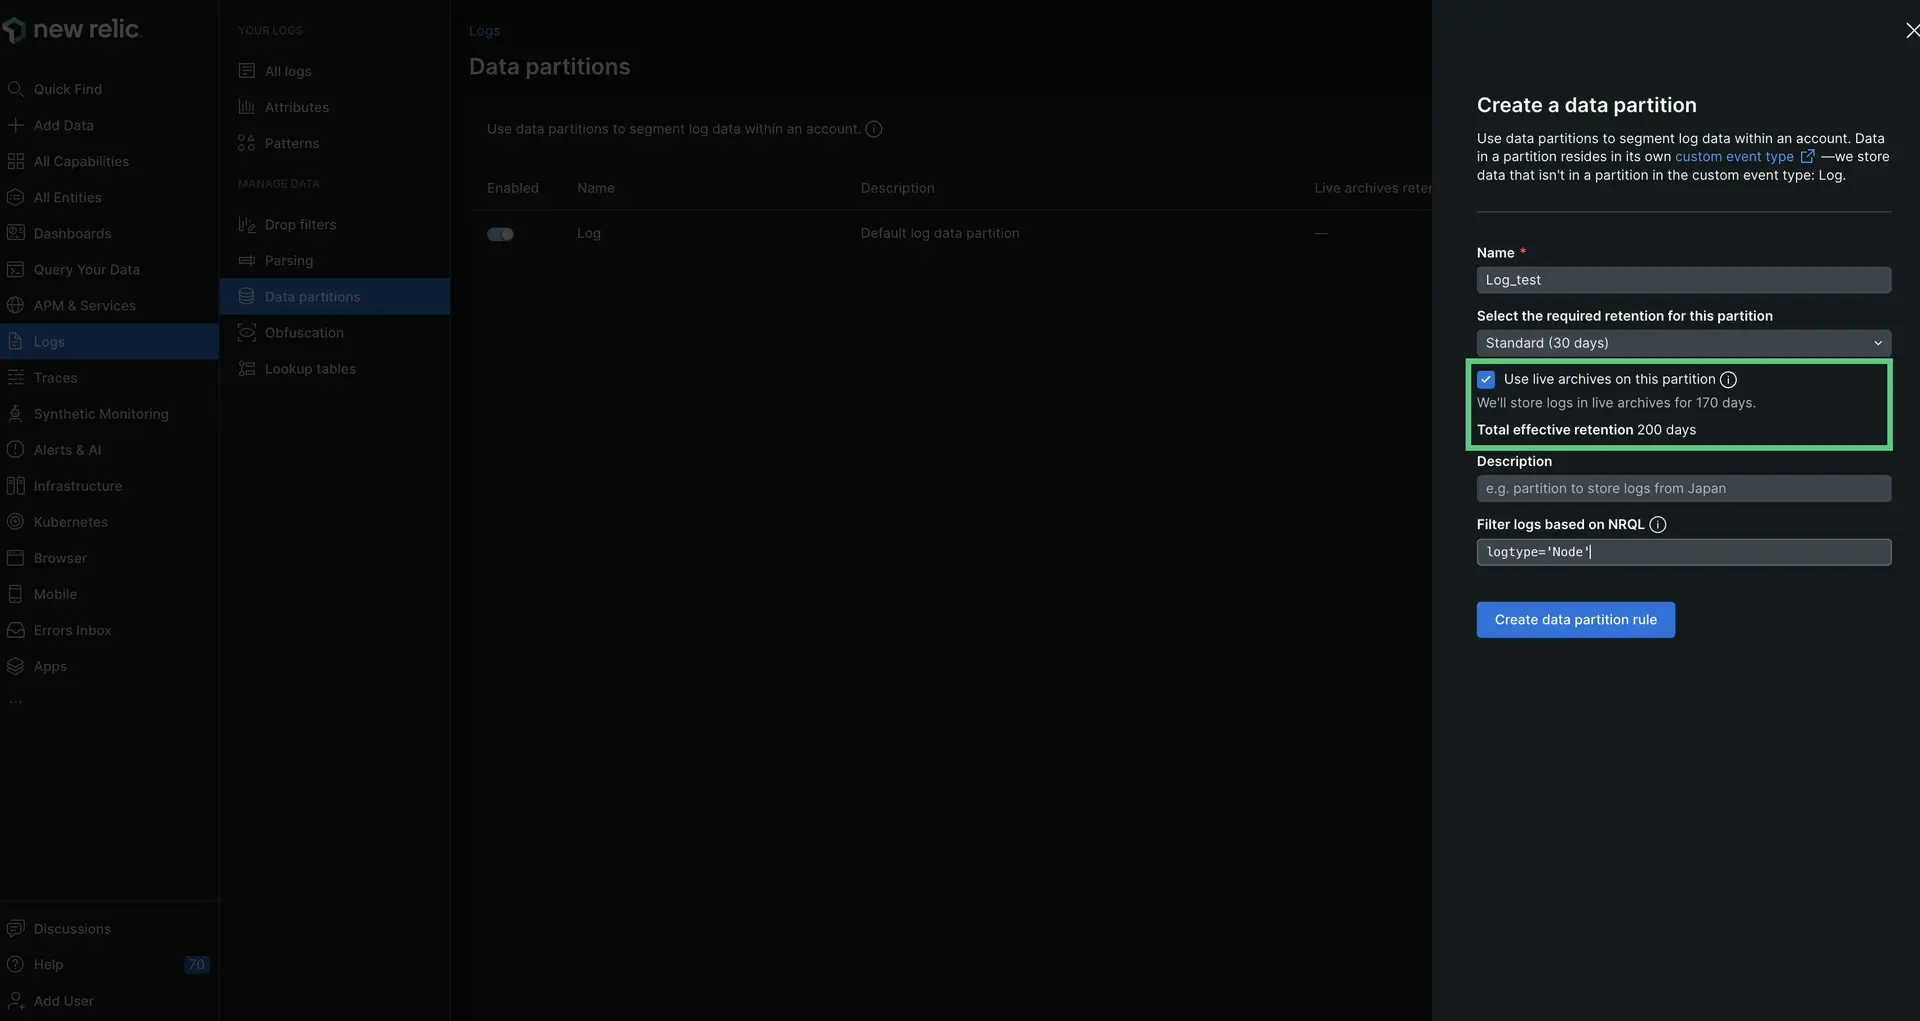
To the left of the logs query bar, click Data partitions, then click Create data partition.
Define a Partition name as an alphanumeric string that begins with Log_.
Select the field Use live archives on this partition.

Go to one.newrelic.com > All capabilities > Logs > Data partitions to create a partition using live archives.
The Total effective retention days will be updated to reflect the regular retention and the live archives retention.
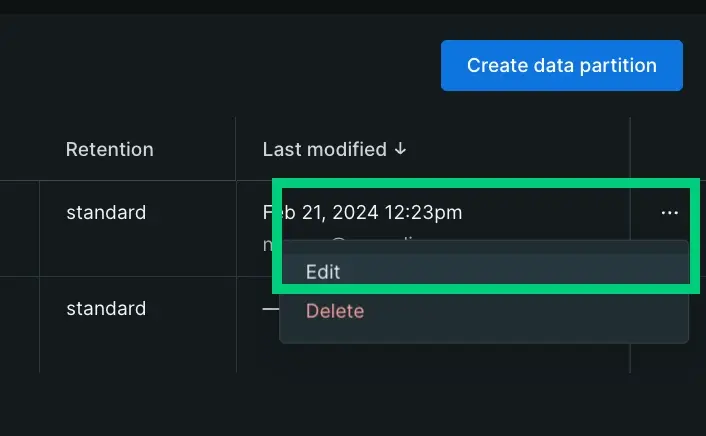
You can also edit an existing partition clicking the icon on the Data partitions page. If you use an existing partition, the same parameters that you selected for the original partition will apply to your live archive data.

For more information about how to use partitions, see our doc Organize data with partitions.
Query your logs
Important
Users can query logs in live archives if they have the Live archives query permission. Refer to user management concepts for more information about using groups, roles, and permissions to control access to certain features.
There are a few ways to query live archives: Lucene, NRQL, or NRQL in the NerdGraph API. For all three methods, you'll need the Live archives query capability to query live archives.
Query live archives with Lucene query syntax
If you're familiar with Lucene query syntax, you can execute it in our Logs UI.
Go to one.newrelic.com > All capabilities > Logs.
Using the search bar, run your desired query. Practicing your query first is best to ensure it works as expected.
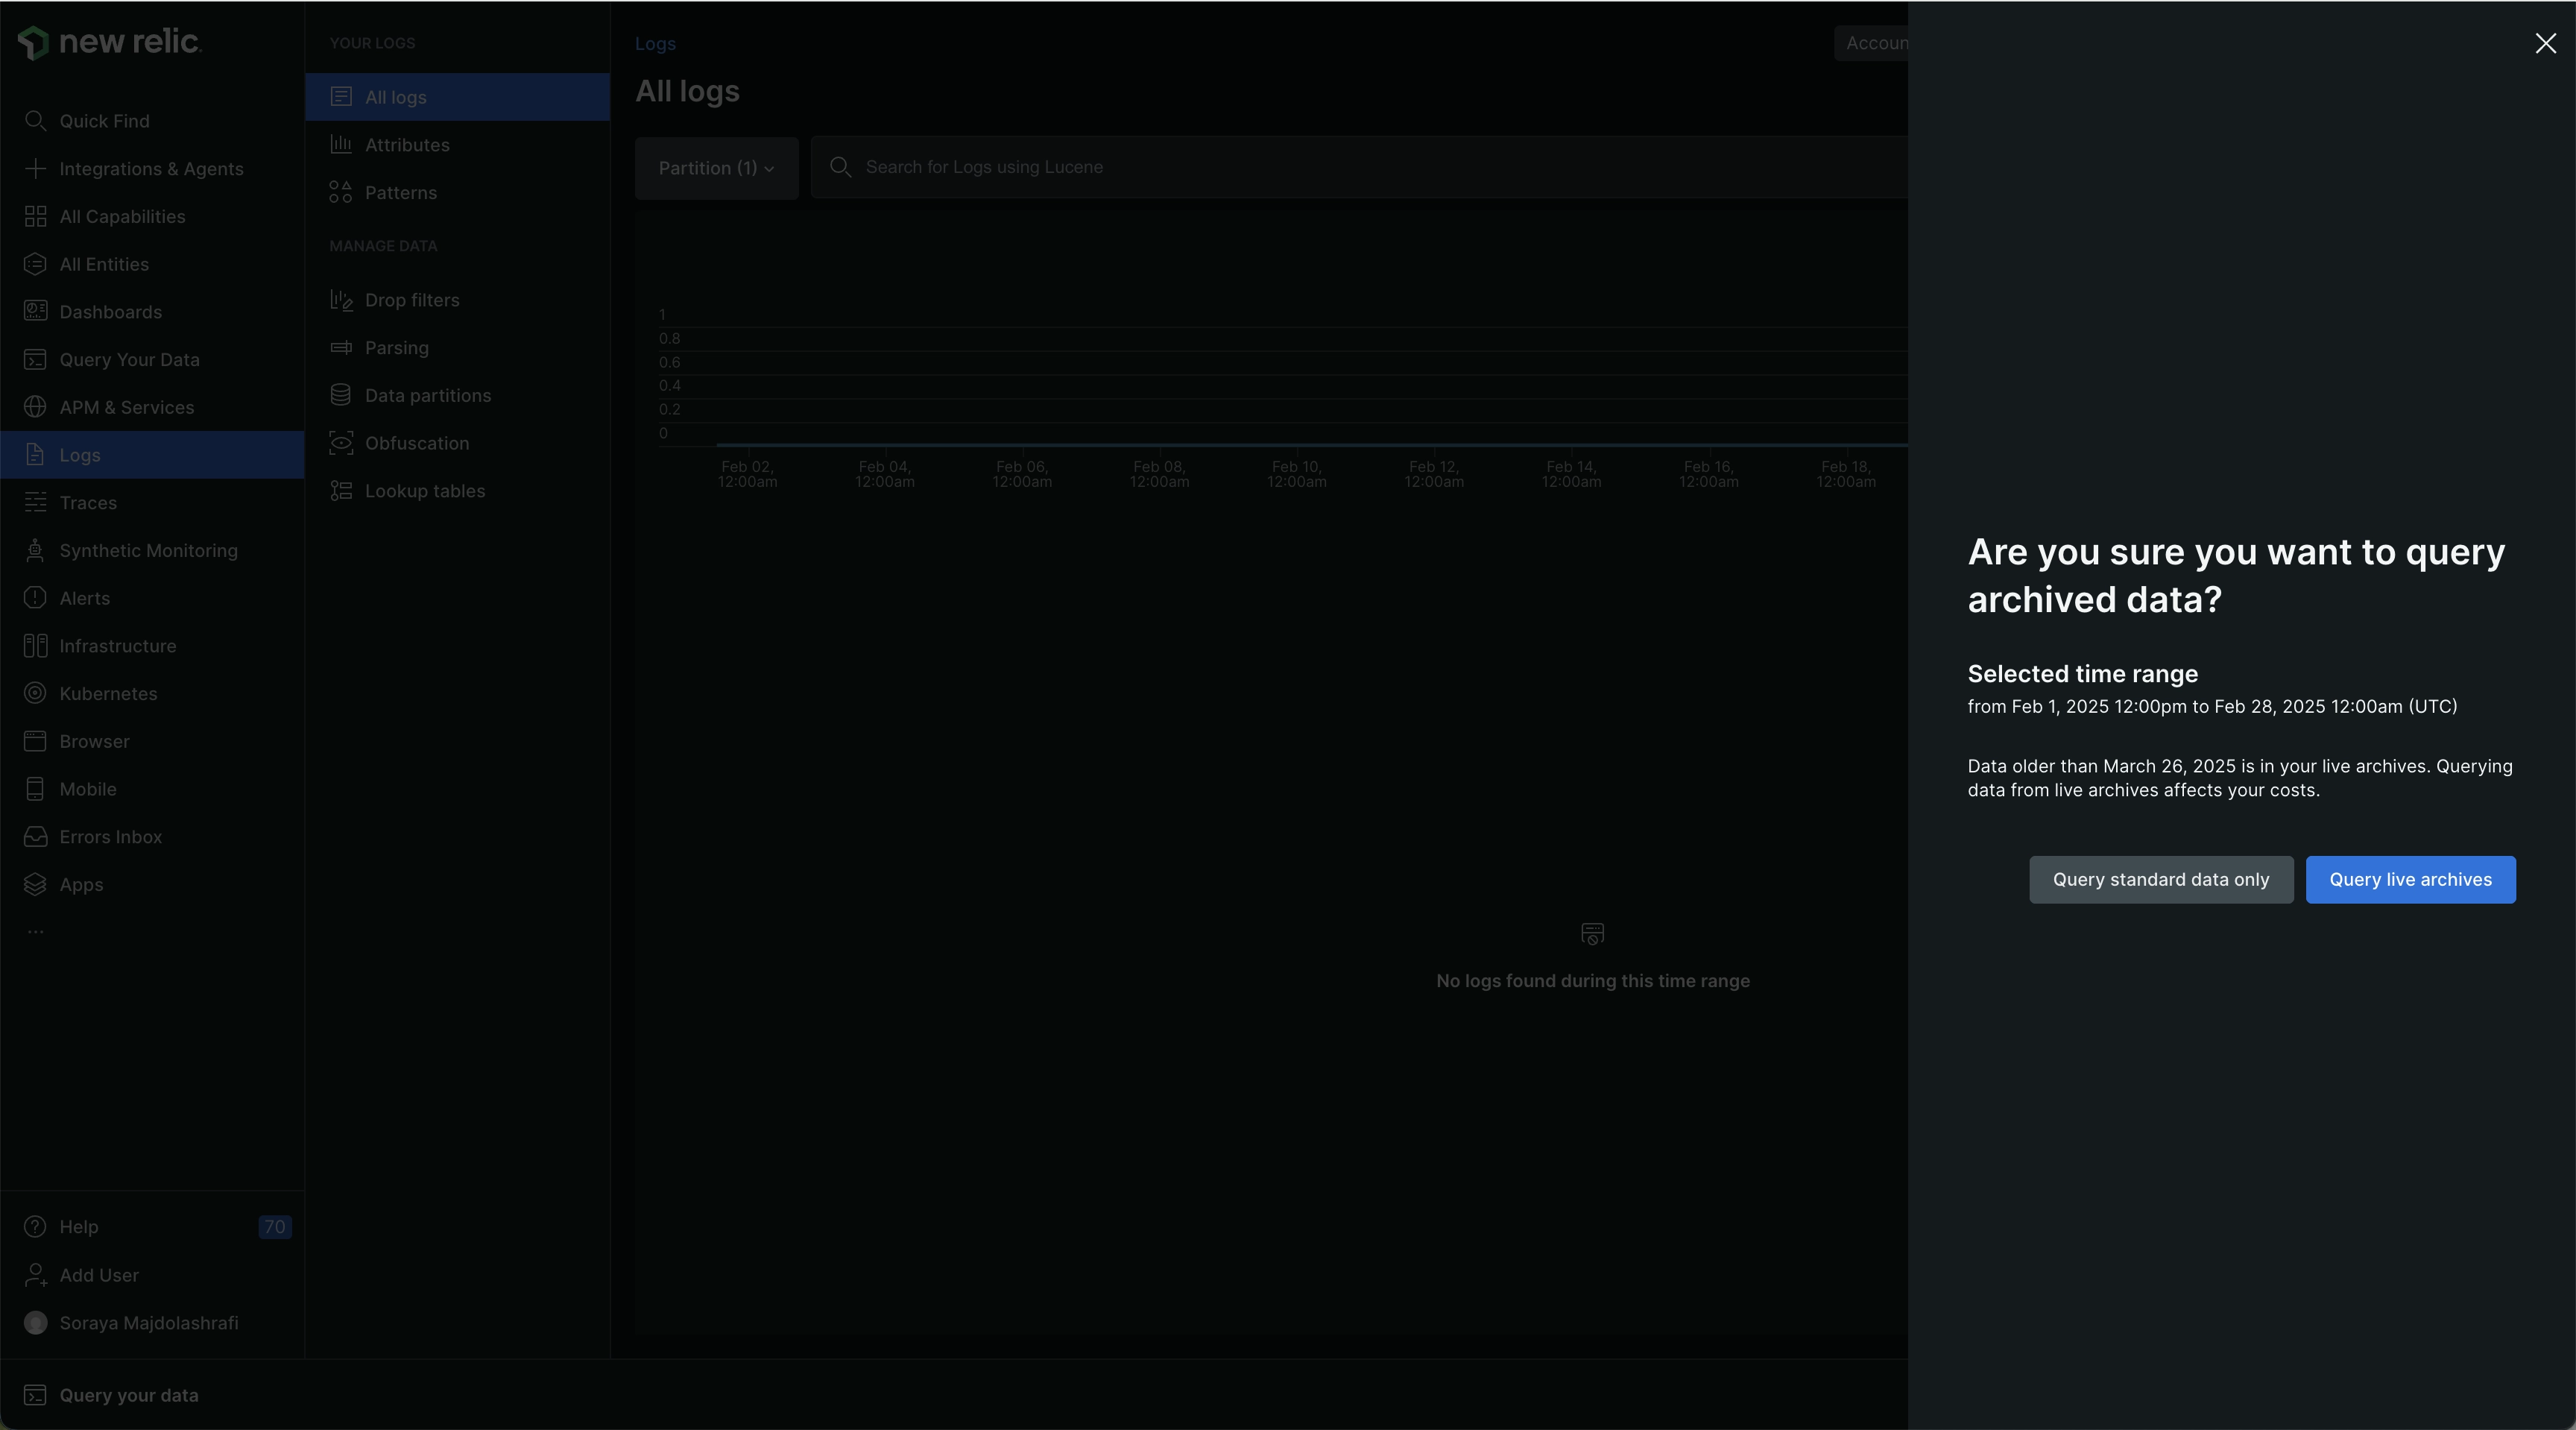
Select the dates you'd like to query.
A screen will show you that you're about to query live archives. Querying live archives is more expensive, so only select Query live archives if you're ready.

Go to one.newrelic.com > All capabilities > Logs to query data stored with live archives.
Query live archives with NRQL
If you want to query using the same language you use for errors inbox or alerts, we suggest querying in NRQL.
Go to one.newrelic.com > All capabilities > Logs.
Click NRQL in the top right corner.
Enter the NRQL query you want to run.
Practice the query first to make sure it works as expected.
Toggle Use live archives.
A screen will show you that you're about to query live archives. Querying live archives is more expensive, so only select Query live archives if you're ready.

Go to one.newrelic.com > All capabilities > Logs, then select NRQL to query data stored with live archives using the query builder.
Query live archives using NerdGraph API
You can also query your live archives data using NRQL in the NerdGraph API. You must include the
{eventNamespaces: "Logging:Archive"}in the NRQL options to specify the live archiveseventNamespace.Here is an example query:
query {actor {account(id: 1234567) {nrql(query: "SELECT count(*) FROM Log SINCE '2024-02-01 12:00:00' UNTIL '2024-02-01 13:00:00'"options: { eventNamespaces: "Logging:Archive" }async: true) {results}}}}
See your data consumption
Live archives is billed differently than the rest of your logs. You can read more about it in our Live archives storage: Billing and rules documentation. Live archives has three billing pillars.
Data: You will be charged for when you originally ingest the regular logs.
Storage: Live archives charges a fee for storing your data with live archives.
Compute: Queries of live archives data will be billed in Compute Capacity Units. See our Usage plan documentation for more information about Compute Capacity Units.
To see your data storage on the Plan & Usage page:
Go to one.newrelic.com, click the user menu, and then click Administration to open the Plan & usage page.
Scroll down to Retention (GB-month).
Click View more details for more information about the storage breakdown.
Once you query live archives, you can explore your compute consumption in the compute management hub.
Go to one.newrelic.com, click the user menu, and then click Administration.
Select Compute management.
Scroll down to Product capabilities.
Select Logs.
Facet by Data category to view compute consumption for live archives.
Example
Let's say you need to check if a user logged into a machine from their computer to fulfill a ticket on September 1st. You can use live archives to help confirm that this took place by completing the following steps:
Check the time frame that the user logged into their machine.
Test your query in Logs to ensure it's working as expected. This is a dry run and won't return any data, but you're just validating the query. If it works, you can then run the more expensive query on your archived logs.
Example query:
"logtype":"linux_audit" "type":"USER_LOGIN" "hostname":"apache_svr01"Change the time selector to search for the dates the user logged into their machine.
Select Query live archives.
Data deletion
If at any point you want to reduce your data retention, please note:
- You will need Admin privileges to edit data retention.
- You can't recover data if you reduce data retention later. Please choose and configure your retention periods carefully.
- Your data deletion is effective on the day you reduce your retention.
- You can request to delete your data for any given set of days. We'll delete all live archives data for the selected dates.
- Days start and end on UTC boundaries, so when making a request, ensure it aligns with UTC. This can mean adding or subtracting a day.
Important
For the avoidance of doubt, New Relic has no obligation to retain data in live archives after account downgrade or lapse in contract, or otherwise if you do not meet applicable commercial requirements.