NerdGraph 의 쿼리 및 변형을 사용하여 대시보드 를 내보내고 새 계정으로 가져올 수 있습니다.
팁
(를) 이미지로 내보낼 수도 있습니다.
이렇게 하려면:
- GraphiQL 탐색기 로 이동합니다.
- 어떤 대시보드를 사용할 수 있는지 알아보십시오.
- 원하는 대시보드를 내보냅니다 .
- 선택한 대시보드를 새 계정으로 가져옵니다 .
대시보드 나열
다음 쿼리를 사용하여 기존 대시보드 목록을 검색합니다.
{ actor { entitySearch(queryBuilder: { type: DASHBOARD }) { results { entities { ... on DashboardEntityOutline { guid name accountId } } } } }}대시보드 내보내기
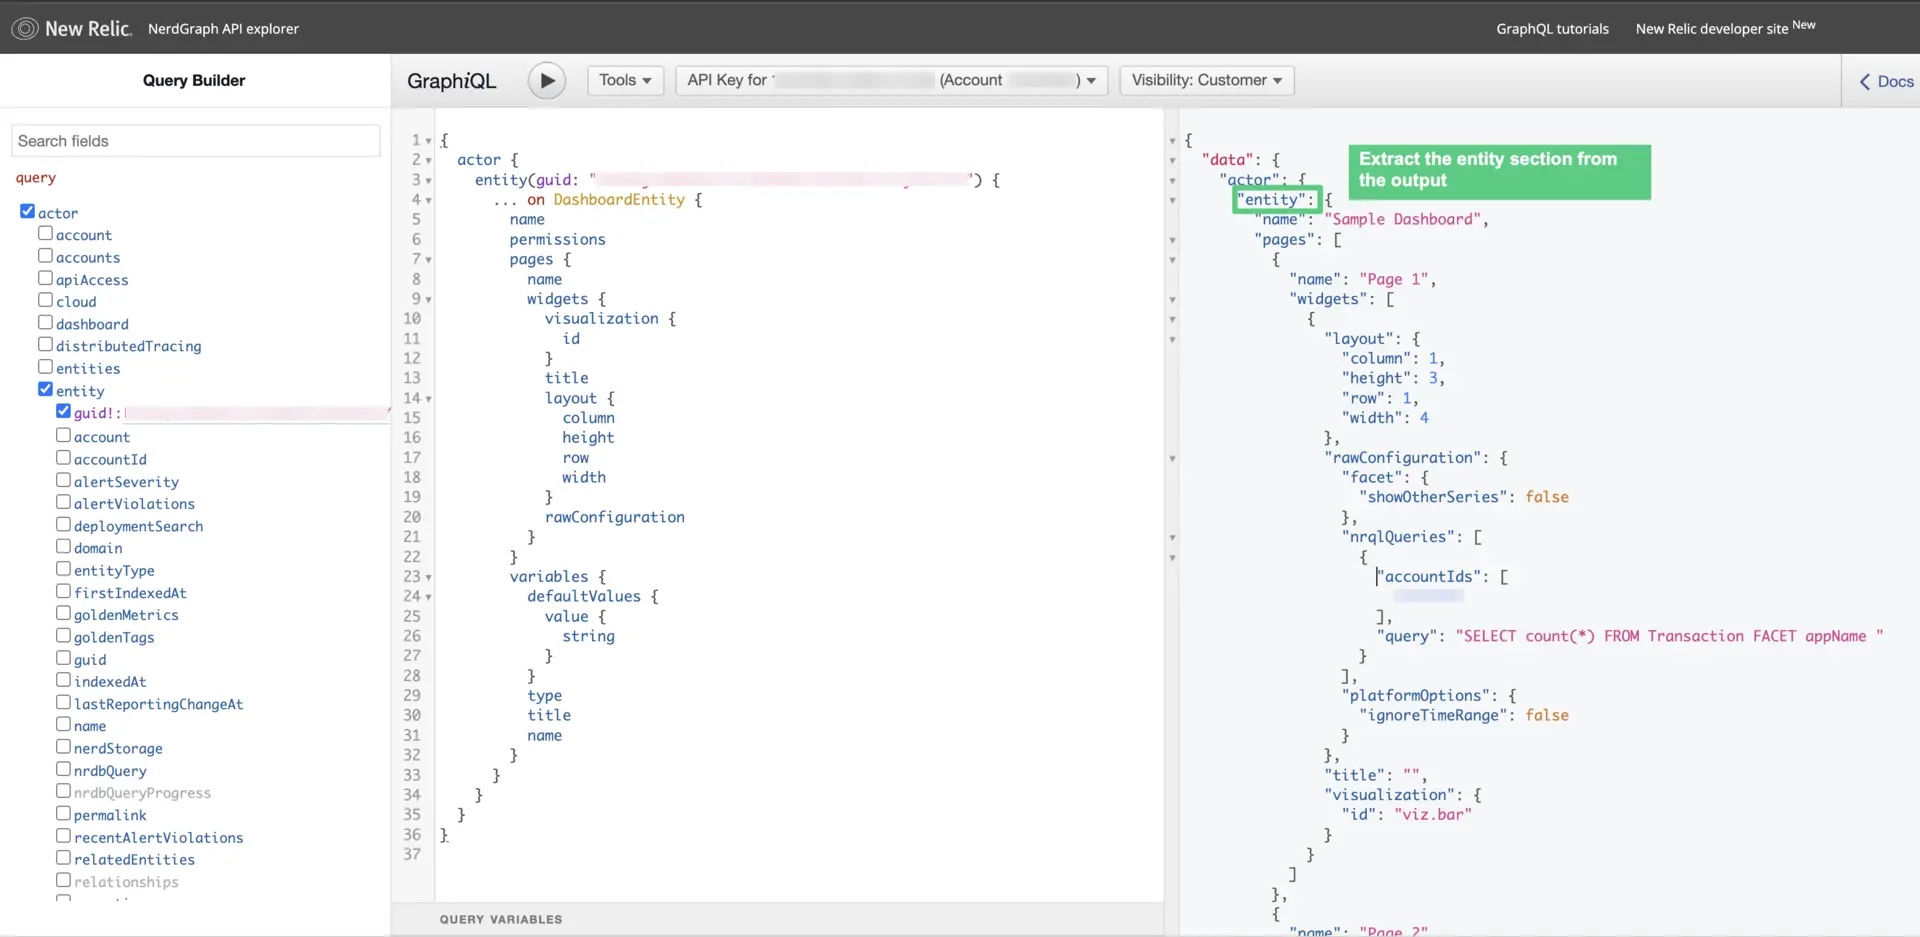
다음 쿼리를 사용하여 내보낸 다음 출력에서 대시보드의 엔터티 정보를 추출합니다.
{ actor { entity(guid: "YOUR_DASHBOARD_GUID") { ... on DashboardEntity { name permissions pages { name widgets { visualization { id } title layout { row width height column } rawConfiguration } } } } }}GraphiQL 출력의 엔티티 정보 예시:

대시보드를 새 계정으로 가져오기
다음 변형을 사용하여 대시보드를 다른 계정으로 가져옵니다.
mutation create($dashboard: DashboardInput!) { dashboardCreate(accountId: YOUR_NEW_ACCOUNT_ID, dashboard: $dashboard) { entityResult { guid name } errors { description } }}이 단계를 따르세요:
Query variables 섹션에서 분리의 이름을
dashboard지정합니다(입력 변수를$dashboard으로 선언했으므로).엔터티의 출력 을 복사하여 새 계정에 붙여넣습니다. 엔티티로 복사됩니다.
entity을dashboard로 변경합니다.