Este documento proporciona información sobre cómo puede emplear Session Replay para realizar análisis en profundidad que permitan investigar y comprender de forma eficiente el comportamiento del usuario. Ahora puedes aprovechar New Relic AI para resumir automáticamente la traza de evento de Session Replay, usar el filtrado de secuencias para identificar repeticiones con patrones de interacción de usuario específicos y recortar grabaciones para centrarte en la parte más relevante de una sesión y compartirla con el equipo o la persona responsable.
Resumen de New Relic AI
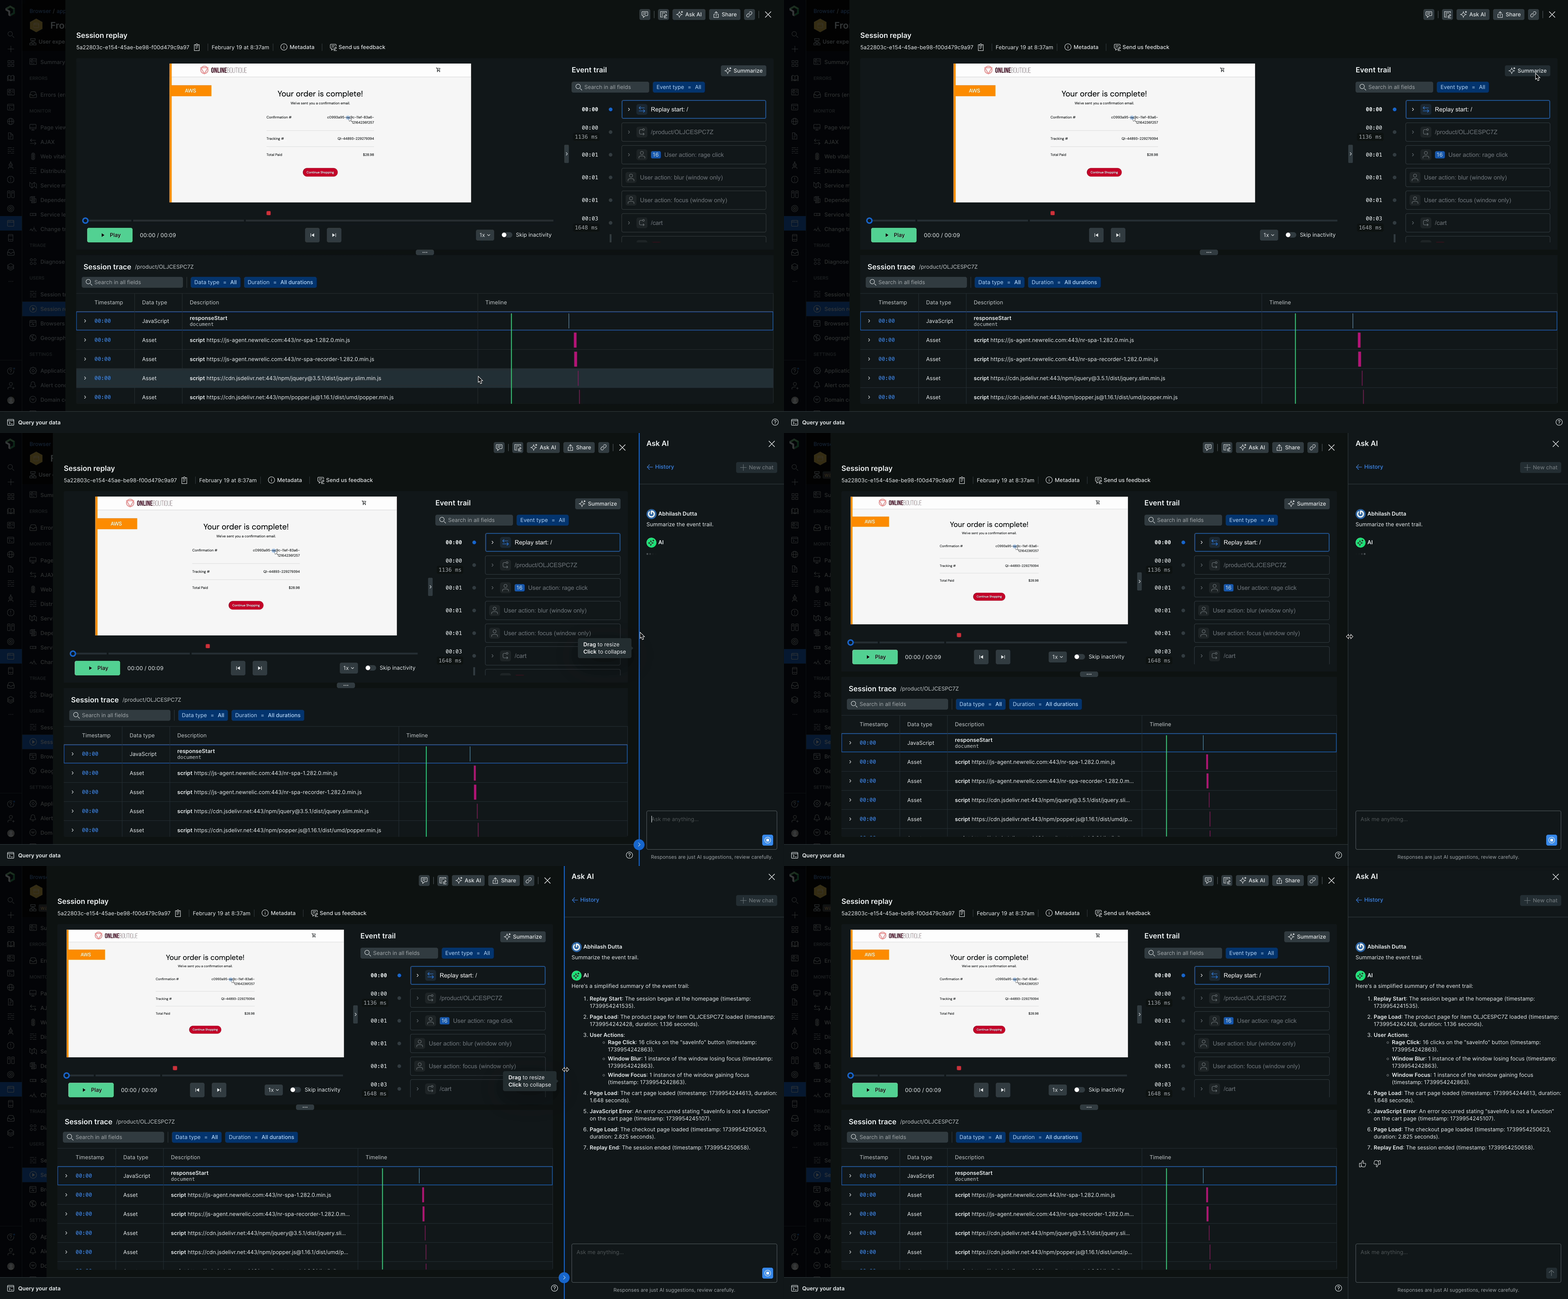
Puede emplear New Relic AI (NRAI) para ayudarlo a resumir y mapear los datos de seguimiento de eventos de Session Replay para que pueda comprender mejor los errores y éxitos del recorrido browser de su usuario.
Para emplear NRAI para resumir los datos de Session Replay, debes tener NRAI habilitado para tu cuenta. Una vez que NRAI esté habilitado en su cuenta, realice lo siguiente para que aparezca su resumen:
Vaya a one.newrelic.com > All Capabilities > Browser.
Seleccione la aplicación de su browser .
En el menú de la izquierda, desplácese hacia abajo y haga clic en Session replay.
Haga clic en la repetición para ver los detalles de la sesión que desea resumir.

Haga clic en Summarize. Se genera un resumen de la sesión en el panel de enfoque.

Filtrado de secuencias
La función de filtrado de secuencia lo ayuda a filtrar la reproducción de sesión en función de una secuencia específica de eventos registrados durante la interacción del usuario. Esta funcionalidad está diseñada para ayudarlo a navegar de manera eficiente a través de numerosas grabaciones de sesiones en la página de Session Listing , lo que facilita la búsqueda de repeticiones relevantes.
Característica clave
- Filtrado de secuencia de eventos: puede filtrar repeticiones especificando una secuencia de eventos en un orden particular, como cuando un usuario realiza una búsqueda y luego agrega un artículo a su carrito.
- Filtros personalizables: puede seleccionar atributos, operadores y valores para definir sus filtros de secuencia.
- Admite múltiples acciones: puede especificar hasta cinco acciones en una secuencia.
- Filtrado flexible: los filtros se pueden aplicar en cualquier orden, lo que permite combinar filtros de secuencia con otros tipos de filtros, como la duración.
Personalizar la vista
De forma predeterminada, la Sequence se establece en All. Puede personalizar la vista seleccionando el filtro Sequence = All y haciendo clic en el cuadro de diálogo Set up a filtering sequence para definir sus filtros de secuencia.
- Vaya a one.newrelic.com > All capabilities > Browser > (select an app) > Session replay.
- Seleccione el filtro Sequence = All , aparece la opción Set up a filtering sequence .
- La opción Set up a filtering sequence le permite crear un filtro de secuencia especificando hasta 5 acciones en un orden particular. Puede definir la secuencia seleccionando el siguiente atributo:
Importante
Debes agregar al menos dos pasos al formulario de filtro.
Acción | Descripción |
|---|---|
Atributo | Seleccione un atributo:
|
Operador | Seleccione un operador de las siguientes opciones:
|
Valor | Busque o ingrese un valor. |
Repetición de la sesión recortada
La función de Trimmed session replay [reproducción de sesión recortada] le permite extraer y compartir segmentos específicos de las grabaciones de sesión, centrar en los eventos relevantes para un análisis objetivo y una resolución de problemas más rápida. En lugar de compartir grabaciones largas y completas, puedes crear clips específicos que destaquen los momentos exactos en que ocurren los problemas.
Crea una repetición de sesión recortada
Vaya a one.newrelic.com > All capabilities > Browser > (select an app) > Session replay.
Seleccione la repetición de la sesión que desea recortar.
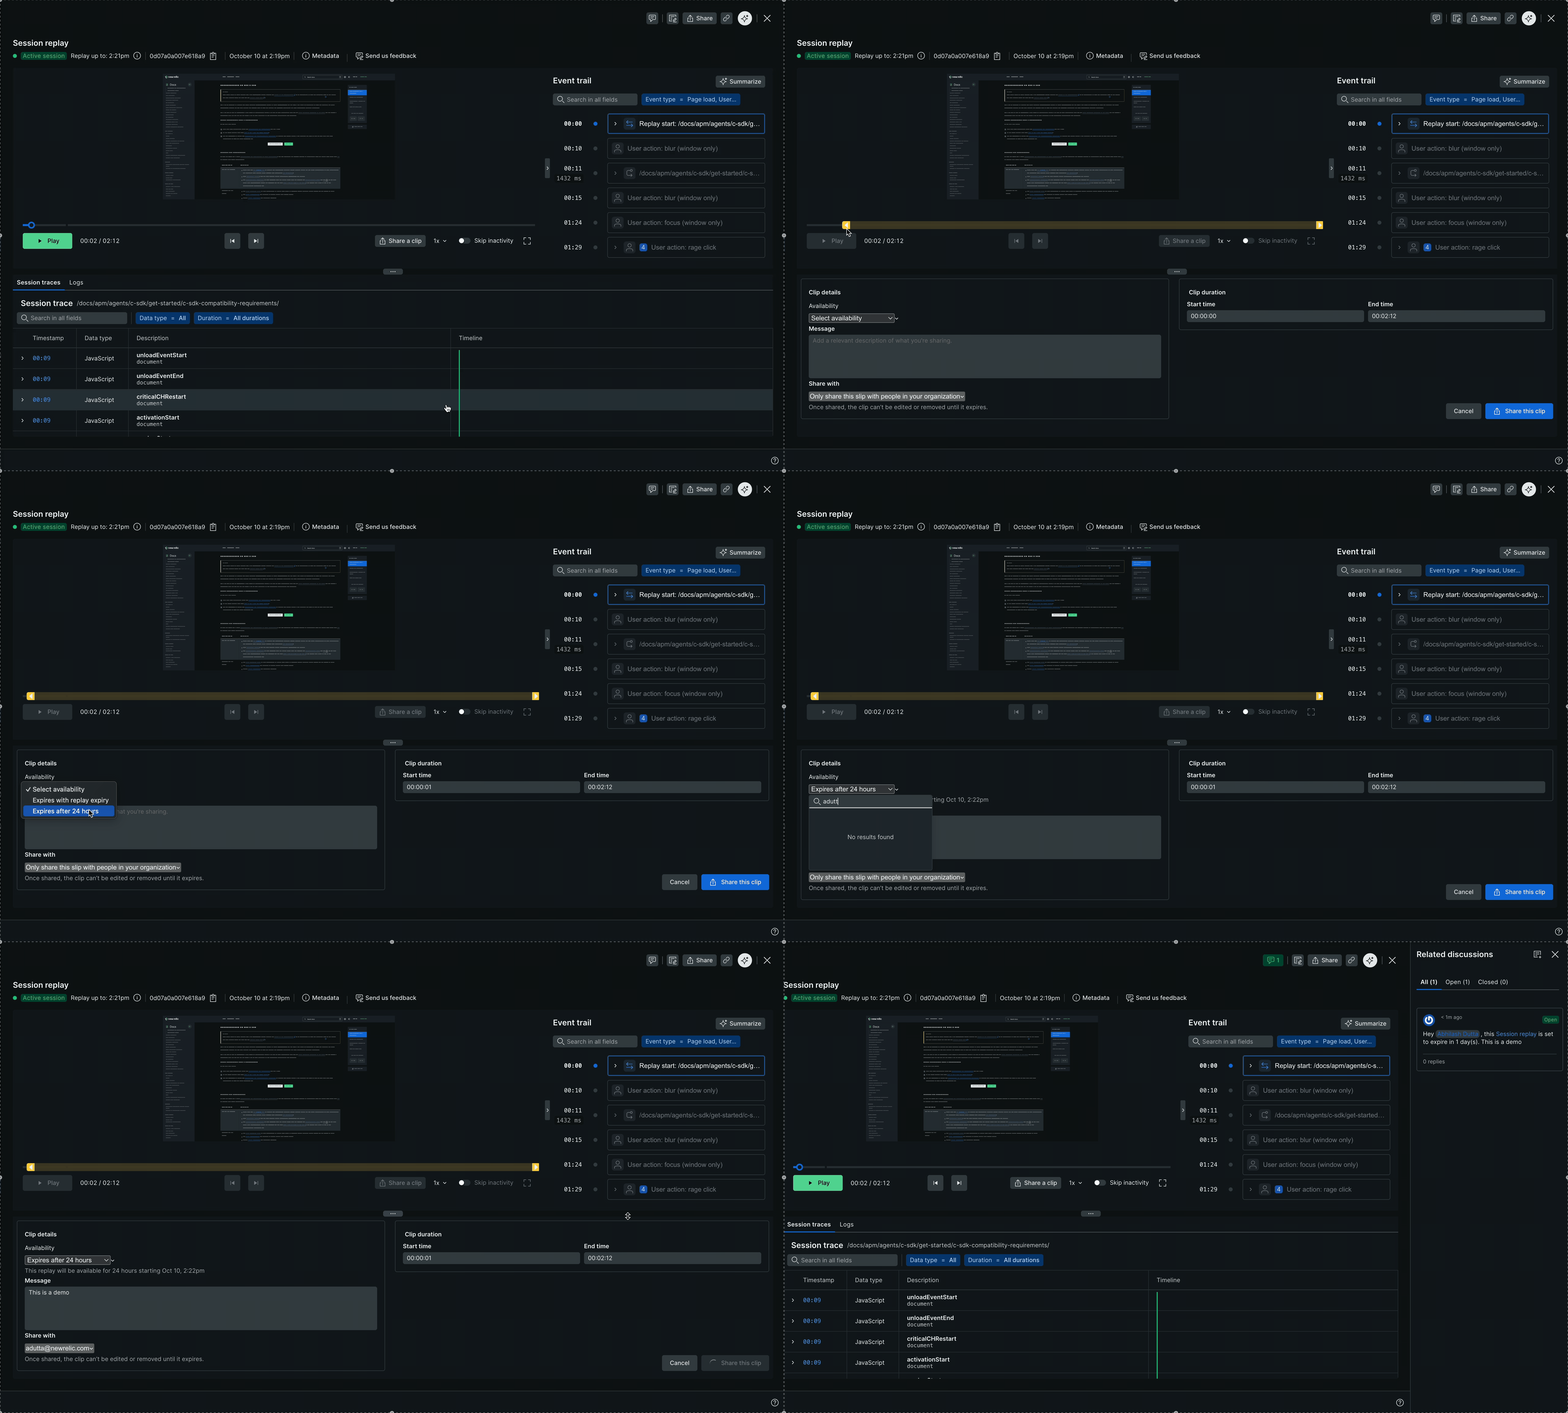
Haz clic en Share a clip en los controles de reproducción de sesión.
Seleccione los límites de su clip empleando los controles de la línea de tiempo:
- Arrastra la flecha izquierda para establecer la hora de inicio de tu clip.
- Arrastra la flecha derecha para establecer el tiempo final de tu clip.
Complete el formulario de detalles del clip:
- Elija cuánto tiempo debe permanecer activo el enlace del clip empleando el menú desplegable Availability.
- Agrega un mensaje (opcional): proporciona contexto sobre lo que muestra el video.
- Agrega direcciones de email para compartir el clip directamente con miembros específicos del equipo.
Revise su selección. La sección resaltada muestra lo que se incluirá en su video.
Haz clic en Share this clip para generar tu segmento recortado.
Importante
Los destinatarios solo podrán ver una repetición compartida si tienen acceso Session Replay y son afiliados a su organización. Si no tienen una cuenta New Relic, se les pedirá que creen una cuando visiten el enlace de repetición.
Acceso a clips compartidos
Cuando recibes una repetición de sesión recortada de un miembro del equipo:
- Mediante notificación por email: Si fuiste agregado como destinatario, recibirás un email con el enlace del video y cualquier mensaje proporcionado por el remitente.
- A través de la URL compartida: Haga clic en el enlace compartido del panel de discusión para abrir la grabación de la sesión recortada en su navegador.
Importante
En Safari, la URL compartida no se puede copiar automáticamente. Deberás copiar manualmente el enlace generado y compartirlo con los destinatarios.
Ver el video: El video se reproduce automáticamente y muestra solo el segmento seleccionado, junto con cualquier mensaje de contexto del remitente.
Disponibilidad de clips: Los clips tienen fechas de caducidad establecido por el remitente. Consulta la ventana Availability si no puedes acceder a un clip compartido previamente.

