Scripted API monitors check your API endpoints to ensure they're functioning correctly. To create a scripted API monitor, go to one.newrelic.com > Synthetic monitoring > Create a monitor, then select the Endpoint availability tile.
Tip
To view and share other API test examples, visit the synthetics scripts section in Support Forum or the Synthetic Monitoring Quickstarts Library.
Use API got module
API tests are powered by the got module, which is available through the $http object. The $http object provides a custom request-like experience with got, giving your monitors backwards compatibility for basic use cases. The request-like experience provided by the $http object will also be returned for any customers attempting to use request directly in Node.js 16 and newer scripted API runtimes.
Result timing details will be provided as long as you use the $http object. For scripted API use cases not covered by the $http object, you can use the $har object to report custom timing details.
Important
After a maximum run time of three minutes, New Relic manually stops the script.

one.newrelic.com > Synthetic monitoring > Create monitor: The script editor suggests functions, selectors, and other elements to simplify scripting commands (available in GitHub).
Configure request options
To start your script:
- Declare a variable (such as
options) to store your got options object. - Define request options such as the URL endpoint and custom headers.
Tip
For a full list of supported options, see got options in the got documentation on GitHub.
Here's an example of optional metadata in the options object:
Send a GET request
To make a GET request, use the $http.get method to submit your request. Define your request options, make your request using $http.get, then validate the response to ensure your endpoint is returning the correct results.
The following example demonstrates how you can:
- Handle retries and timeouts for a GET request
- Parse the json response body.
- Assert on application health status.
- Store the result in a custom attribute.
/** * Script Name: Advanced Example - Node 16.10.0 * Author:      New Relic * Version:     1.0 */
const assert = require("assert")
// Get secure credentialsconst applicationId = $secure.APP_IDconst apiKey = $secure.API_KEY
// The URL for the API endpoint to get information about a specific applicationconst URL = `https://api.newrelic.com/v2/applications/${applicationId}.json`
// Define headers, including the API key for authenticationconst headers = {  "X-Api-Key": apiKey,  "Custom-Header": "CustomValue", // Example of a custom header}
// Define got options for retries and timeoutsconst options = {  headers: headers,  timeout: {    request: 10000, // Set a global timeout of 10000 milliseconds for the request  },  retry: {    limit: 3, // Retry a failed request up to 3 times    statusCodes: [408, 413, 429, 500, 502, 503, 504], // Common status codes to retry on    errorCodes: [      "ETIMEDOUT",      "ECONNRESET",      "EADDRINUSE",      "ECONNREFUSED",      "EPIPE",      "ENOTFOUND",      "ENETUNREACH",      "EAI_AGAIN",    ],    methods: ["GET"], // Only retry for GET requests  },  hooks: {    beforeRetry: [      (options, error, retryCount) => {        console.error(          `Retrying after error ${error.code}, retry #: ${retryCount}`        )      },    ],  },}
// Make the GET request with a callback$http.get(URL, options, function (error, response, body) {  if (error) {    // Handle the error case    console.error(`Request failed: ${error.message}`)    return  }
  // Assert the response status code is 200  assert.equal(response.statusCode, 200, "Expected HTTP status code 200")
  // Log the status code to the console  console.log("Request Status Code:", response.statusCode)
  // If further processing of the response body is needed, it can be done here  // For example, parsing JSON response (if response is in JSON format)  const jsonData = typeof body === "string" ? JSON.parse(body) : body
  // Log the parsed JSON to the console  console.log("Parsed JSON data:", jsonData)
  // Check the application's health status  const healthStatus = jsonData.application.health_status  assert.equal(healthStatus, "green", "Expected the application's health status to be 'green'")
  // If the assertion passes, the script will continue; otherwise, it will fail the monitor
// This shows up in SyntheticCheck as `custom.healthStatus` $util.insights.set("healthStatus", healthStatus)})Send a POST request
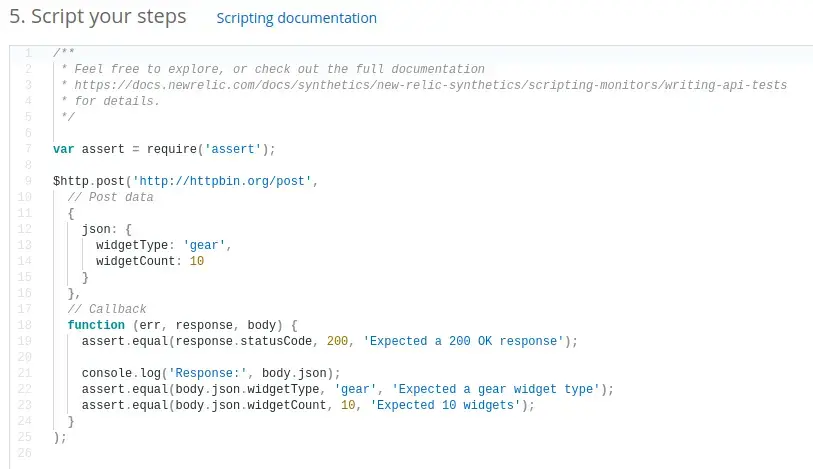
To make a POST request, use the $http.post method to submit your request. Define your request options, make your request using $http.post, then validate the response to ensure your endpoint is returning the correct results.
Important
The script environment contains write protected directories. If your script requires storing files, prepend any of the following paths to the filename:
runtime/input-output/input/runtime/input-output/output/
Validate results
To validate your results, import the assert module to define your test case. Call an assert method to validate your endpoint's response. If any assert functions fail, the entire monitor will be considered a failed check. This may trigger alert notifications and affect your metrics.
Important
Synthetic monitoring does not allow thrown exceptions. Thrown exceptions result in script failure. Use the assert module to validate your results, and use console.log() to log results to the synthetic's console.