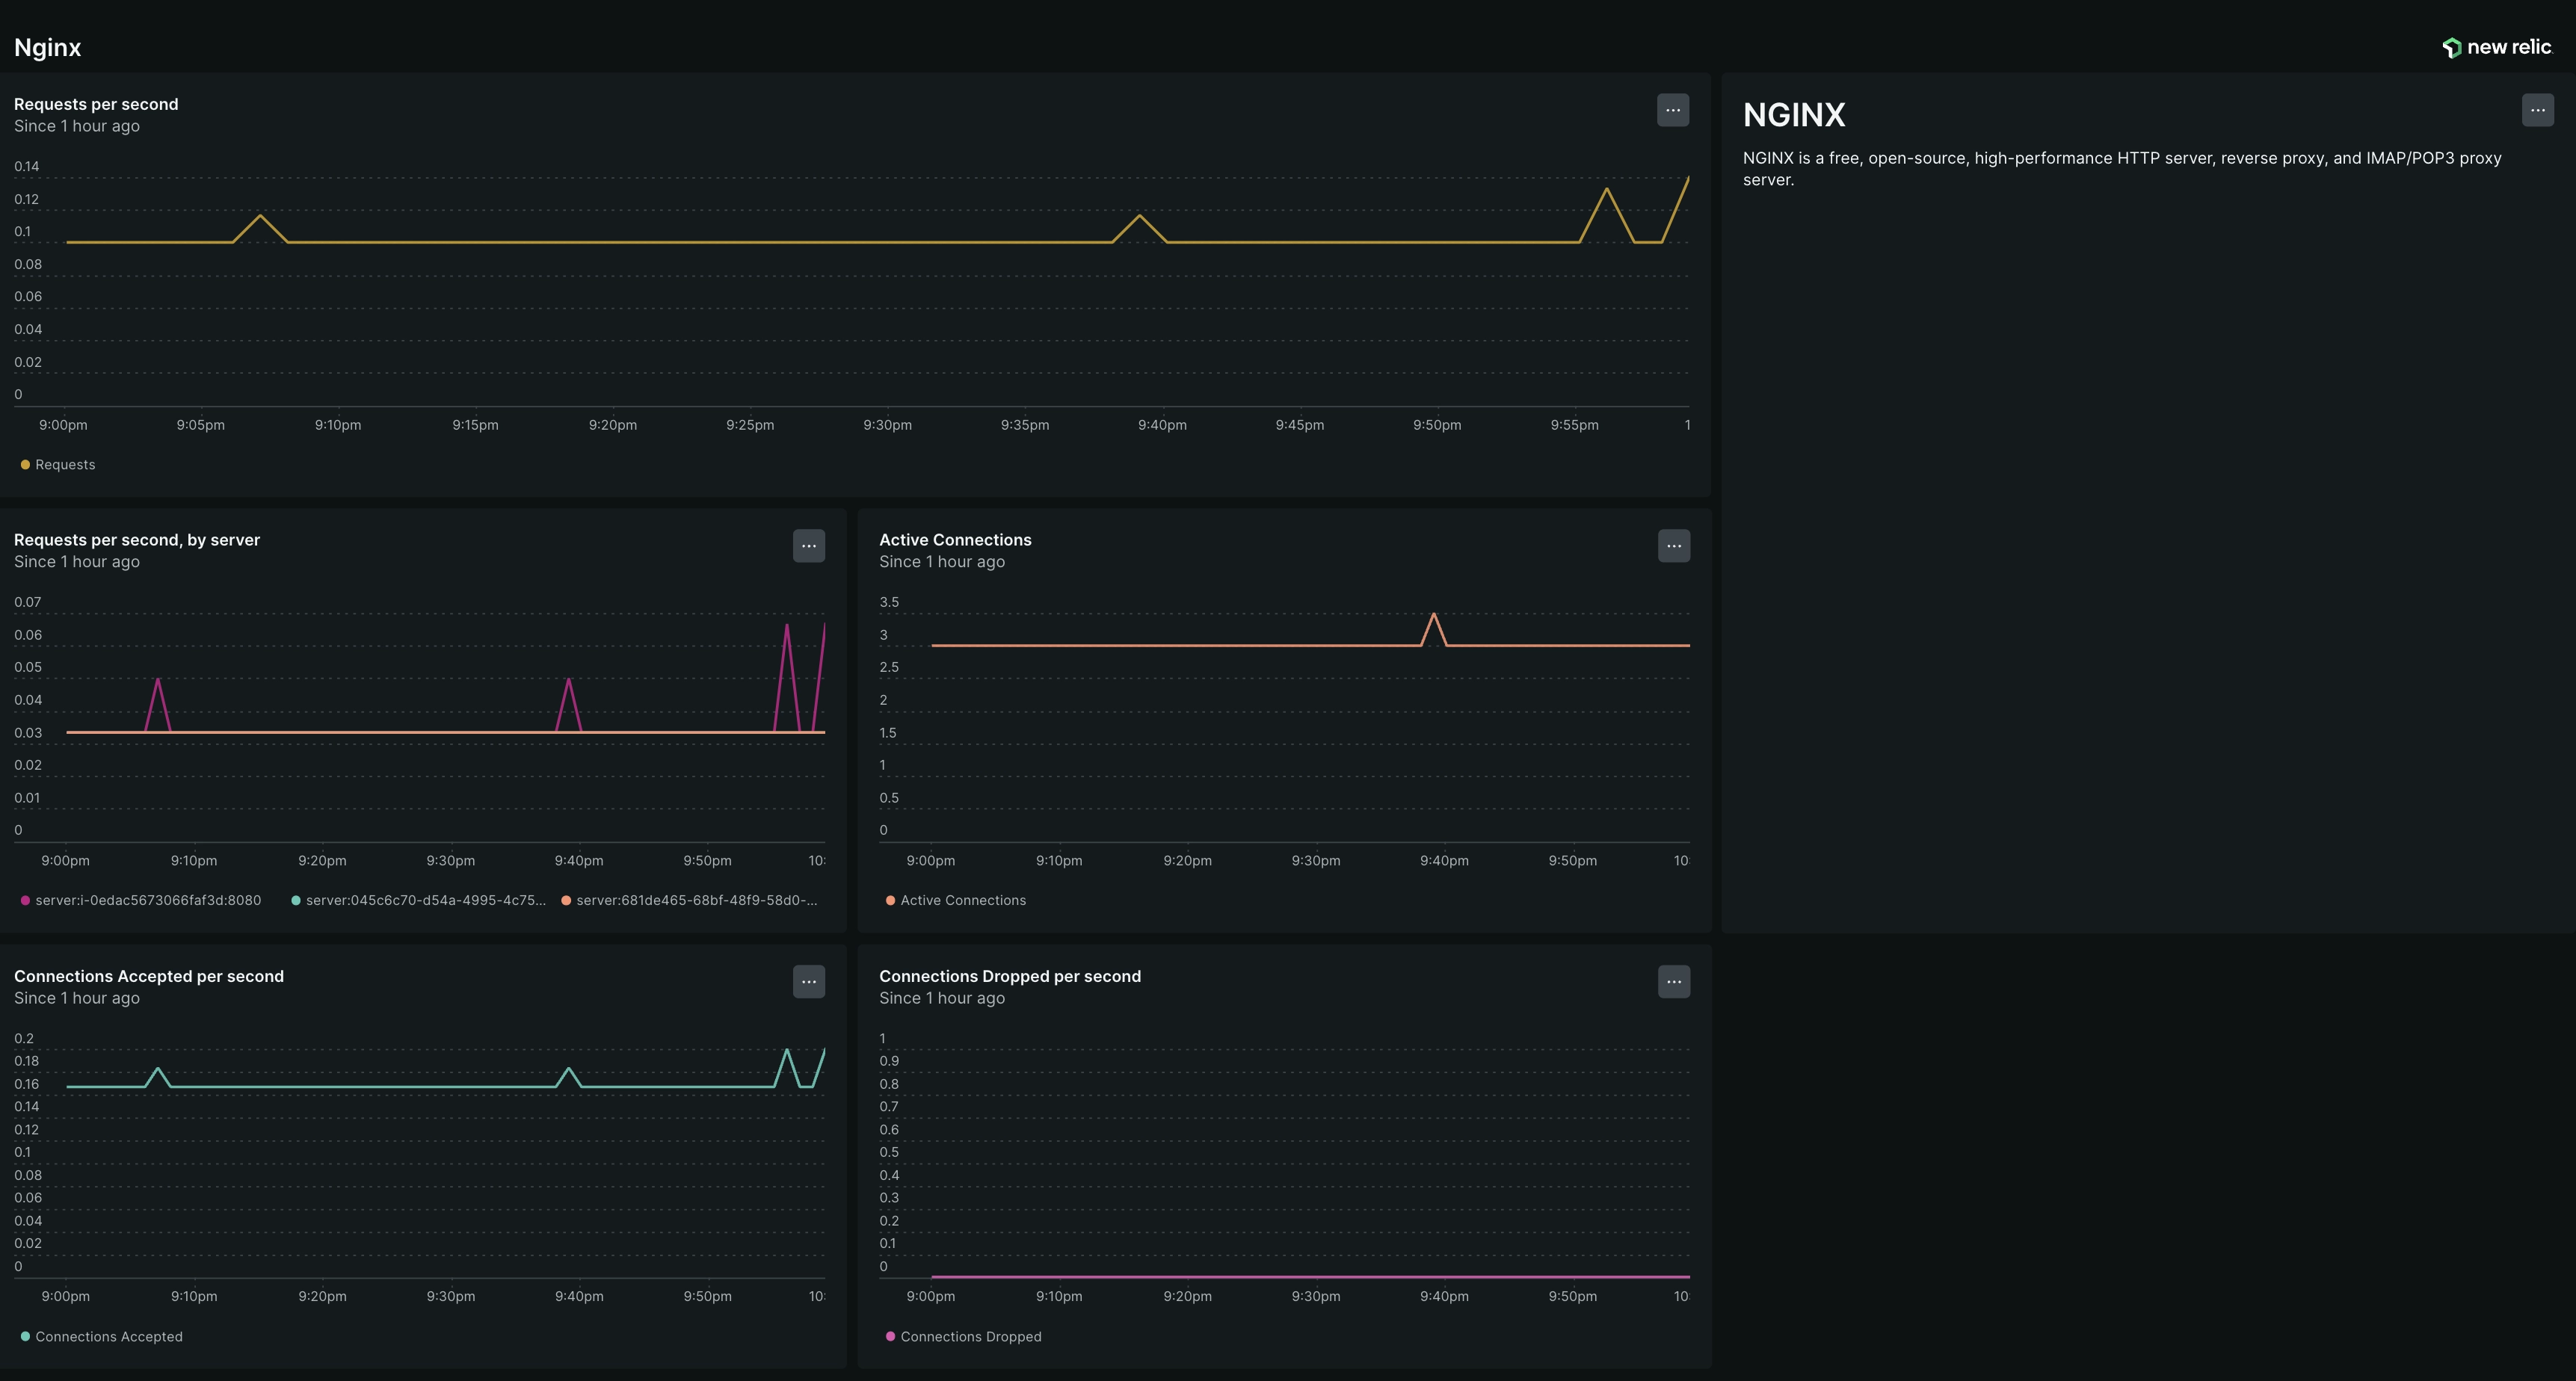
Streamline NGINX monitoring and troubleshooting with the New Relic NGINX integration buildpack for VMware Tanzu. By automatically collecting and sending detailed inventory and performance metrics to the New Relic platform, you gain invaluable insights into connections, client requests, and overall server health. Correlate this data with VMware Tanzu infrastructure metrics from the New Relic Firehose Nozzle for comprehensive environment visibility and rapid issue resolution.
Requirements and compatibility
We've certified the product with VMware Tanzu OpsManager versions up to v3.0.x, and Tanzu Application Service versions 4.x, 5.x, 6.x, and 10.x.
The New Relic NGINX integration buildpack for VMware Tanzu requires the following:
- CF CLI: Version 6.38 or later is needed as this buildpack is installed as a multi-buildpack in the app manifest.
- NGINX buildpack: This buildpack must be installed on top of the
nginx_buildpack. - New Relic account and license key: An active New Relic account with a license key is required. This key is used to bind NGINX servers to the New Relic infrastructure agent, which transmits metrics to the New Relic platform.
For general information about adding multiple buildpacks to manifests, see Cloud Foundry documentation: Pushing an app with multiple buildpacks.
Version and support information
The following table provides version support information about the New Relic NGINX integration buildpack for VMware Tanzu.
Element | Details |
|---|---|
Tile version | 1.1.5 |
Release date | August 11, 2025 |
Software component version | New Relic NGINX integration buildpack for VMware Tanzu 1.1.5 |
Compatible Ops Manager version(s) | 3.0.x |
Compatible VMware Tanzu Application Service for VMs versions | 4.x, 5.x, 6.x, and 10.x |
BOSH stemcell version | Ubuntu Jammy |
CF Stack | cflinuxfs3, cflinuxfs4 |
Installation and configuration
This section describes how to install and configure the New Relic NGINX integration buildpack for VMware Tanzu.
You can install the buildpacks either as a tile in Ops Manager or individually using the CF CLI.
Download the latest version of the tile (currently newrelic-nginx-buildpack-1.1.5.pivotal) from the Broadcom download site, or from New Relic's GitHub repo under releases.
Navigate to the Ops Manager Installation Dashboard and click Import a Product to upload the product file.
Under the Import a Product button, click the + sign next to the version number of New Relic NGINX Buildpack for Tanzu to add the tile to your staging area.
Click the newly added New Relic NGINX Buildpack for Tanzu tile.
Install and configure the tile in Ops Manager. You can accept the default values to install both buildpacks in your PCF foundation or select the checkbox for any buildpacks you wish to install under Tile Configuration > New Relic Buildpack Selection.
If you make any configuration changes, click the Save button on each tab at the bottom of the page.
In Ops Manager, go to the installation UI and click Apply changes.
Unzip newrelic-nginx-buildpack-*.pivotal into a separate subdirectory:
$unzip newrelic-pcf-nginx-buildpack-*.pivotal -d buildpack_tileChange directory to buildpack_tile/releases:
$cd buildpack_tile/releasesCreate a subdirectory, such as tmp:
$mkdir tmpExtract the tgz file in the releases folder into the tmpdirectory:
$tar xvf newrelic-pcf-nginx-buildpack-*.tgz -C tmpChange directory to tmp/packages:
$cd tmp/packagesExtract any of the individual buildpack .tgz files using the following command:
$tar xvf newrelic_nginx_buildpack_cflinuxfs4.tgzOR
$tar xvf newrelic_nginx_buildpack_cflinuxfs3.tgzThis will create a folder with the name of the buildpack, containing the zipped version of the buildpack.
Upload the zipped buildpack file using the CF CLI's cf create-buildpack command:
$cf create-buildpack newrelic_nginx_buildpack-local newrelic_nginx_buildpack_cflinuxfs4/newrelic_nginx_buildpack-cached-cflinuxfs4-v*.zip 99OR
$cf create-buildpack newrelic_nginx_buildpack-local newrelic_nginx_buildpack_cflinuxfs3/newrelic_nginx_buildpack-cached-cflinuxfs3-v*.zip 99Buildpack build and deploy process
The buildpacks in this tile are pre-built and ready for use in Cloud Foundry. However, if you want to make changes or update the cached version of any buildpacks with newer dependencies, you can build your own copy. Follow the instructions below to build and deploy your own copy.
Build the buildpack
- Clone the buildpack repository to your system:bash$git clone https://github.com/newrelic/newrelic-pcf-nginx-buildpack
- Change directory to the cloned buildpack.
- Source the
.envrcfile in the buildpack directory:bash$source .envrc - Install Bosh CLI and Tile Generator:bash$./scripts/setup.sh
- To build the buildpack, you have two options:
Only build the buildpack:
bash$make clean$make packageThe following buildpacks will be generated:
build/newrelic_nginx_buildpack-cached-cflinuxfs4-v*.zipbuild/newrelic_nginx_buildpack-cached-cflinuxfs3-v*.zipOR
Build the buildpack by creating a tile:
bash$make clean$make allThe following tile will be generated:
product/newrelic-pcf-nginx-buildpack-*.pivotal
Deploy to Cloud Foundry
Upload the buildpack to Cloud Foundry and optionally specify it by name using the CF CLI:
bash$cf create-buildpack newrelic_nginx_buildpack [BUILDPACK_ZIP_FILE_PATH] 99Create a folder named
exampleand download theexample.tar.gzarchive:bash$mkdir example$cd example$wget https://github.com/newrelic/newrelic-pcf-nginx-buildpack/releases/download/v1.0.1/example.tar.gzPush the application using the
cf pushcommand by using themanifest.yml:bash$cf push
(Optional) Bind your application to New Relic Broker Service
To integrate your application with the New Relic Broker Service, follow these steps:
Use the Cloud Foundry CLI to create a New Relic service instance:
bash$cf create-service newrelic <NEWRELIC_PLAN_NAME> <YOUR_NEWRELIC_SERVICE_INSTANCE_NAME>Make sure you replace
<NEWRELIC_PLAN_NAME>with the desired New Relic plan and<YOUR_NEWRELIC_SERVICE_INSTANCE_NAME>with a name for your service instance.Bind your application to the New Relic service instance using the CF CLI:
bash$cf bind-service my_app <YOUR_NEWRELIC_SERVICE_INSTANCE_NAME>Make sure to replace
my_appwith the name of your application and<YOUR_NEWRELIC_SERVICE_INSTANCE_NAME>with the name of the New Relic service instance you created.Specify the New Relic service instance in the
servicessection of your application'smanifest.ymlfile:services:- <YOUR_NEWRELIC_SERVICE_INSTANCE_NAME>Deploy your application with the updated manifest:
bash$cf push
Monitoring with New Relic
Once the application is successfully pushed, the NGINX integration will start sending NGINX metrics to New Relic.
To install the dashboard, follow these UI instructions. Make sure you skip the installation and directly install the dashboard.

You may also explore data further under All entities > On Hosts > NGINX Servers.
Important
The cached version of this integration buildpack contains New Relic infrastructure agent 1.53.0 and New Relic NGINX integration 3.4.6.
Leave us feedback
If you have a feature request, questions, or information about a bug, please submit a GitHub issue.