preview
We're still working on this feature, but we'd love for you to try it out!
If you have questions or feedback, or if you need help during the preview of the .NET agent's Instrumentation editor, send an email to dotnet-li-editor-beta@newrelic.com.
This feature is currently provided as part of a preview program pursuant to our pre-release policies.
Our Instrumentation editor allows .NET app users to implement custom instrumentation from the New Relic user interface without requiring a restart of the instrumented application. This editor:
- Allows authorized users to edit custom instrumentation from the New Relic UI instead of the local XML files.
- Validates against the custom instrumentation schema.
- Provides an option for customers who do not have access to either the application code or hosts on which their applications execute.
Requirements
To use the Instrumentation editor, you must meet the following requirements:
Requirements | Comments |
|---|---|
Agent | .NET agent version 7.0.2 or higher |
Owner or Admin | |
Security | Users of high-security mode cannot use the Instrumentation editor to update instrumentation of their app. |
Define custom instrumentation

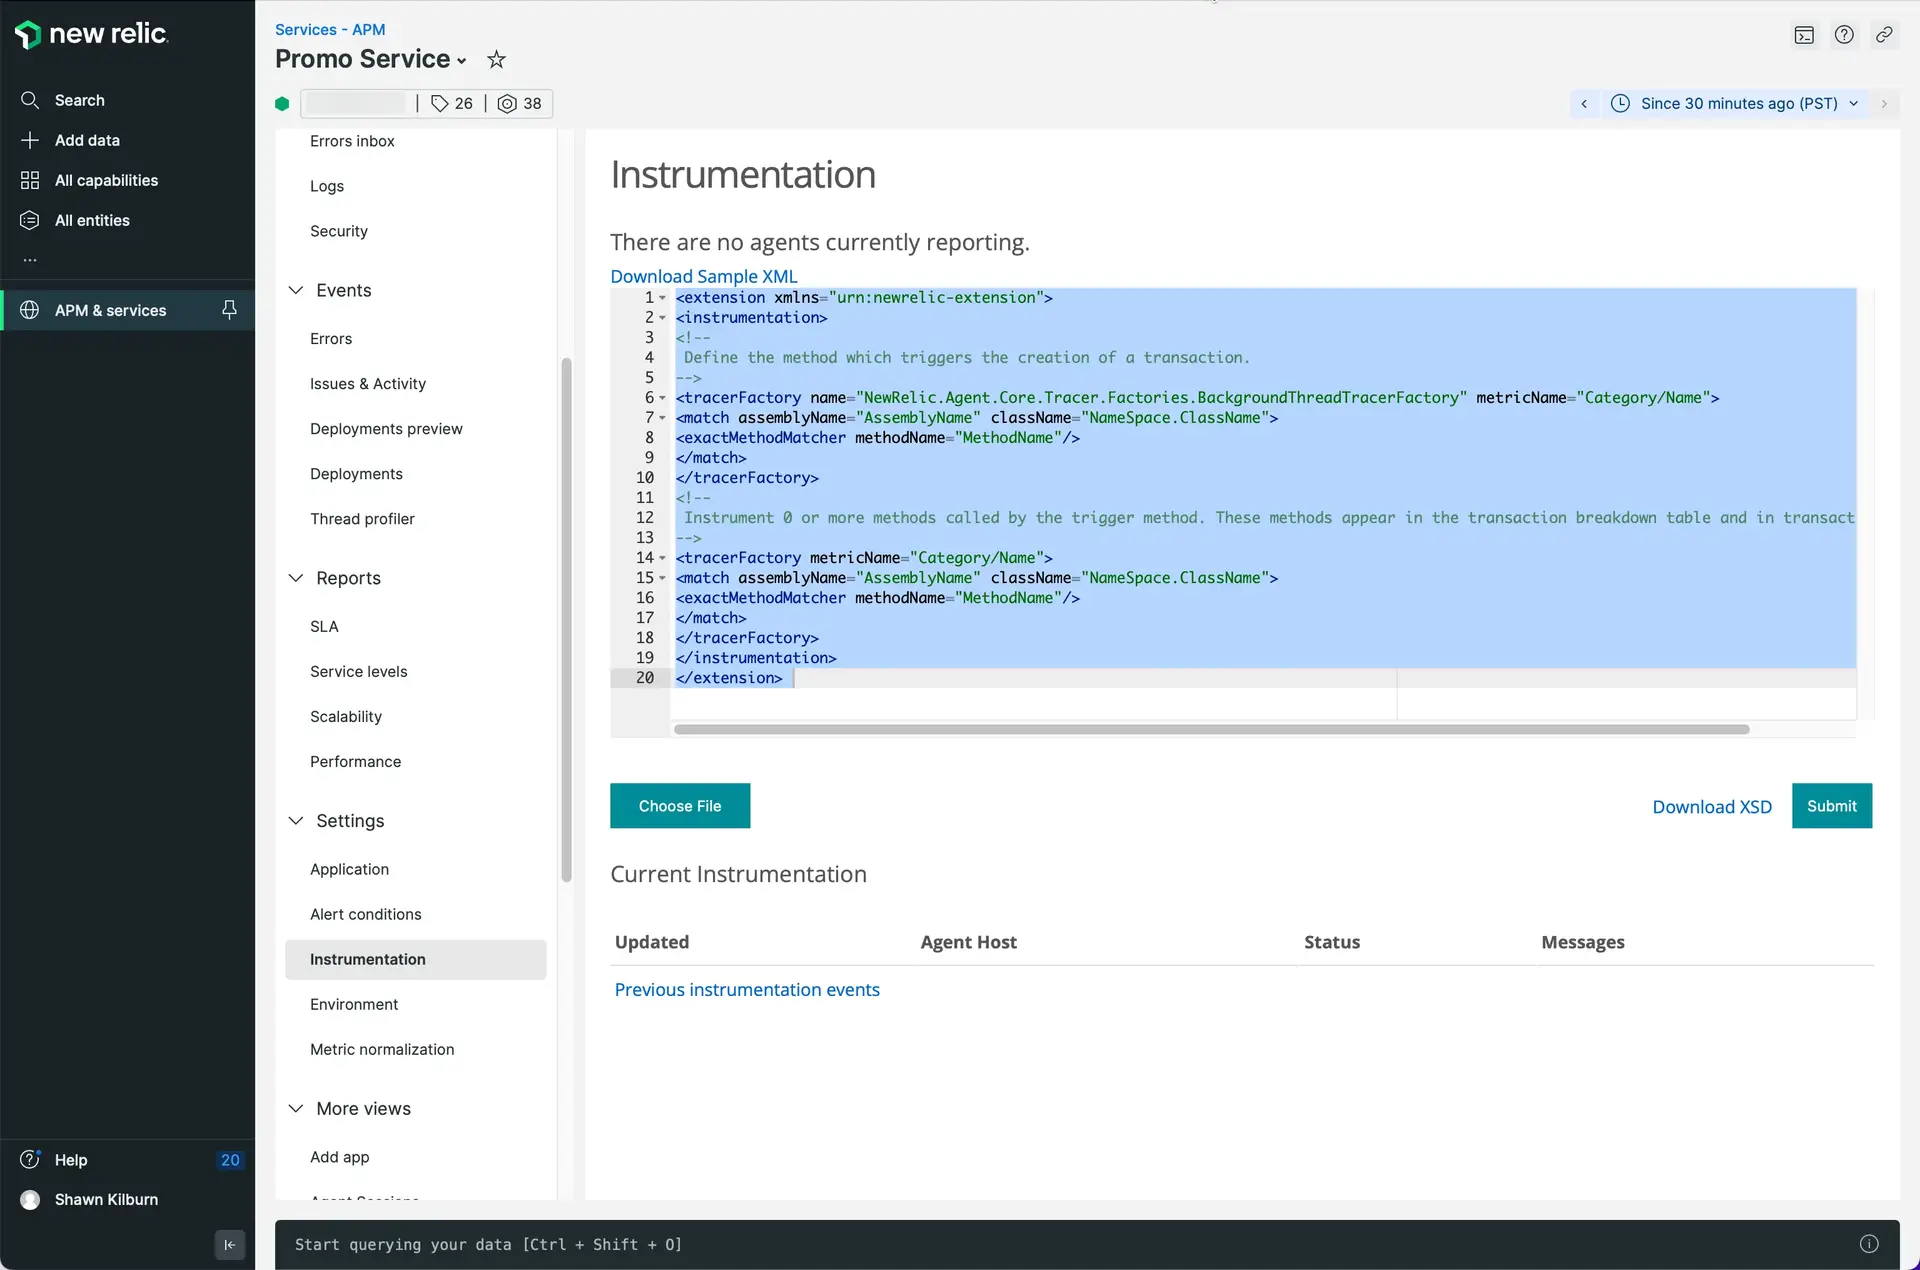
one.newrelic.com > All capabilities > APM & services > (select a .NET app) > Settings > Instrumentation: The Instrumentation editor provides an easy way to view or edit your custom instrumentation in the UI. This XML example shows the assembly name, class name, and method name.
Importante
Deploying live instrumentation causes a brief period of higher overhead. This can noticeably slow application requests for several seconds.
To use the Instrumentation editor:
Go to one.newrelic.com > All capabilities > APM. Find your app, then click Settings > Instrumentation.
Use the Instrumentation editor to provide XML using the same syntax as described for editing local .xml instrumentation files and adding instrumentation detail. Use any of these options from the UI:
- Type in XML code directly.
- Copy the code and paste it in from a clipboard.
- Click Download Sample XML to create a sample instrumentation file as a starting point.
- Upload an .xml file by selecting Choose file. For an example, see Example MyInstrumentation.xml.
The Instrumentation editor validates your XML code as you type. To perform XML validation outside of the editor, select Download XSD, and use the XSD file with your favorite XML validation tool to diagnose problems.
To deploy the changes, select Submit.
View instrumentation results
The .NET agent will begin the new instrumentation within a few harvest cycles (typically a few minutes). The Current instrumentation section of the Instrumentation UI will show the status of applied changes.
The XML from the Instrumentation editor is combined with the XML that exists in the local instrumentation files on the machine running the agent. The agent periodically looks for changes in the final (combined) XML and picks them up dynamically, without requiring a restart of the agent or application.