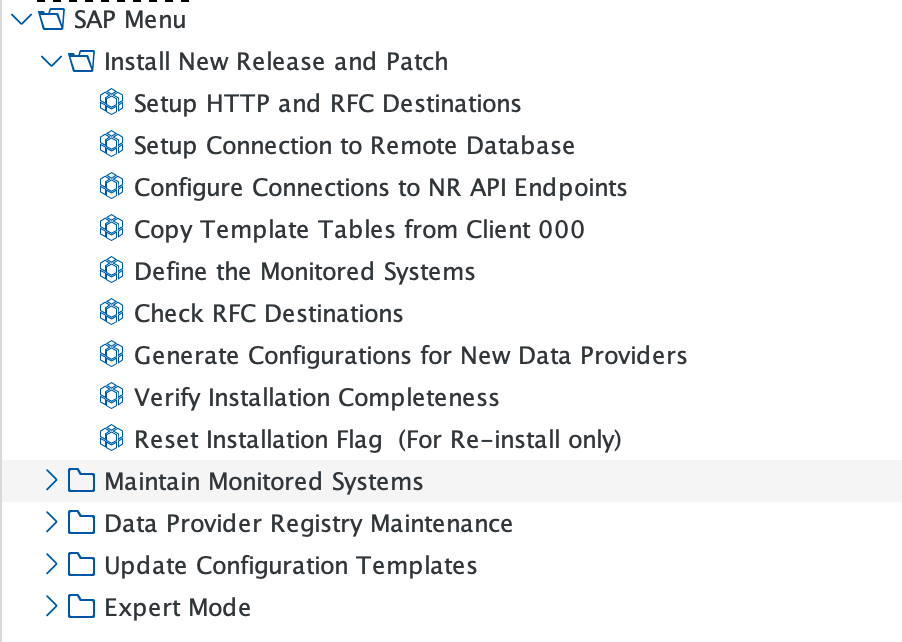
Using the /NEWR/INSTALL menu
Log in to the production client of the central monitoring system.
Start the data provider setup by accessing the area
/NEWR/INSTALLmenu.Navigate to the SAP Easy Access root menu before starting the area menu by typing
/n/NEWR/INSTALLin the command field.Tip
If you're unsure whether you are at the SAP Easy Access root menu, type in
/nand press Enter.
After successfully installing the add-on on the central monitoring system:
Ensure the installer has proper authorization to perform the configuration.
Note the new transaction code introduced by the add-on package, listed in Transaction Code for NRM4SAP Installation and Configuration.
Add the parameter
/NEWR/*to the code authorization object(s) in the installer'sprofile/role.Tip
If upgrading from a previous version, refer Upgrade from Previous Version to determine which steps are necessary.
Connect systems and generate configurations
Important
Complete the configuration steps before installation if they have not yet been completed.
Set up HTTP and RFC Destinations: Use this option to invoke transaction
SM59and verify your RFC and HTTPS connections.Setup Connection to Remote Database:
- Use SAP transaction DBACOCKPIT to verify the setup of connections to remote HANA databases.
- Ensure that a database connection is created for each remote HANA database you wish to monitor.
- For detailed instructions, see Create Database Connection.

Configure Connections to NR API Endpoints:
- Click New Entries.
- Enter the New Relic Account ID (optionally prefixed with SAP-), API Ingest Key, Metric Endpoint, Event Endpoint, Log Endpoint, and Trace Endpoint for the New Relic account.
- Click Save.

Copy Template Tables from Client 000: Execute this option to copy the table from client 000 by clicking the
 icon, and confirm success with the success message.
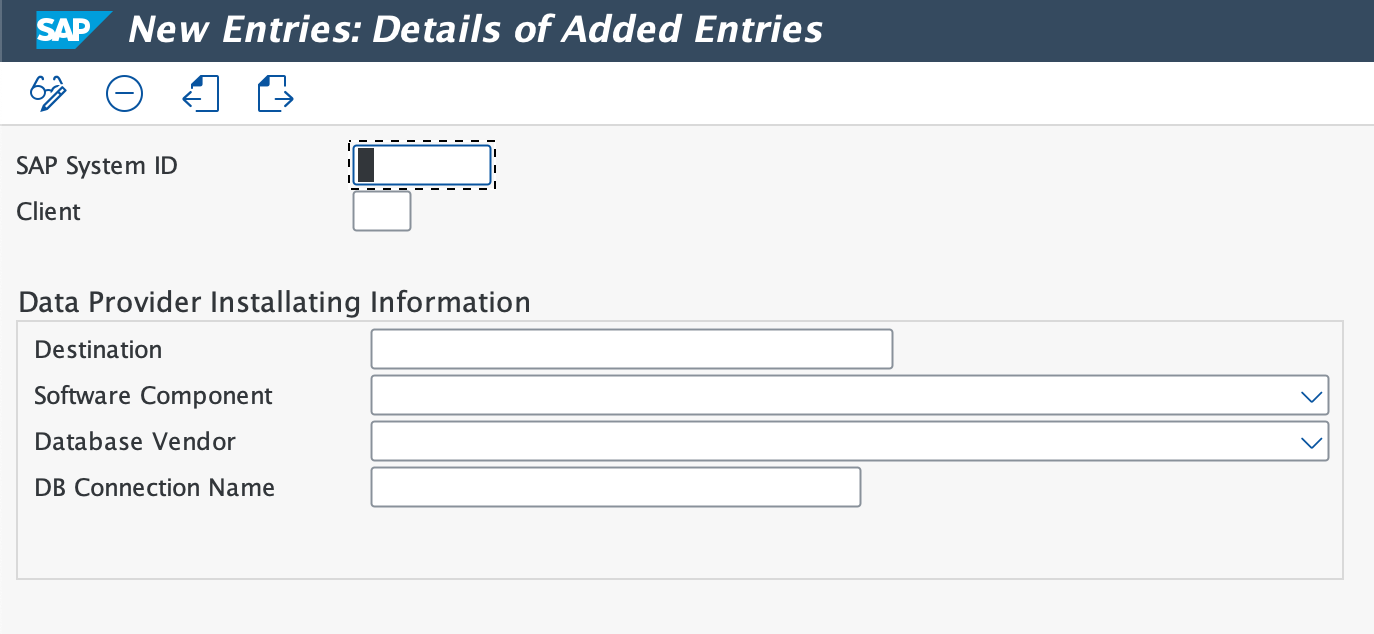
Define the Monitored Systems: Use this option to define the monitored systems.
Click New Entries to enter the SAP System ID and Client number.
In Data Provider Installation Information, specify the RFC Destination, select the SAP Software Component, enter the Database Vendor, and provide the DB Connection Name (HANA database only).
Click Monitoring Group, select Yes in the dialog box to confirm.
Choose the necessary monitoring groups, and click the
 to complete the process.
Click BACK or the F3 key to go to the next step.

Tip
Maintain the list of Monitoring Groups by navigating to Expert Mode > Installation Setups > Monitoring Group Maintenance. For a complete list of data providers in each monitoring group, see the Data Providers Reference.
Check RFC Destinations: Use this menu option to test RFC destinations for all monitored systems and NR API endpoints, except for 'NONE'.
Generate Configurations for New Data Providers:
- Use this menu option to generate data providers for a new release or patch. For fresh installations, all Data Providers (DP) are generated.
- On the first screen, confirm the release and patch details; empty fields indicate pre-existing configuration.
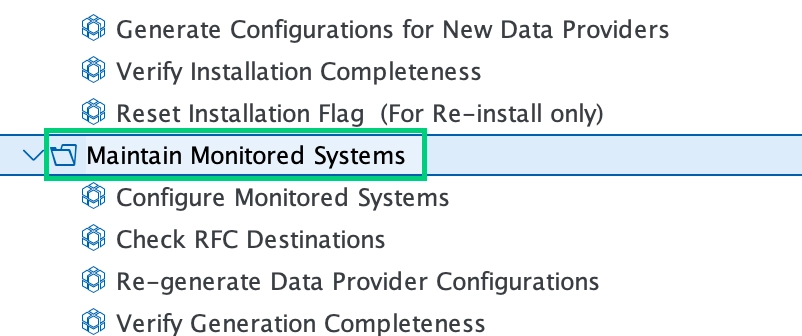
- To regenerate, select Re-generate Data Provider Configurations in Maintain Monitored Systems or use Reset Installation Flag (For Re-install only) to reset the installation flag and regenerate configurations.

Verify Installation Completeness: Click Verify Installation Completeness to ensure everything is configured correctly. If any item displays a red indicator, click the execution button in the Action Needed column.
