Feature Availability
Fleet Control for Kubernetes clusters is generally available (GA). Support for managing agents on hosts is currently in public preview.
For a complete list of supported agents and their environments, see our agent type compatibility documentation.
The public preview feature is provided pursuant to our pre-release policies.
This guide provides the fastest path to getting started with Fleet Control. We'll walk you through the essential "happy path" workflow to create your first fleet and run a basic deployment.
Workflow overview
The setup process for Fleet Control has a specific order. You must create a fleet before you can install Agent Control, because the installation process requires a fleet to associate with. Once Agent Control is installed, the entity is automatically assigned to that fleet. Therefore, the workflow is:
- Create a fleet in the New Relic platform.
- Install Agent Control on your entities. The installation wizard uses your fleet's details to assign each entity, making it an "Assigned Managed Entity."
- Run a deployment to install and configure agents on the entities that are now part of your fleet.
Prerequisites
You will need the Organization Manager role or a custom role with the equivalent fleet management permissions to perform these actions.
Step 1: Create your first fleet
The first step is to create a fleet. In Fleet Control, a fleet is a homogeneous collection of managed entities (like Kubernetes clusters) that share identical instrumentation configurations. Fleets act as logical groupings, allowing you to manage agent versions and configurations consistently across your environment at scale, preventing configuration drift and observability gaps.
- Log into the New Relic platform under the appropriate account.
- Navigate to All capabilities → New Relic Control.
- Tip: You can pin New Relic Control to the left-hand navigation bar for easy access by clicking the pin icon.
- From the New Relic Control menu, select Fleets under the Fleet Control section.
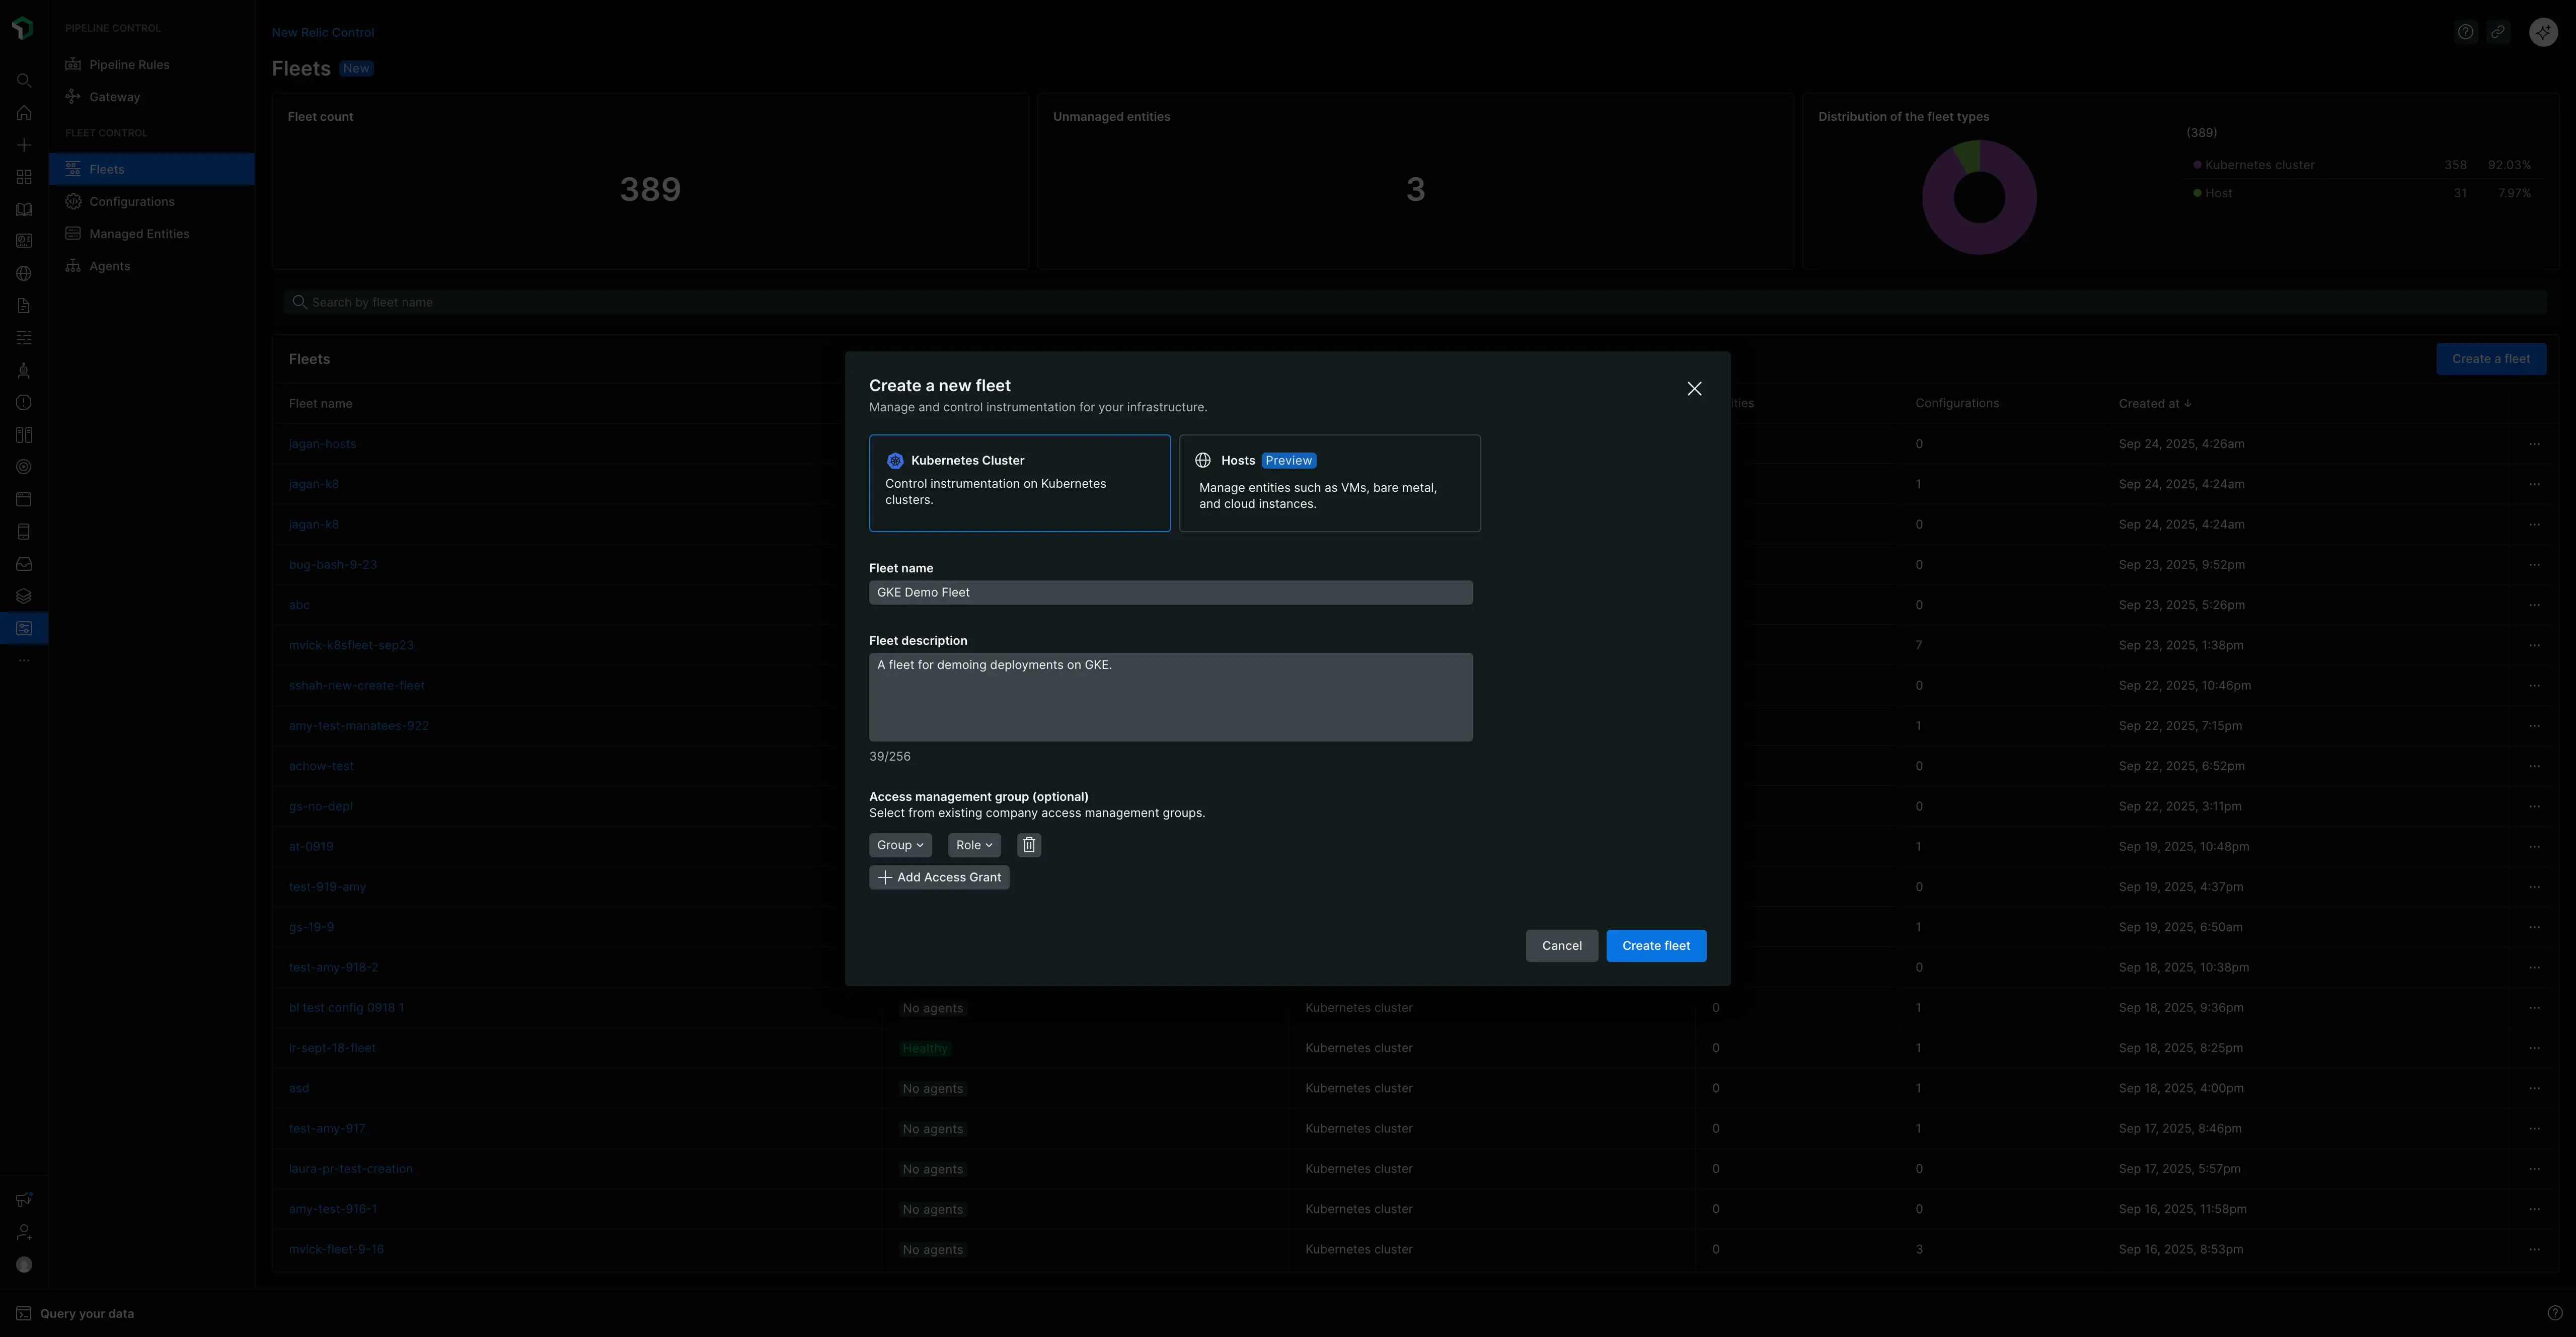
- On the main Fleets page, click the Create a fleet button.
- In the modal:
- Give your fleet a meaningful Name (for example,
prod-us-east-1-platform-k8s) and an optional Description. - Select the Type of Fleet. For this guide, we'll select Kubernetes, which is generally available. Host support is currently in public preview.
- Leave Access management as the default. This is an optional setting for FGA (fine-grained access control).
- Give your fleet a meaningful Name (for example,
- Click Create Fleet.

With the fleet created, you now have the necessary component to proceed with installing Agent Control.
Step 2: Install Agent Control
Now that your fleet exists, install Agent Control on the entities you want to associate with it.
Follow the instructions in the Agent Control setup documentation. The wizard provides a values.yaml file and Helm command that installs Agent Control and assigns the managed entity to the fleet you just created. Once complete, your entities will appear as Assigned Managed Entities within your fleet.
Step 3: Create an agent configuration
Before you deploy the New Relic Infrastructure agent, you need to create a configuration for it. Any configurations you create are saved globally and become available for use across your New Relic account.
- In the New Relic Control left-hand menu, click Configurations.
- Click the Create configuration button.
- In the modal:
- For Environment, select Kubernetes.
- For Agent type, select New Relic Infrastructure.
- Give the configuration a meaningful, unique name. Since configurations are global, a clear name is important. For example:
New Relic default infra config.
- Click Continue.
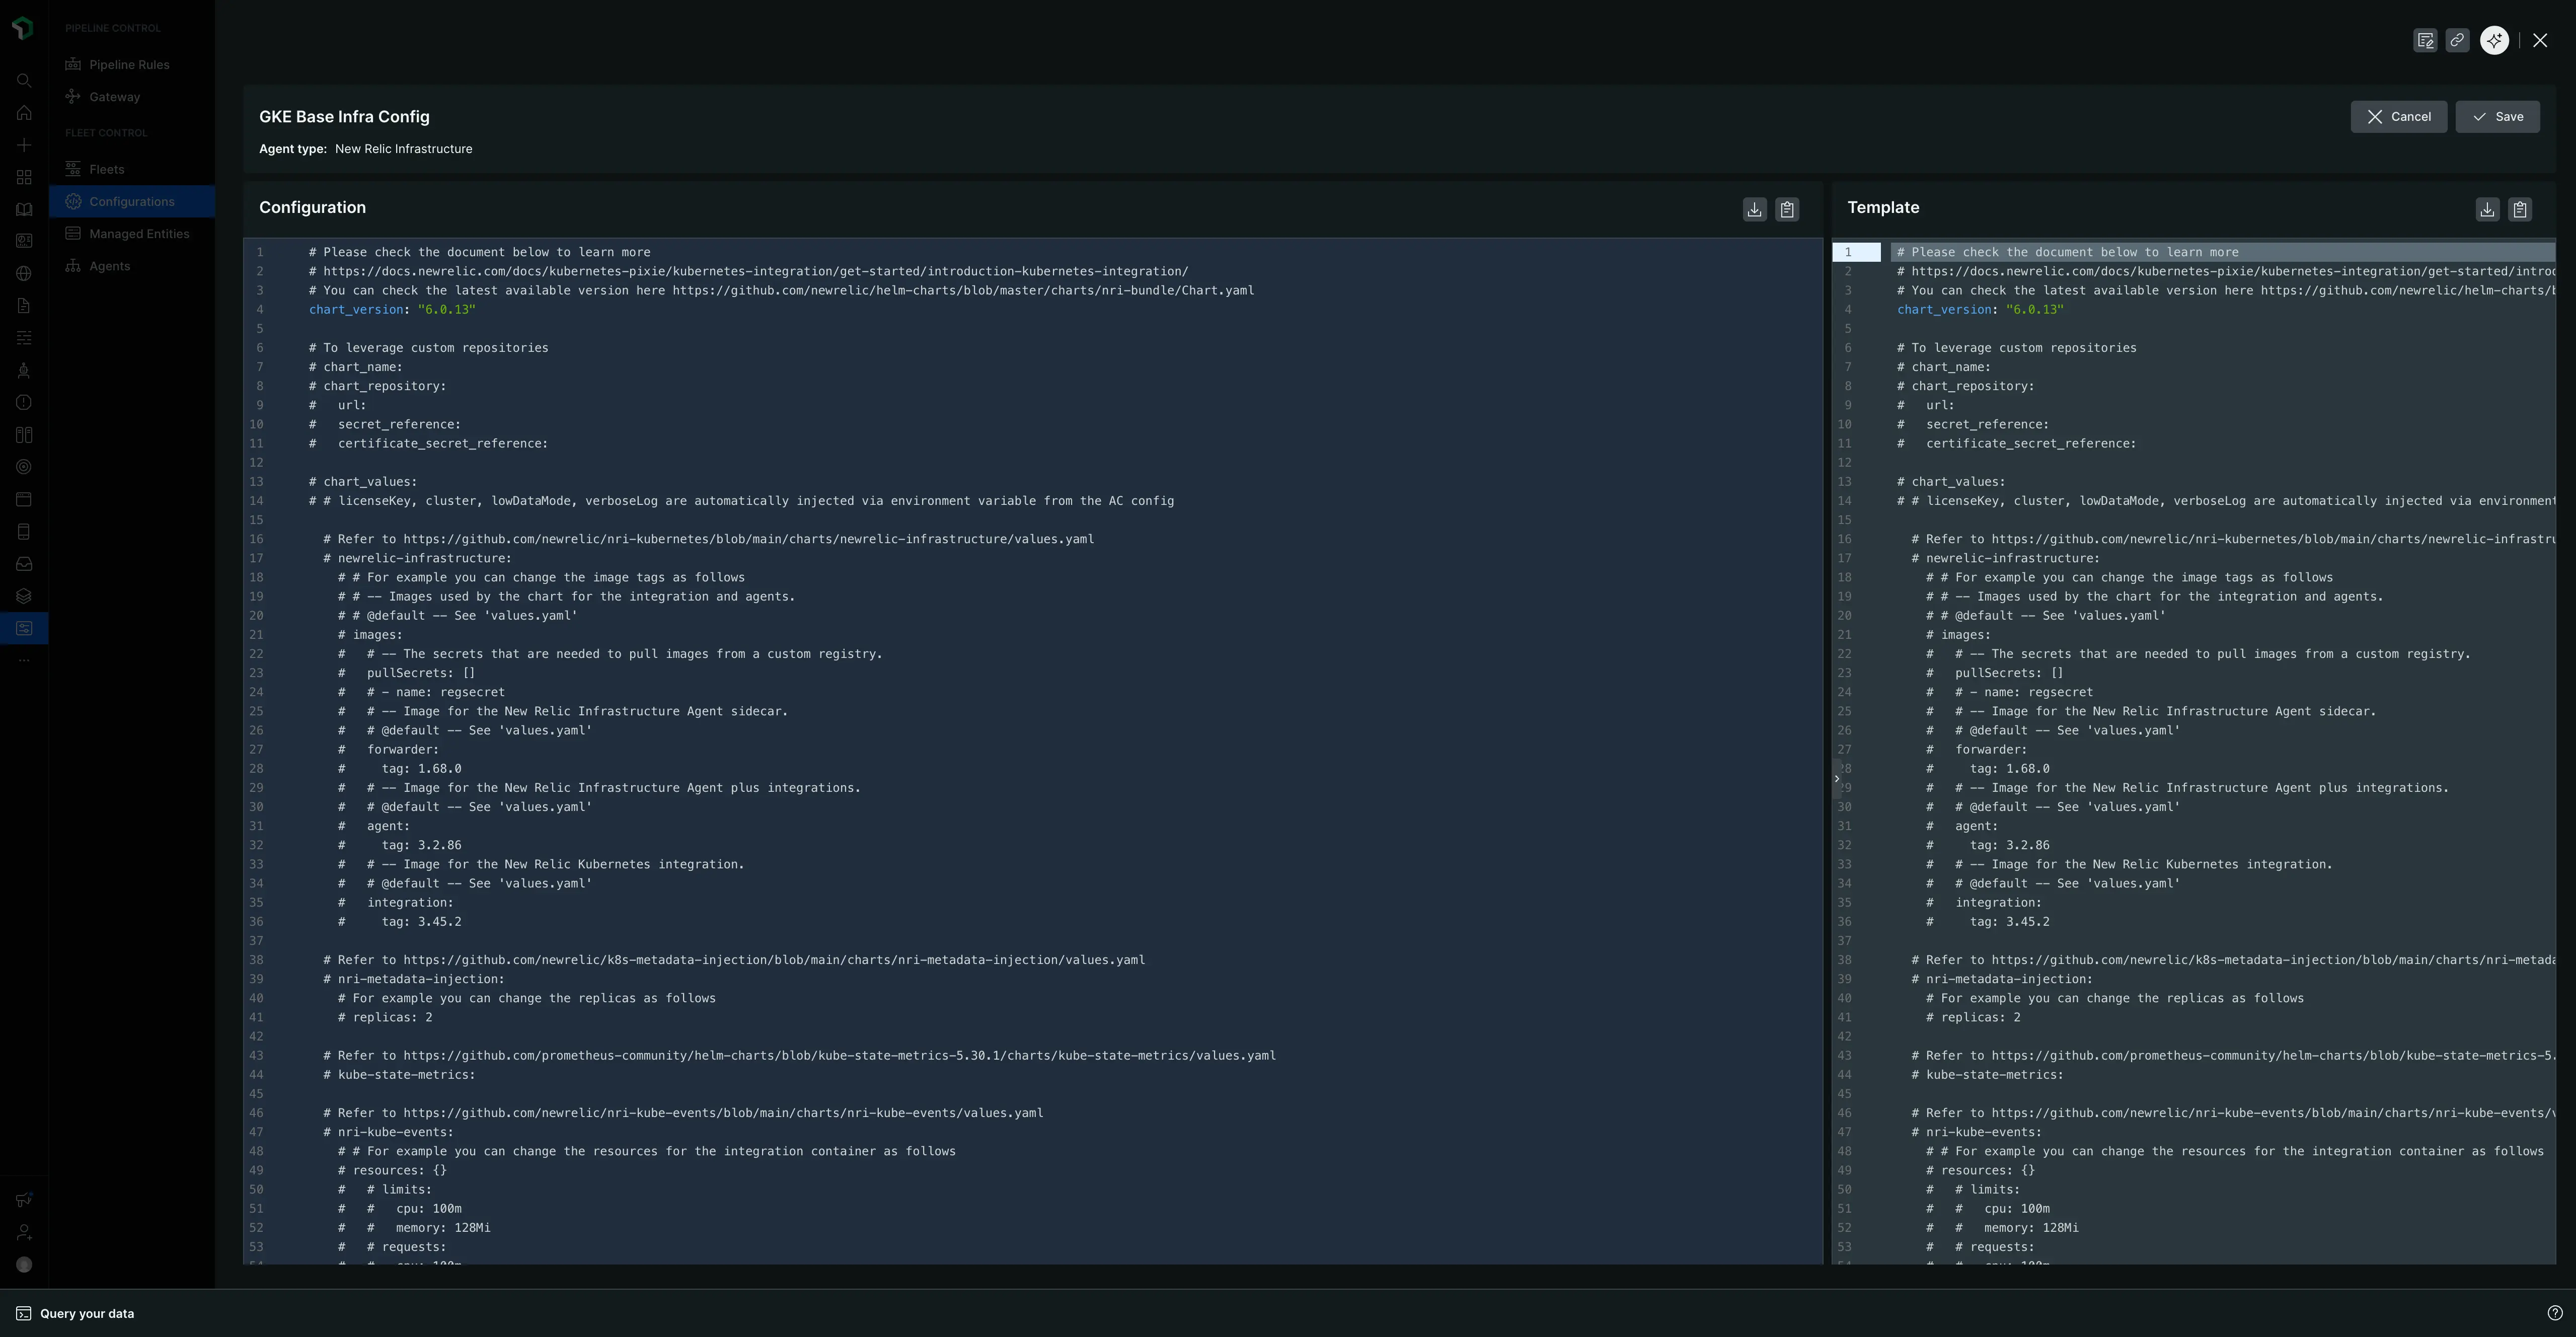
- You'll see two panels. The right panel contains a default template. Click the Copy button to copy the entire template.
- Paste the copied text into the left configuration panel.
- Click Save. Your configuration is now saved globally.

Step 4: Create and run your first deployment
A deployment is a controlled set of actions that can install, delete, or configure agents on the managed entities in your fleet. Now you'll create one to deploy the New Relic Infrastructure agent.
- Navigate back to the Fleets tab and select the fleet you created earlier.
- On the fleet's summary page, click Create a deployment. (If the fleet has existing deployments, go to the Deployments tab and click Create deployment).
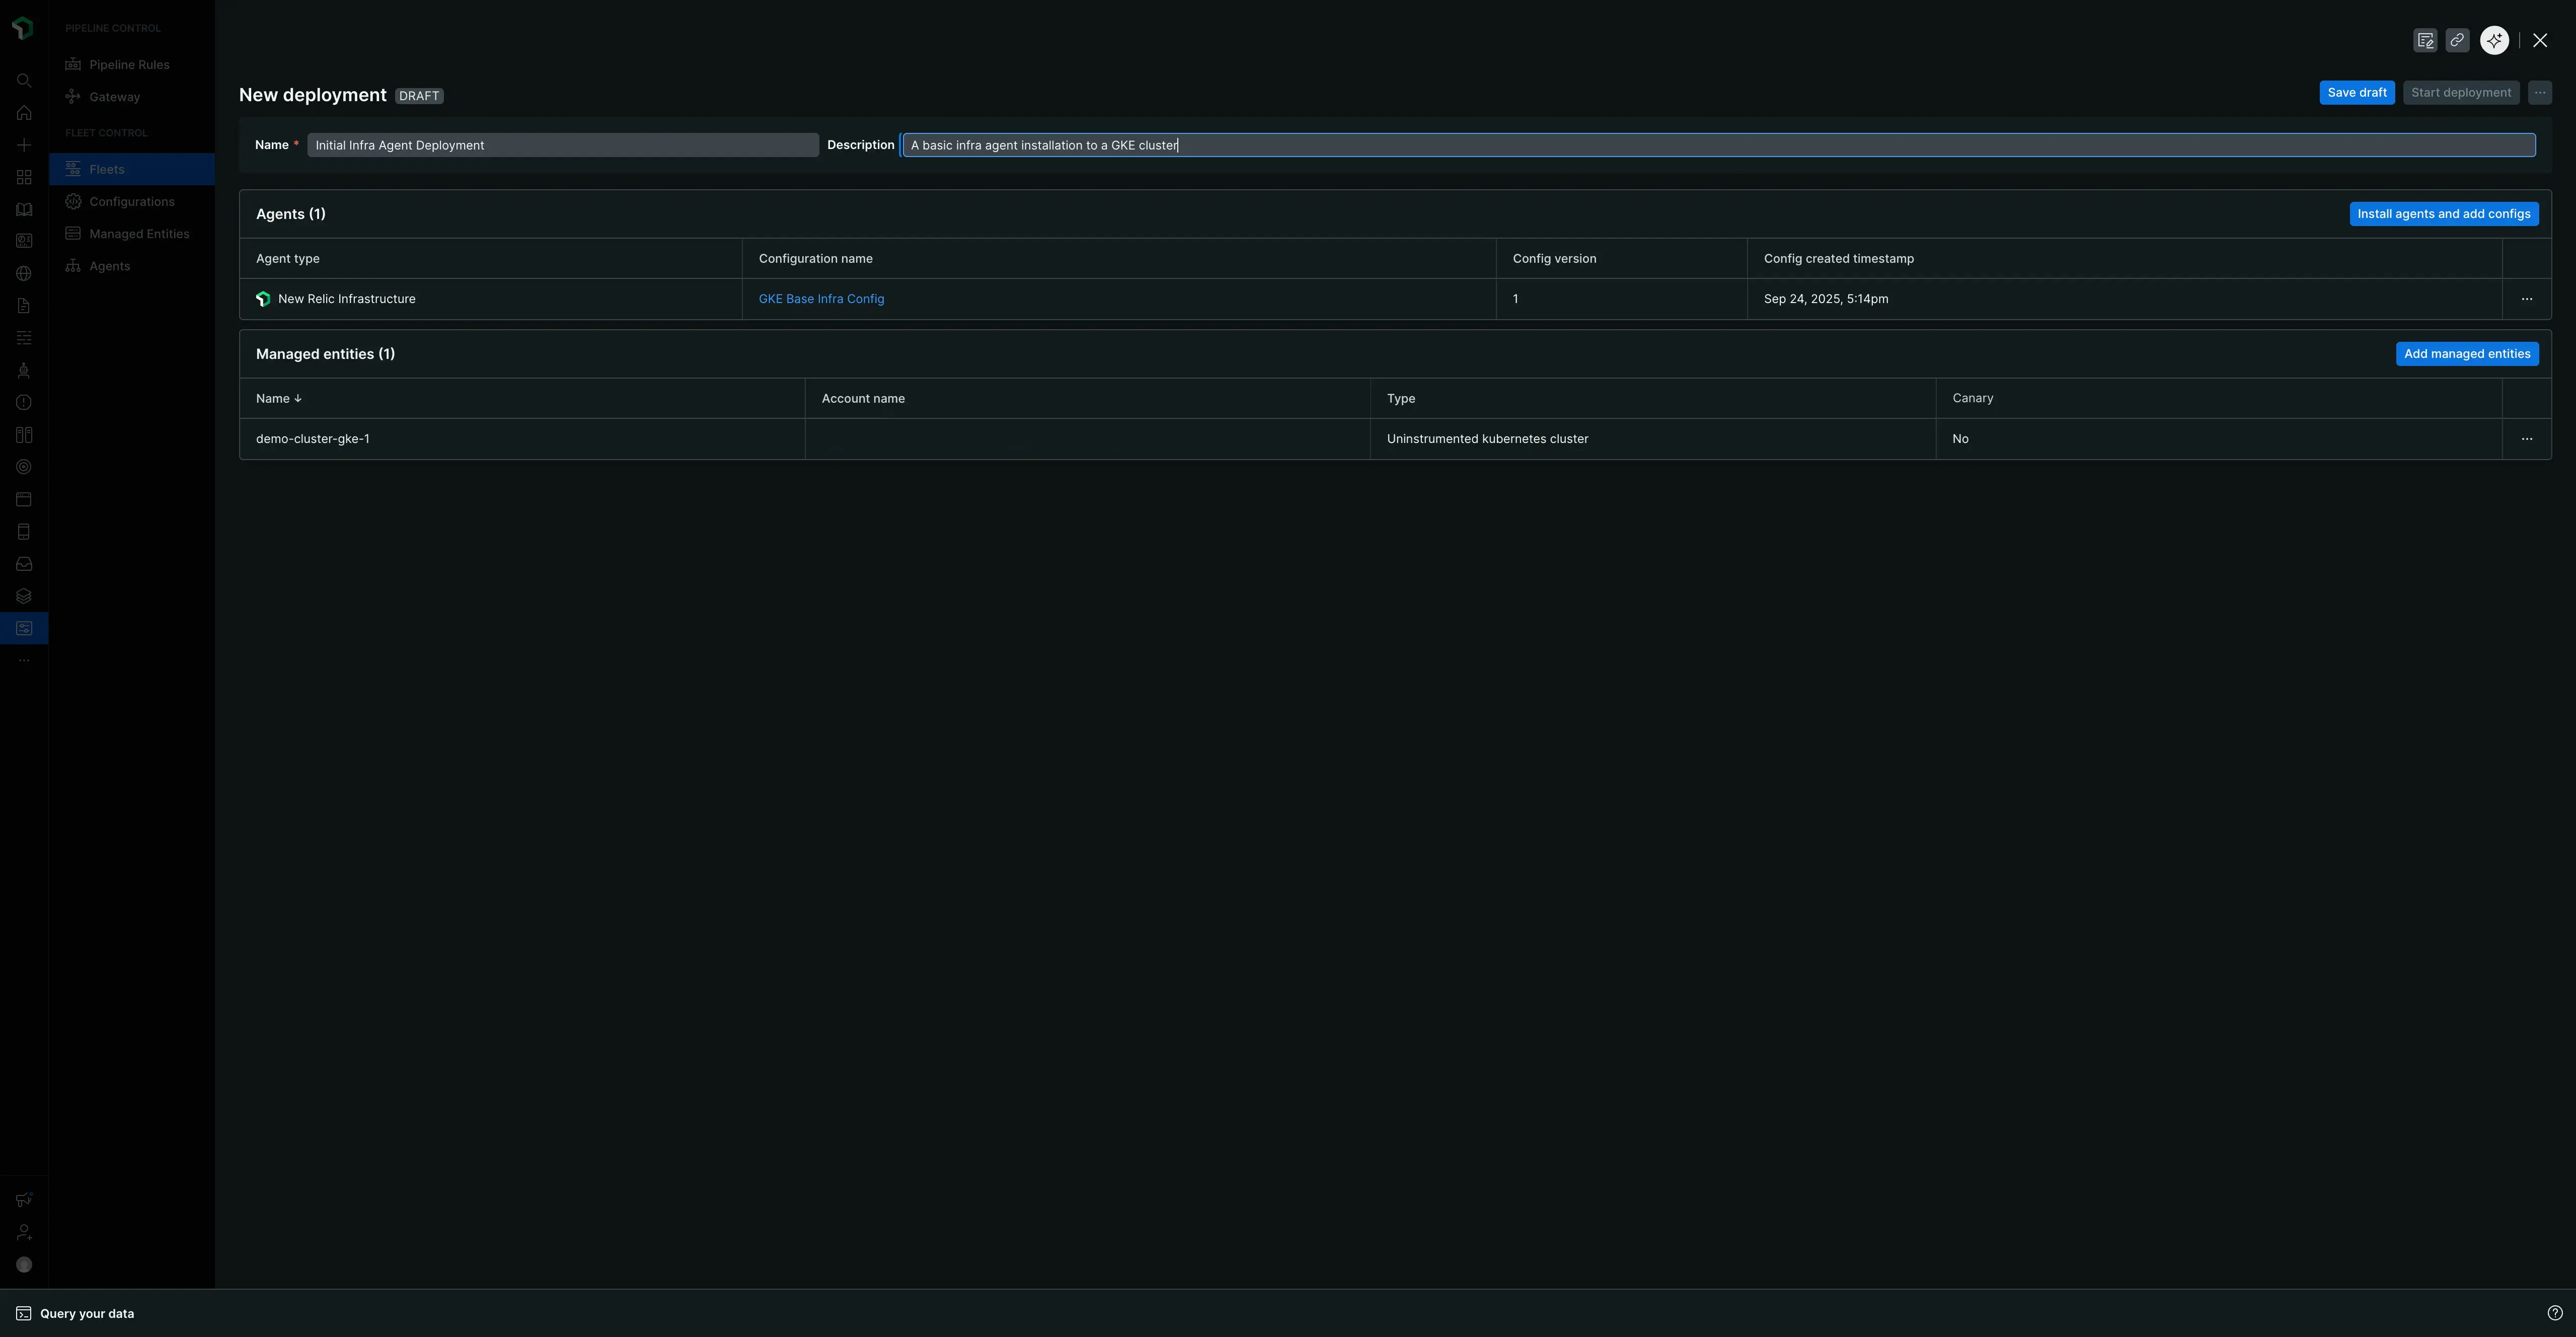
- Give your deployment a mandatory Name. A meaningful name provides historical context and helps with troubleshooting. Consider a pattern that includes the change, a version, or a ticket ID. For example:
v1.0-initial-infra-deployoradd-logging-JIRA-123. - Click Add an agent.
- Select the agent type you created the configuration for: New Relic Infrastructure.
- From the list of available configurations, select the
New Relic default infra configyou just created. The version will default tov1. - Click Add to deployment. The agent and its associated configuration will now appear in a table called Agents.
- Click Save draft.
- When you're ready, click Start deployment. A confirmation modal will appear.
- In the modal, click Start deployment to launch.

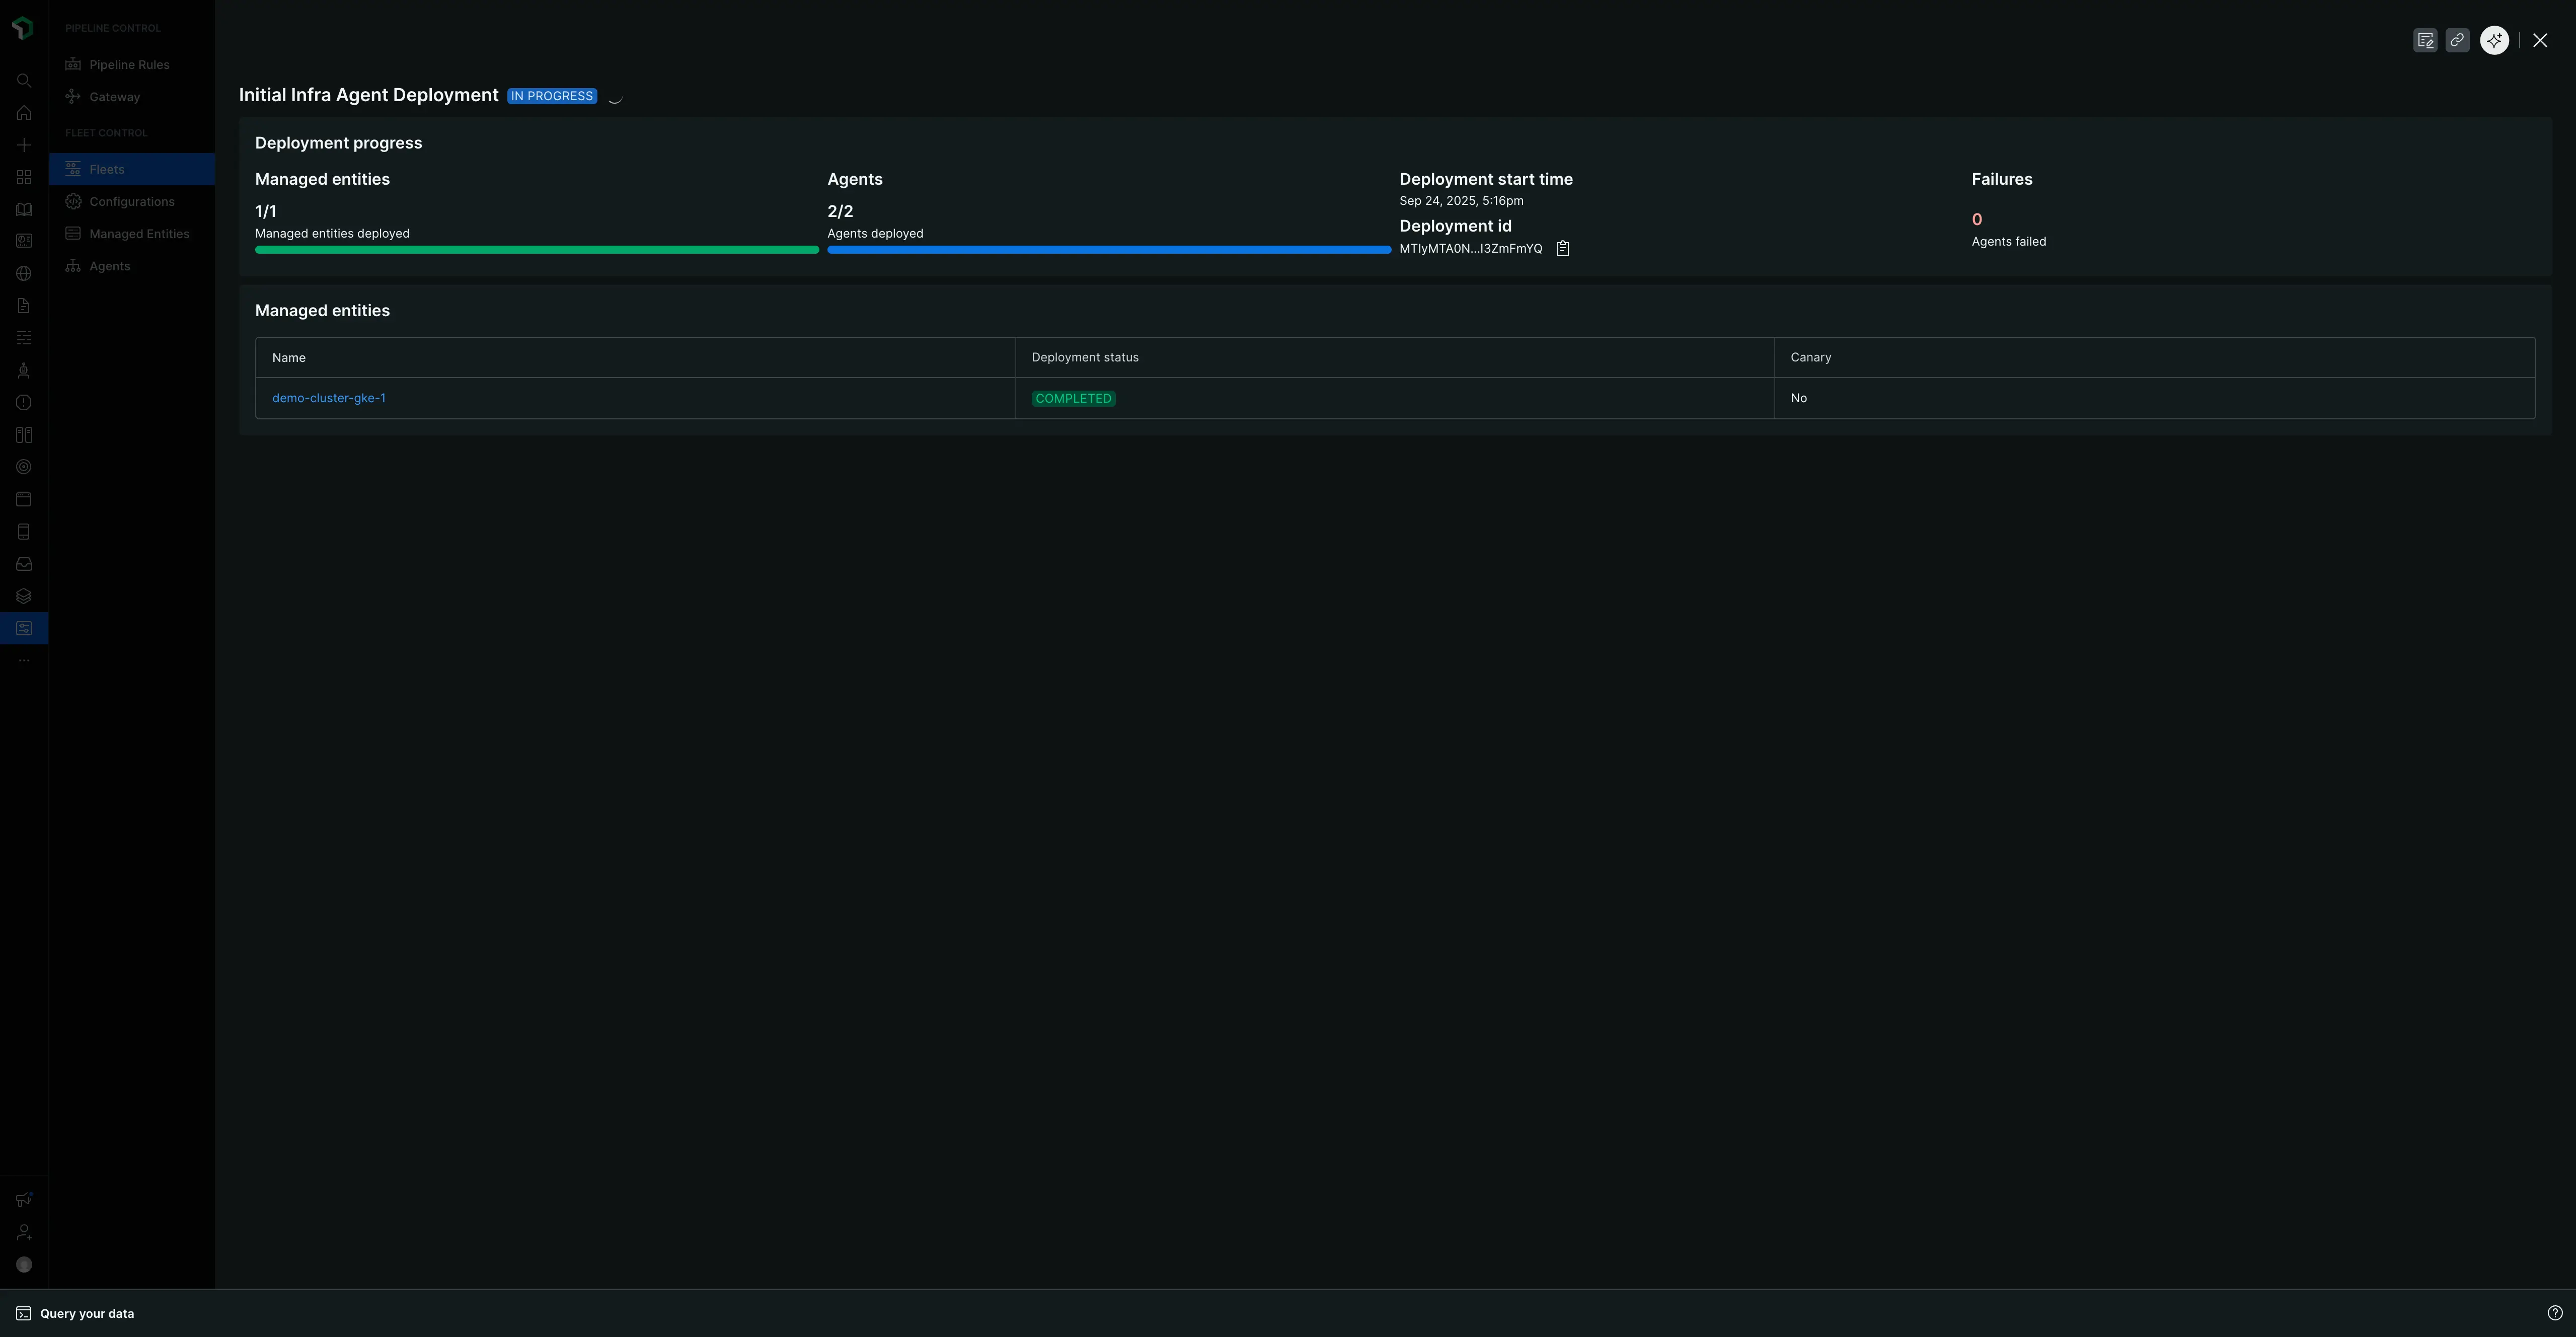
An "IN PROGRESS" screen will show the status, the number of managed entities and agents affected, and a deployment ID. When complete, the page will update with a "Completed" status and summary tables detailing the deployment, the agents, and the specific managed entities that were instrumented.

Next steps
Congratulations on deploying your first fleet! You've learned the core workflow for managing your instrumentation at scale.
To build on what you've learned, explore our page on Managing fleets. It provides additional details on the more nuanced, day-to-day features of Fleet Control, including how to:
- Author and version your agent configurations.
- Manage your fleet's details and settings.
- Use the top-level Managed Entities tab to see all your infrastructure with Agent Control installed, including both assigned and unassigned entities.
- Dive into a specific fleet to view the effective configuration on its Agents tab and understand the different deployment and instrumentation statuses.