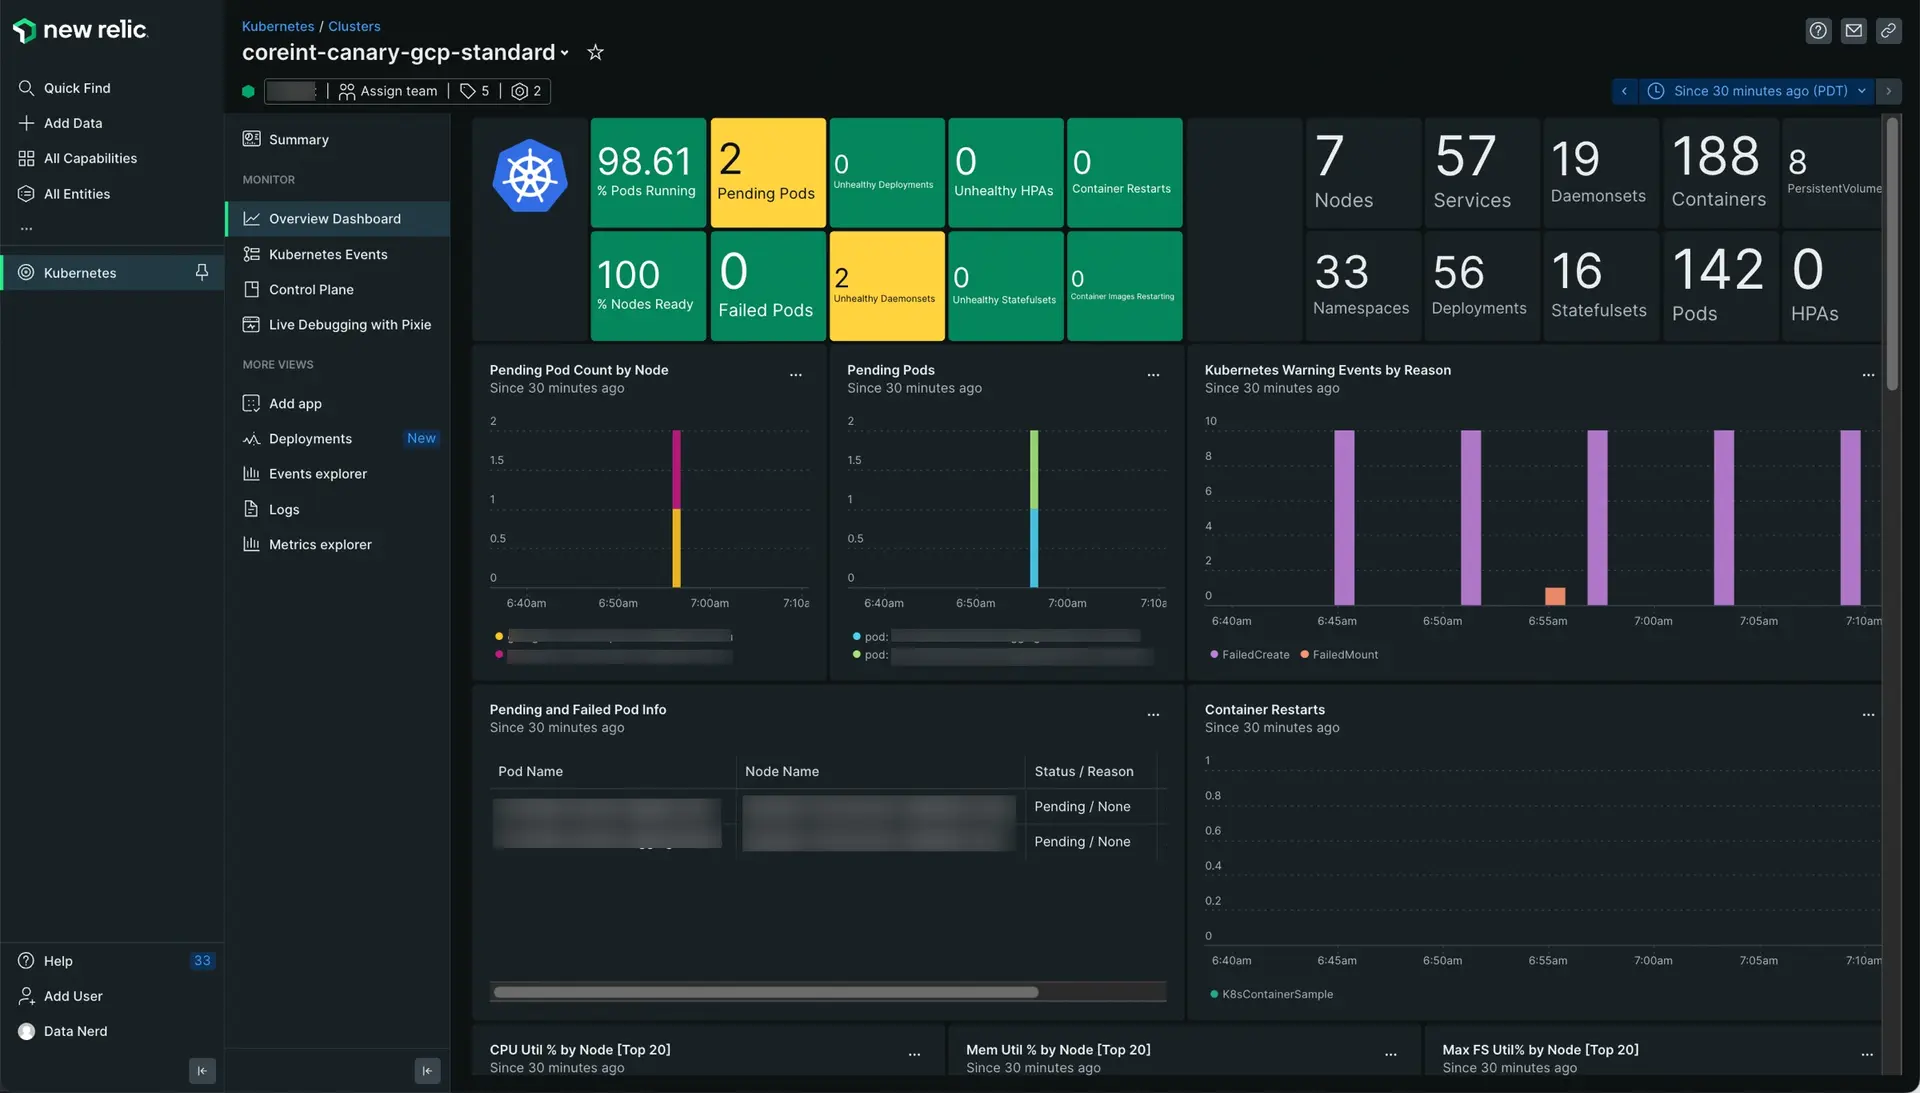
The New Relic Kubernetes integration gives you full observability into the health and performance of your environment by leveraging the New Relic infrastructure agent. This agent collects telemetry data from your cluster using several New Relic integrations such as the Kubernetes events integration, the Prometheus Agent, and the New Relic Logs Kubernetes plugin.
Installation options
To install our Kubernetes integration, we recommend that you follow the instructions here for our guided install experience. We recommend this interactive installation tool for servers, VMs, and unprivileged environments.
The guided install experience simplifies the installation process for the New Relic Kubernetes integration, and gives you control over which features are enabled and what data is collected. It also offers a quickstart option that includes some optional, pre-built resources such as dashboards and alerts alongside the Kubernetes integration so that you can gain instant visibility into your Kubernetes clusters.
You can choose from one of the following three options:
- New Relic CLI
- A Helm command with pre-populated required values
- A plain manifest
Navigating the Kubernetes integration guided install
Once you start the guided install, use the following information to help you make decisions about the configurations.
Tip
The steps that follow skip the preliminary steps for the quickstart. If you chose the guided install with the quickstart, just click through the pages Confirm your Kubernetes quickstart installation and Installation plan to reach the main guided install pages described below.
Prepare to install
Prepare your Kubernetes system for the guided install:
If custom manifests have been used instead of Helm, you will need to first remove the old installation using
kubectl delete -f previous-manifest-file.yml
, and then proceed through the guided installer again. This will generate an updated set of manifests that can be deployed usingkubectl apply -f manifest-file.yml
.Make sure you're using the supported Kubernetes versions and make sure to check out the preliminary notes for your managed services or platforms on our compatibility and requirements page.
Make sure you have your New Relic . You can set up a free account—no credit card required.
Make sure the newrelic dockerhub (
https://hub.docker.com/u/newrelic
) and Google's registry (registry.k8s.io
) domains are added to your allow list. This is where the installation will pull container images from. Note, you may need to follow the commands to identify the additional Google registry domains to be added to your white list, becauseregistry.k8s.io
typically redirects to your local registry domain (e.g.,asia-northeast1-docker.pkg.dev
) based on your region.If you're installing our integration on a managed cloud, please take a look at these preliminary notes before proceeding:
Begin the guided install
Begin your guided install by clicking one of the options below:
Guided install option | Description |
---|---|
Use this if your New Relic organization does not use the EU data center, and you don't need the bonus dashboards and alerts from the quickstart. | |
Use this if your New Relic organization uses the EU data center, and you don't need the bonus dashboards and alerts from the quickstart. | |
Use this option if your New Relic organization does not use the EU data center, and you also want to install some bonus dashboards and alerts from the quickstart. |
Configure your install
On the page Configure the Kubernetes Integration complete the following fields:
Field | Description |
---|---|
We'll send your data to this account | Choose the New Relic account that you want your Kubernetes data written to. |
Cluster name | Cluster name is the name we will use to tag your Kubernetes data with so that you can filter for the data specific to the cluster you're installing this integration in. This is important if you choose to connect multiple clusters to your New Relic account so choose a name that you'll recognize. |
Namespace for the integration | Namespace for the integration is the namespace we will use to house the Kubernetes integration in your cluster. We recommend using the default namespace of |
Select additional data
On the page Select the additional data you want to gather, choose the options that are right for you:
Scrape Prometheus endpoints
By selecting this option, we will install Prometheus in agent mode to collect metrics from the Prometheus endpoints exposed in your cluster. Expand the collapsers to see details about each option:
Gather log data
Enable service-level insights, full-body requests, and application profiles through Pixie
Pixie is an open source observability tool for Kubernetes applications that uses eBPF to automatically collect telemetry data. If you don't have Pixie installed on your cluster, but want to leverage Pixie's powerful telemetry data collection and visualization on the New Relic platform, check Enable service-level insights, full-body requests, and application profiles through Pixie.
If you're already using Community Cloud, select Community Cloud hosted Pixie is already running on this cluster. Keep the following in mind about the different ways Pixie can be hosted. New Relic provides a different level of integration support for each Pixie hosting option.
Finish your install
Finalize the Kubernetes installation setup by choosing one of the following installation methods in the last step of the guided install:
Guided Install (recommended): This option will automatically download and use the
newrelic-cli
CLI to install and configure the Kubernetes integration.Helm 3: Use this option if you prefer using Helm to install and configure the Kubernetes integration. This option installs the
nri-bundle
Helm chart, which you can further configure with the options described here. This is also where you can enable the New Relic operator.Manifest: Select this option if you prefer generating a Kubernetes manifest in YAML format and manually installing it with
kubectl
.Tip
Not seeing data? If you completed the steps above and are still not seeing data, check out this troubleshooting page.
Use this option when you have a Windows-based Kubernetes system. Note that there are various limitations to the Windows integration.
preview
This feature is currently in preview.
Compatibility and requirements
Before you install the Kubernetes integration, review the compatibility and requirements.
Important
When using containers in Windows, the container host version and the container image version must be the same. Our Kubernetes integration can run on Windows versions LTSC 2019 (1809), 20H2, and LTSC 2022.
To check your Windows version:
- Open a command window.
- Run the following command:
$Reg Query "HKLM\SOFTWARE\Microsoft\Windows NT\CurrentVersion" /v$ReleaseIdcmd.exe
Example: Get Kubernetes for Windows from a BusyBox container
Run this command:
$kubectl exec -it busybox1-766bb4d6cc-rmsnj -- Reg Query$"HKLM\SOFTWARE\Microsoft\Windows NT\CurrentVersion" /v ReleaseId
You should see something like this:
$HKEY_LOCAL_MACHINE\SOFTWARE\Microsoft\Windows NT\CurrentVersion$ReleaseId REG_SZ 1809
For a useful mapping between release IDs and OS versions, see here.
Install
You can install the Kubernetes integration for Windows using Helm. See an example on how to install the integration in a cluster with nodes having different build versions of Windows (1809 and 2004):
- Add the New Relic Helm charts repo:
$helm repo add newrelic https://helm-charts.newrelic.com
- Create a namespace for newrelic:
$kubectl create namespace newrelic
- Install kube-state-metrics.
$helm repo add ksm https://kubernetes.github.io/kube-state-metrics$helm install ksm ksm/kube-state-metrics --version 2.13.2
Important
This command is for installing kube-state-metrics, a mandatory dependency of the integration, on a Linux node. We don't support installing this for non-Linux nodes, and if you install it on a non-Linux node, deployment might fail. We recommend using nodeSelector
to choose a Linux node. This can be done by editing kube-state-metrics deployment.
- Create a
values-newrelic.yaml
file with the follow data to be used by Helm:
global: licenseKey: _YOUR_NEW_RELIC_LICENSE_KEY_ cluster: _K8S_CLUSTER_NAME_
enableLinux: true # Set to true if your cluster also has linux nodesenableWindows: truewindowsOsList: - version: 2019 # Human-readable version identifier imageTag: 2-windows-1809-alpha # Tag to be used for nodes running the windows version above buildNumber: 10.0.17763 # Build number for your nodes running the version above. Used as a selector. - version: 20h2 imageTag: 2-windows-20H2-alpha buildNumber: 10.0.19042 - version: 2022 imageTag: 2-windows-ltsc2022-alpha buildNumber: 10.0.20348nodeSelector: kubernetes.io/os: linux # Selector for Linux installation.windowsNodeSelector: kubernetes.io/os: windows # Selector for Windows installation.
- Install the integration with:
$helm upgrade --install newrelic newrelic/newrelic-infrastructure \>--namespace newrelic --create-namespace \>--version 2.7.2 \>-f values-newrelic.yaml
- Check that pods are being deployed and reach a stable state:
$kubectl -n newrelic get pods -w
The Helm chart will create one DaemonSet per each version of Windows that is in the list and use NodeSelector to deploy the corresponding Pod per Node.
Limitations
The following limitations apply to the Kubernetes integration for Windows:
- The Windows agent only sends the Kubernetes samples (
K8sNodeSample
,K8sPodSample
, etc.) SystemSample
,StorageSample
,NetworkSample
, andProcessSample
are not generated.- Some Kubernetes metrics are missing because the Windows kubelet doesn’t have them:
- Node:
fsInodes
: not sentfsInodesFree
: not sentfsInodesUsed
: not sentmemoryMajorPageFaultsPerSecond
: always returns zero as a valuememoryPageFaults
: always returns zero as a valuememoryRssBytes
: always returns zero as a valueruntimeInodes
: not sentruntimeInodesFree
: not sentruntimeInodesUsed
: not sent- Pod:
net.errorsPerSecond
: not sentnet.rxBytesPerSecond
: not sentnet.txBytesPerSecond
: not sent- Container:
containerID
: not sentcontainerImageID
: not sentmemoryUsedBytes
: in the UI, this is displayed in the pod card that appears when you click on a pod, and will show no data. We will soon fix this by updating our charts to usememoryWorkingSetBytes
instead.- Volume:
fsUsedBytes
: zero, sofsUsedPercent
is zero
Known issues with the Windows Kubelet
There are a couple of issues with the Windows version of Kubelet that can prevent the integration from fetching data:
- Issue 90554: This issue makes the Kubelet return 500 errors when the integration makes a request to the
/stats/summary
endpoint. It will be included in the Kubernetes 1.19 release and has been backported to the releases 1.16.11, 1.17.7, and 1.18.4. There is no solution on the integration side for this problem, we advise you to update to one of the patch versions as soon as possible. You can see if you're being affected by this problem by enabling verbose logs and looking for messages of the type:
$error querying Kubelet. Get "https://<KUBELET_IP>/stats/summary": error calling kubelet endpoint. Got status code: 500
- Issue 87730: This issue makes the Kubelet metrics very slow when running minimal load. It makes the integration fail with a timeout error. A patch for this issue has been added for Kubernetes 1.18 and backported to 1.15.12, 1.16.9, and 1.17.5. We advise you to update to one of the patch versions as soon as possible. To mitigate this issue you can increase the integration timeout with the
TIMEOUT
config option. You can see if you're being affected by this problem by enabling verbose logs and looking for messages of the type:
$error querying Kubelet. Get "https://<KUBELET_IP>/stats/summary": context deadline exceeded (Client.Timeout exceeded while awaiting headers)
Use this option when monitoring Kubernetes workloads on EKS Fargate. This integration automatically injects a sidecar containing the infrastructure agent and the nri-kubernetes integration in each pod that needs to be monitored.
Preview
This feature is currently in preview.
New Relic supports monitoring Kubernetes workloads on EKS Fargate by automatically injecting a sidecar containing the infrastructure agent and the nri-kubernetes
integration in each pod that needs to be monitored.
If the same Kubernetes cluster also contains EC2 nodes, our solution will also be deployed as a DaemonSet
in all of them. No sidecar will be injected into pods scheduled in EC2 nodes, and no DaemonSet
will be deployed to Fargate nodes. Here's an example of a hybrid instance with both Fargate and EC2 nodes:
In a mixed environment, the integration only uses a sidecar for Fargate nodes.
New Relic collects all the supported metrics for all Kubernetes objects regardless of where they are scheduled, whether it's Fargate or EC2 nodes. Please note that, due to the limitations imposed by Fargate, the New Relic integration is limited to running in unprivileged mode on Fargate nodes. This means that metrics that are usually fetched from the host directly, like running processes, will not be available for Fargate nodes.
The agent in both scenarios will scrape data from Kube State Metrics (KSM), Kubelet, and cAdvisor and send data in the same format.
Important
Just like for any other Kubernetes cluster, our solution still requires you to deploy and monitor a Kube State Metrics (KSM) instance. Our Helm Chart and/or installer will do so automatically by default, although this behavior can be disabled if your cluster already has a working instance of KSM. This KSM instance will be monitored as any other workload: By injecting a sidecar if it gets scheduled in a Fargate node or with the local instance of the DaemonSet
if it gets scheduled on an EC2 node.
Other components of the New Relic solution for Kubernetes, such as nri-prometheus
, nri-metadata-injection
, and nri-kube-events
, do not have any particularities and will be deployed by our Helm Chart normally as they would in non-Fargate environments.
Installation
You can choose between two alternatives for installing New Relic full observability in your EKS Fargate cluster:
Regardless of the approach you choose, the experience is exactly the same after it's installed. The only difference is how the container is injected. We do recommend setting up automatic injection with the New Relic infrastructure monitoring operator because it will eliminate the need to manually edit each deployment you want to monitor.
Automatic injection (recommended)
By default, when Fargate support is enabled, New Relic will deploy an operator to the cluster (newrelic-infra-operator
). Once deployed, this operator will automatically inject the monitoring sidecar to pods that are scheduled into Fargate nodes, while also managing the creation and the update of Secrets
, ClusterRoleBindings
, and any other related resources.
This operator accepts a variety of advanced configuration options that can be used to narrow or widen the scope of the injection, through the use of label selectors for both pods and namespaces.
What the operator does
Behind the scenes, the operator sets up a MutatingWebhookConfiguration
, which allows it to modify the pod objects that are about to be created in the cluster. On this event, and when the pod being created matches the user’s configuration, the operator will:
- Add a sidecar container to the pod containing the New Relic Kubernetes integration.
- If a secret doesn't exist, create one in the same namespace as the pod containing the New Relic , which is needed for the sidecar to report data.
- Add the pod's service account to a
ClusterRoleBinding
previously created by the operator chart, which will grant this sidecar the required permissions to hit the Kubernetes metrics endpoints.
The ClusterRoleBinding
grants the following permissions to the pod being injected:
rules:- apiGroups: [""] resources: - "nodes" - "nodes/metrics" - "nodes/stats" - "nodes/proxy" - "pods" - "services" - "namespaces" verbs: ["get", "list"]- nonResourceURLs: ["/metrics"] verbs: ["get"]
Tip
In order for the sidecar to be injected, and therefore to get metrics from pods deployed before the operator has been installed, you need to manually perform a rollout (restart) of the affected deployments. This way, when the pods are created, the operator will be able to inject the monitoring sidecar. New Relic has chosen not to do this automatically in order to prevent unexpected service disruptions and resource usage spikes.
Important
Remember to create a Fargate profile with a selector that declares the newrelic
namespace (or the namespace you choose for the installation).
Here's the injection workflow:
Automatic injection installation
Tip
The following steps are for a default setup. Before completing these, we suggest you take a look at the Configuration section below to see if you want to modify any aspects of the automatic injection.
First, add the New Relic Helm repository if you have not done so before:
$helm repo add newrelic https://helm-charts.newrelic.com
Then, in order to install the operator in charge of injecting the infrastructure sidecar, please create a file named values.yaml
, which will be used to define your configuration:
## Global valuesglobal: # -- The cluster name for the Kubernetes cluster. cluster: "_YOUR_K8S_CLUSTER_NAME_"
# -- The license key for your New Relic Account. This will be preferred configuration option if both `licenseKey` and `customSecret` are specified. licenseKey: "_YOUR_NEW_RELIC_LICENSE_KEY_"
# -- (bool) In each integration it has different behavior. Enables operating system metric collection on each EC2 K8s node. Not applicable to Fargate nodes. # @default -- false privileged: true
# -- (bool) Must be set to `true` when deploying in an EKS Fargate environment # @default -- false fargate: true
## Enable nri-bundle sub-charts
newrelic-infra-operator: # Deploys the infrastructure operator, which injects the monitoring sidecar into Fargate pods enabled: true tolerations: - key: "eks.amazonaws.com/compute-type" operator: "Equal" value: "fargate" effect: "NoSchedule" config: ignoreMutationErrors: true infraAgentInjection: # Injection policies can be defined here. See [values file](https://github.com/newrelic/newrelic-infra-operator/blob/main/charts/newrelic-infra-operator/values.yaml#L114-L125) for more detail. policies: - namespaceName: namespace-a - namespaceName: namespace-b
newrelic-infrastructure: # Deploys the Infrastructure Daemonset to EC2 nodes. Disable for Fargate-only clusters. enabled: true
nri-metadata-injection: # Deploy our mutating admission webhook to link APM and Kubernetes entities enabled: true
kube-state-metrics: # Deploys Kube State Metrics. Disable if you are already running KSM in your cluster. enabled: true
nri-kube-events: # Deploy the Kubernetes events integration. enabled: true
newrelic-logging: # Deploys the New Relic's Fluent Bit daemonset to EC2 nodes. Disable for Fargate-only clusters. enabled: true
newrelic-prometheus-agent: # Deploys the Prometheus agent for scraping Prometheus endpoints. enabled: true config: kubernetes: integrations_filter: enabled: true source_labels: ["app.kubernetes.io/name", "app.newrelic.io/name", "k8s-app"] app_values: ["redis", "traefik", "calico", "nginx", "coredns", "kube-dns", "etcd", "cockroachdb", "velero", "harbor", "argocd", "istio"]
Finally, after creating and tweaking the file, you can deploy the solution using the following Helm command:
$helm upgrade --install newrelic-bundle newrelic/nri-bundle -n newrelic --create-namespace -f values.yaml
Important
When deploying the solution on a hybrid cluster (with both EC2 and Fargate nodes), please make sure that the solution is not selected by any Fargate profiles; otherwise, the DaemonSet
instances will be stuck in a pending state. For fargate-only environments this is not a concern because no DaemonSet
instances are created.
Configuration
You can configure different aspects of the automatic injection. By default, the operator will inject the monitoring sidecar to all pods deployed in Fargate nodes which are not part of a Job
or a BatchJob
.
This behavior can be changed through configuration options. For example, you can define selectors to narrow or widen the selection of pods that are injected, assign resources to the operator, and tune the sidecar. Also, you can add other attributes, labels, and environment variables. Please refer to the chart README.md and values.yaml.
Important
Specifying your own custom injection rules will discard the default ruleset that prevents sidecar injection on pods that are not scheduled in Fargate. Please ensure that your custom rules have the same effect; otherwise, on hybrid clusters which also have the DaemonSet
deployed, pods scheduled in EC2 will be monitored twice, leading to incorrect or duplicate data.
Update to the latest version or to a new configuration
To update to the latest version of the EKS Fargate integration, upgrade the Helm repository using helm repo update newrelic
and reinstall the bundle by simply running again the command above.
To update the configuration of the infrastructure agent injected or the operator itself, modify the values-newrelic.yaml
and upgrade the Helm release with the new configuration. The operator is updated immediately, and your workloads will be instrumented with the new version on their next restart. If you wish to upgrade them immediately, you can force a restart of your workloads by running:
$kubectl rollout restart deployment YOUR_APP
Uninstall the Fargate integration
In order to uninstall the sidecar performing the automatic injection but keep the rest of the New Relic solution, using Helm, disable the infra-operator by setting infra-operator.enabled
to false
, either in the values.yaml
file or in the command line (--set
), and re-run the installation command above.
We strongly recommend keeping the --set global.fargate=true
flag, since it does not enable automatic injection but makes other components of the installation Fargate-aware, preventing unwanted behavior.
To uninstall the whole solution:
- Completely uninstall the Helm release.
- Rollout the pods in order to remove the sidecar:
$kubectl rollout restart deployment YOUR_APP
- Garbage collect the secrets:
$kubectl delete secrets -n YOUR_NAMESPACE -l newrelic/infra-operator-created=true
Known limitations: automatic injection
Here are some issues to be aware of when using automatic injection:
Currently there is no controller that watches the whole cluster to make sure that secrets that are no longer needed are garbage collected. However, all objects share the same label that you can use to remove all resources, if needed. We inject the label
newrelic/infra-operator-created: true
, which you can use to delete resources with a single command.At the moment, it's not possible to use the injected sidecar to monitor services running in the pod. The sidecar will only monitor Kubernetes itself. However, advanced users might want to exclude these pods from automatic injection and manually inject a customized version of the sidecar with on-host integrations enabled by configuring them and mounting their configurations in the proper place. For help, see this tutorial.
Manual injection
If you have any concerns about the automatic injection, you can inject the sidecar manually directly by modifying the manifests of the workloads scheduled that are going to be scheduled on Fargate nodes. Please note that adding the sidecar into deployments scheduled into EC2 nodes may lead into incorrect or duplicate data, especially if those nodes are already being monitored with the DaemonSet
.
The following objects are required for the sidecar to successfully report data:
- The
ClusterRole
providing the permission needed by thenri-kubernetes
integration - A
ClusterRoleBinding
linking theClusterRole
and the service account of the pod - The secret storing the New Relic
licenseKey
in each Fargate namespace - The sidecar container in the spec template of the monitored workload
Manual injection installation
Tip
These manual setup steps are for a generic installation. Before completing these, take a look at the Configuration section below to see if you want to modify any aspects of the automatic injection.
Complete the following for manual injection:
- If
ClusterRole
doesn't exist, create it and grant the permissions required to hit the metrics endpoints. This only needs to be done once, even for monitoring multiple applications in the same cluster.
- For each workload you want to monitor, add an additional sidecar container for the
newrelic/infrastructure-k8s
image. Here is an example of an injected sidecar.
- Create a
ClusterRoleBinding
, or add to a previously created one theServiceAccount
of the application that is going to be monitored. All the workloads may share the sameClusterRoleBinding
, but theServiceAccount
of each one must be added to it.
- Create a secret containing the New Relic . Each namespace needs its own secret.
Configuration
When adding the manifest of the sidecar agent manually, you can use any agent configuration option to configure the agent behavior. For help, see Infrastructure agent configuration settings.
Update to the latest version
To update any of the components, you just need to modify the deployed yaml.
Updating any of the fields of the injected container will cause the pod to be re-created.
Important
The agent cannot hot load the New Relic . After updating the secret, you need to rollout the deployments again.
Uninstall the Fargate integration
To remove the injected container and the related resources, you just have to remove the following:
- The sidecar from the workloads that should be no longer monitored.
- All the secrets containing the newrelic license.
ClusterRole
andClusterRoleBinding
objects.
Notice that removing the sidecar container will cause the pod to be re-created.
Logging
New Relic logging isn't available on Fargate nodes because of security constraints imposed by AWS, but here are some logging options:
- If you're using Fluentbit for logging, see Kubernetes plugin for log forwarding.
- If your log data is already being monitored by AWS FireLens, see AWS FireLens plugin for log forwarding.
- If your log data is already being monitored by Amazon CloudWatch Logs, see Stream logs using Kinesis Data Firehose.
- See AWS Lambda for sending CloudWatch logs.
- See Three ways to forward logs from Amazon ECS to New Relic.
Troubleshooting
DaemonSet replicas are being deployed into Fargate nodes
If you notice that any Infra DaemonSet
replicas are being scheduled on Fargate nodes, it might be because the nodeAffinity
rules are not configured properly.
Double-check that the solution was installed with the global.fargate
option to true
, either through the command line (--set global.fargate=true
) or in the values.yaml
file. If the installation method was not Helm, you’ll need to manually add nodeAffinity
rules to exclude Fargate nodes.
Event FailedScheduling
due to untolerated taint
Remember to add in the values.yaml
file the tolerations
described in Automatic injection installation if you get the following event while trying to create a pod:
LAST SEEN | TYPE | REASON | OBJECT | MESSAGE:--|:--|:--|:--|:--3m9s (x2 over 8m10s) | Warning | FailedScheduling | Pod/no-fargate-deploy-cbddd6ccf-8f9x4 | 0/2 nodes are available: 2 node(s) had untolerated taint {eks.amazonaws.com/compute-type: fargate}. preemption: 0/2 nodes are available: 2 Preemption is not helpful for scheduling..
Event FailedScheduling
due to too many pods
Check if there's a Fargate profile with a selector that names the namespace where installation is occurring if you get the following event while trying to create a pod:
LAST SEEN | TYPE | REASON | OBJECT | MESSAGE:--|:--|:--|:--|:--61s | Warning | FailedScheduling | Pod/newrelic-bundle-newrelic-infra-operator-admission-create-d8ggt | 0/2 nodes are available: 2 Too many pods. preemption: 0/2 nodes are available: 2 No preemption victims found for incoming pod..
View your EKS data
Here's an example of what a Fargate node looks like in the New Relic UI:
To view your AWS data:
- Go to one.newrelic.com > All capabilities > Infrastructure > Kubernetes and do one of the following:
- Select an integration name to view data.
- Select the Explore data icon to view AWS data.
- Filter your data using two Fargate tags:
computeType=serverless
fargateProfile=[name of the Fargate profile to which the workload belongs]
If you want to use Helm to install the integration, you have two options:
- Our guided install experience, which will provide a Helm command with the required fields pre-populated. This option also allows for installing our integration as plain manifests rather than a Helm release.
- Manual configuration via the values.yaml file. This tab will guide you through how to do that.
Helm is a package manager on top of Kubernetes. It facilitates installation, upgrades, or revision tracking, and it manages dependencies for the services that you install in Kubernetes. If you haven't already, create your free New Relic account below to start monitoring your data today.
Compatibility and requirements
Make sure Helm is installed on your machine. Version 3 of the Kubernetes Integration requires Helm version 3.
To install the Kubernetes integration using Helm, you will need your New Relic and your Kubernetes cluster's name:
- Find and copy your .
- Choose a display name for your cluster. For example, you could use the output of:
$kubectl config current-context
Important
Keep these values somewhere safe, as you will need them later during the installation process.
Install the Kubernetes integration with Helm
New Relic has several Helm charts for the different components which offer different features for the platform:
newrelic-infrastructure
: Contains the main Kubernetes integration and the infrastructure agent. This is the core component for the New Relic Kubernetes experience, responsible for reporting most of the data that is surfaced in the Kubernetes Dashboard and the Kubernetes Cluster Explorer.newrelic-logging
: Provides a DaemonSet with New Relic's Fluent Bit output plugin to easily forward your logs to New Relic.nri-kube-events
: Collects and reports cluster events (such askubectl get events
) to New Relic.newrelic-prometheus-agent
: New Relic's Prometheus Configurator configures a Prometheus in agent mode and use our remote write endpoint to reports metrics to New Relic.nri-metadata-injection
: Sets up a minimalMutatingAdmissionWebhook
that injects a couple of environment variables in the containers. These contain metadata about the cluster and New Relic installation and will be later picked up by applications instrumented using APM, allowing to correlate APM and infrastructure data.nri-statsd
: New Relic StatsD integration.
Although you can install these components separately, we strongly recommend you use the nri-bundle
chart. New Relic provides this chart, which acts as a wrapper or a meta-package for the individual charts mentioned above. The use of this chart enables you these advantages:
- It provides full control over which components are installed. Each component is installed as a separate Helm dependency. You can configure them individually using the parameters mentioned here.
- It ensures that their installed versions are compatible with each other.
- It ensures that their configuration values are consistent across the installed charts.
The nri-bundle
chart is the one that is installed and configured by our Kubernetes guided install.
Installing and configuring nri-bundle
with Helm
- Ensure you're using the appropriate context in the machine where you will run Helm and
kubectl
:
You can check the available contexts with:
$kubectl config get-contexts
And switch to the desired context using:
$kubectl config use-context _CONTEXT_NAME_
- Add the New Relic Helm charts repo:
$helm repo add newrelic https://helm-charts.newrelic.com
- Create a file named
values-newrelic.yaml
, which will be used to define your configuration:
global: licenseKey: _YOUR_NEW_RELIC_LICENSE_KEY_ cluster: _K8S_CLUSTER_NAME_
newrelic-prometheus-agent: # Automatically scrape prometheus metrics for annotated services in the cluster # Collecting prometheus metrics for large clusters might impact data usage significantly enabled: truenri-metadata-injection: # Deploy our webhook to link APM and Kubernetes entities enabled: truenri-kube-events: # Report Kubernetes events enabled: truenewrelic-logging: # Report logs for containers running in the cluster enabled: truekube-state-metrics: # Deploy kube-state-metrics in the cluster. # Set this to true unless it is already deployed. enabled: true
- Make sure everything is configured properly in the chart by running the following command. Notice that we're specifying
--dry-run
and--debug
, so nothing will be installed in this step:
$helm upgrade --install newrelic-bundle newrelic/nri-bundle \>--namespace newrelic --create-namespace \>-f values-newrelic.yaml \>--dry-run \>--debug
Please notice and adjust the following flags:
global.licenseKey=YOUR_NEW_RELIC_LICENSE_KEY
: Must be set to a valid for your account.global.cluster=K8S_CLUSTER_NAME
: It's used to identify the cluster in the New Relic UI, so should be a descriptive value not used by any other Kubernetes cluster configured in your New Relic account.kube-state-metrics.enabled=true
: Setting this totrue
will automatically install Kube State Metrics (KSM) for you, which is required for our integration to run. You can set this to false if KSM is already present in your cluster, even if it's on a different namespace.newrelic-prometheus-agent.enabled=true
: Will deploy our Prometheus Agent, which automatically collects data from Prometheus endpoints present in the cluster.nri-metadata-injection.enabled=true
: Will install our minimal webhook, which adds environment variables that, in turn, allows linking applications instrumented with New Relic APM to Kubernetes.
Our Kubernetes charts have a comprehensive set of flags and tunables that can be edited to better fit your particular needs. Please, check the Configure the integration section below to see what can be changed.
- Install the Kubernetes integration by running the command without
--debug
and--dry-run
:
$helm upgrade --install newrelic-bundle newrelic/nri-bundle \>--namespace newrelic --create-namespace \>-f values-newrelic.yaml
Important
Make sure you're using Kubernetes version 1.27.x or a lower version that we support.
- Check that pods are being deployed and reach a stable state:
$kubectl -n newrelic get pods -w
You should see:
newrelic-nrk8s-ksm
pod.newrelic-nrk8s-kubelet
pod for each node in your cluster.newrelic-nrk8s-control-plane
pod for each master node in your cluster, if any.newrelic-kube-state-metrics
pod, if you included KSM with our installation.newrelic-nri-kube-events
pod, if you enabled Kubernetes events reporting.prometheus-agent
pod, if you enabled the Prometheus agent integration.newrelic-newrelic-logging
pod for each node in your cluster, if you enabled the logging integration.
Did this doc help with your installation?
Configure the integration
Our nri-bundle
chart. whose installation instructions can be found above, acts as a wrapper or a meta-package for a couple of other charts, which are the ones containing the components for our solution. By offering such a wrapper we can provide a controlled set of our components with versions that we know are compatible with each other, while keeping the component's charts relatively simple.
The nri-bundle
chart wraps multiple individual charts to gather different telemetry data and send it to New Relic. The bundle allows to selectively enable the desired child charts depending on your needs. To configure each individual component, you must use Helm's dependency system, which in short means that the configuration for each child chart must be placed under a separate section (named after each child chart) in the values-newrelic.yml file. For example, to configure the newrelic-infrastructure
chart, you would add the following to the values-newrelic.yaml
:
# General settings that apply to all the child chartsglobal: licenseKey: _YOUR_NEW_RELIC_LICENSE_KEY_ cluster: _K8S_CLUSTER_NAME_
# ... Other settings as shown above
# Specific configuration for the newrelic-infrastructure child chartnewrelic-infrastructure: verboseLog: true # Enable debug logs privileged: false # Install with minimal privileges # Other options from https://github.com/newrelic/helm-charts/tree/master/charts/newrelic-infrastructure-v3
# Specific configuration for the newrelic-logging child chartnewrelic-logging: fluentBit: retryLimit: 10
You can also pass child chart options through the command line by prefixing them with the child chart name and replace the nesting by dots:
helm upgrade --install newrelic-bundle newrelic/nri-bundle \--namespace=newrelic \--set global.licenseKey=_YOUR_NEW_RELIC_LICENSE_KEY_ \--set global.cluster=_K8S_CLUSTER_NAME_ \--set newrelic-infrastructure.privileged=false \--set newrelic-infrastructure.verboseLog=true \--set newrelic-logging.fluentBit.retryLimit=10
The full list of flags you can tweak (such as scrape-interval) for each child chart can be found in their respective repositories:
newrelic-infrastructure
- Configure debug logs, privilege mode, control plane monitoring, etc.
nri-kube-events
nri-metadata-injection
- Configure how the webhook for APM linkage is deployed.
- Configure which Prometheus endpoints are scraped.
newrelic-logging
- Configure which logs or log attributes are sent to New Relic.
Tip
When specifying configuration options for the child charts, you must place them under a section named after the chart name in your values-newrelic.yaml
.
Tip
To pass child chart options through the command line, you need to prefix them with the child chart name and replace the nesting by dots.
Use your Kubernetes data
Learn more about:
- Unprivileged and privileged modes
- Exploring your Kubernetes data in the UI
- Using your Kubernetes data with queries, in charts, for alerts, etc.